Development of custom electronic boards with CNC Router.
During our group activity this week, we explored the world of biomaterials. In my case, I decided to investigate and experiment with clear gelatin and glycerin. Furthermore, my teammates, teachers Renso and Wilber, also enthusiastically joined the project.
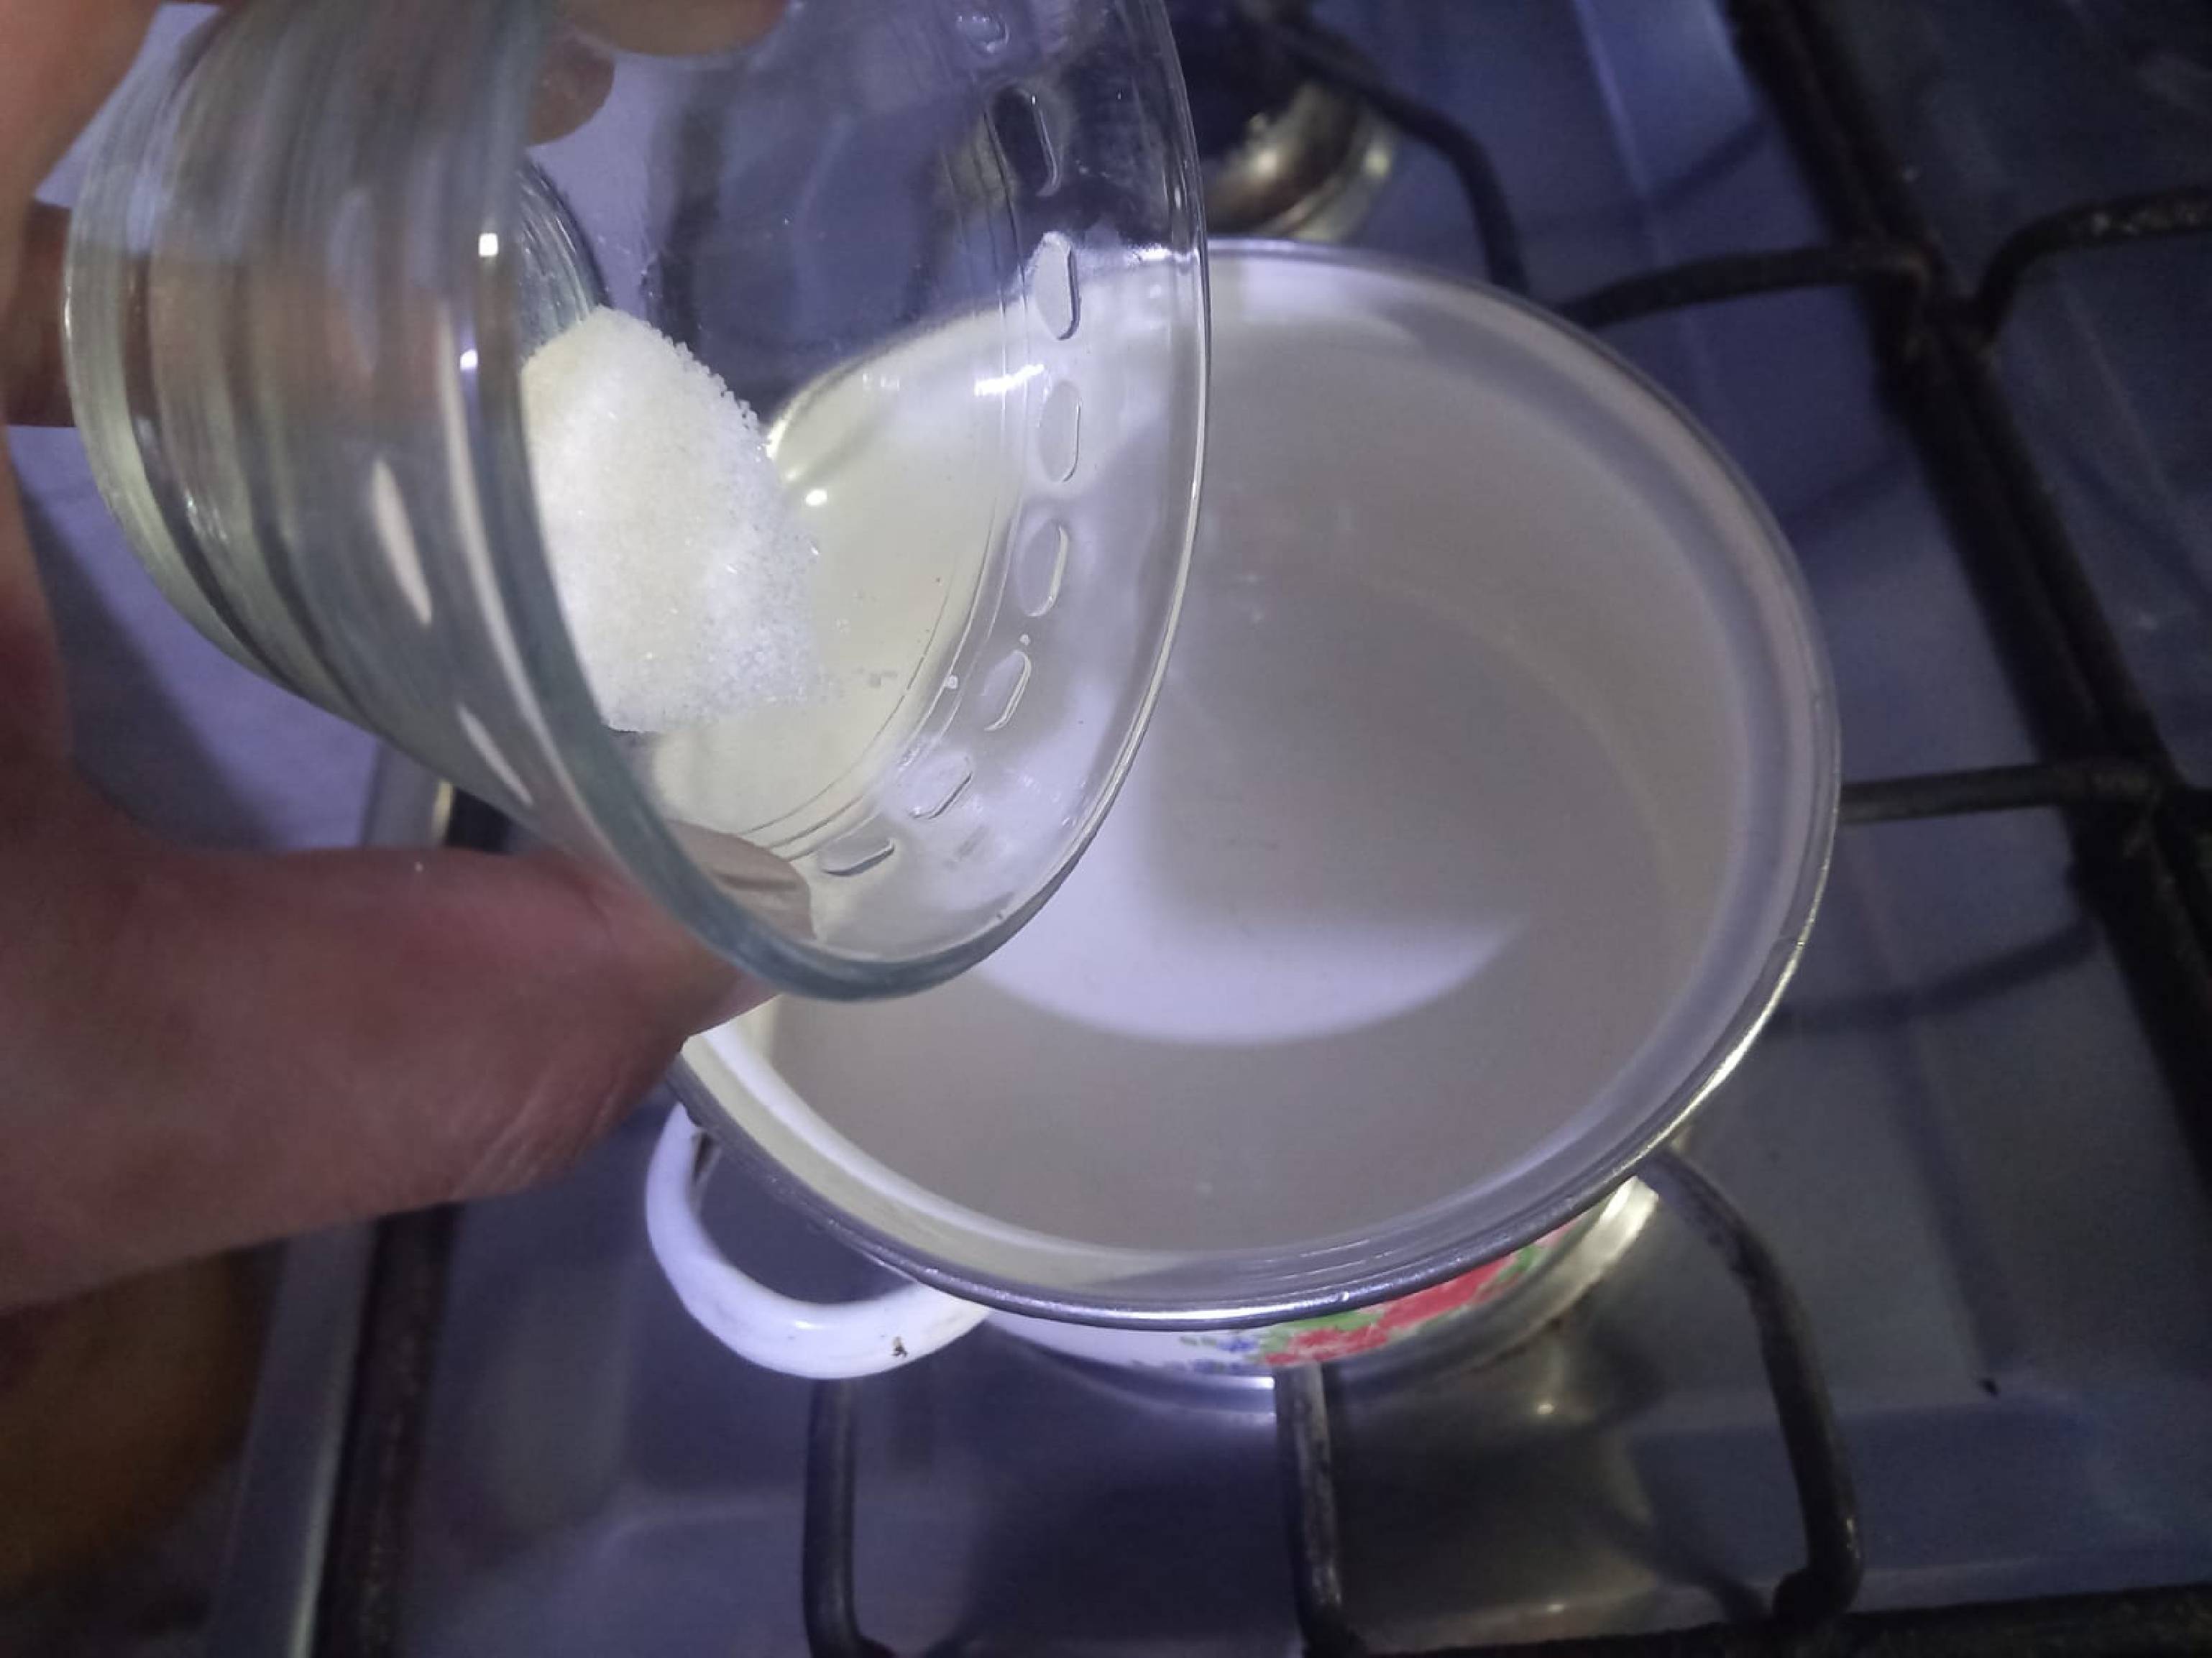
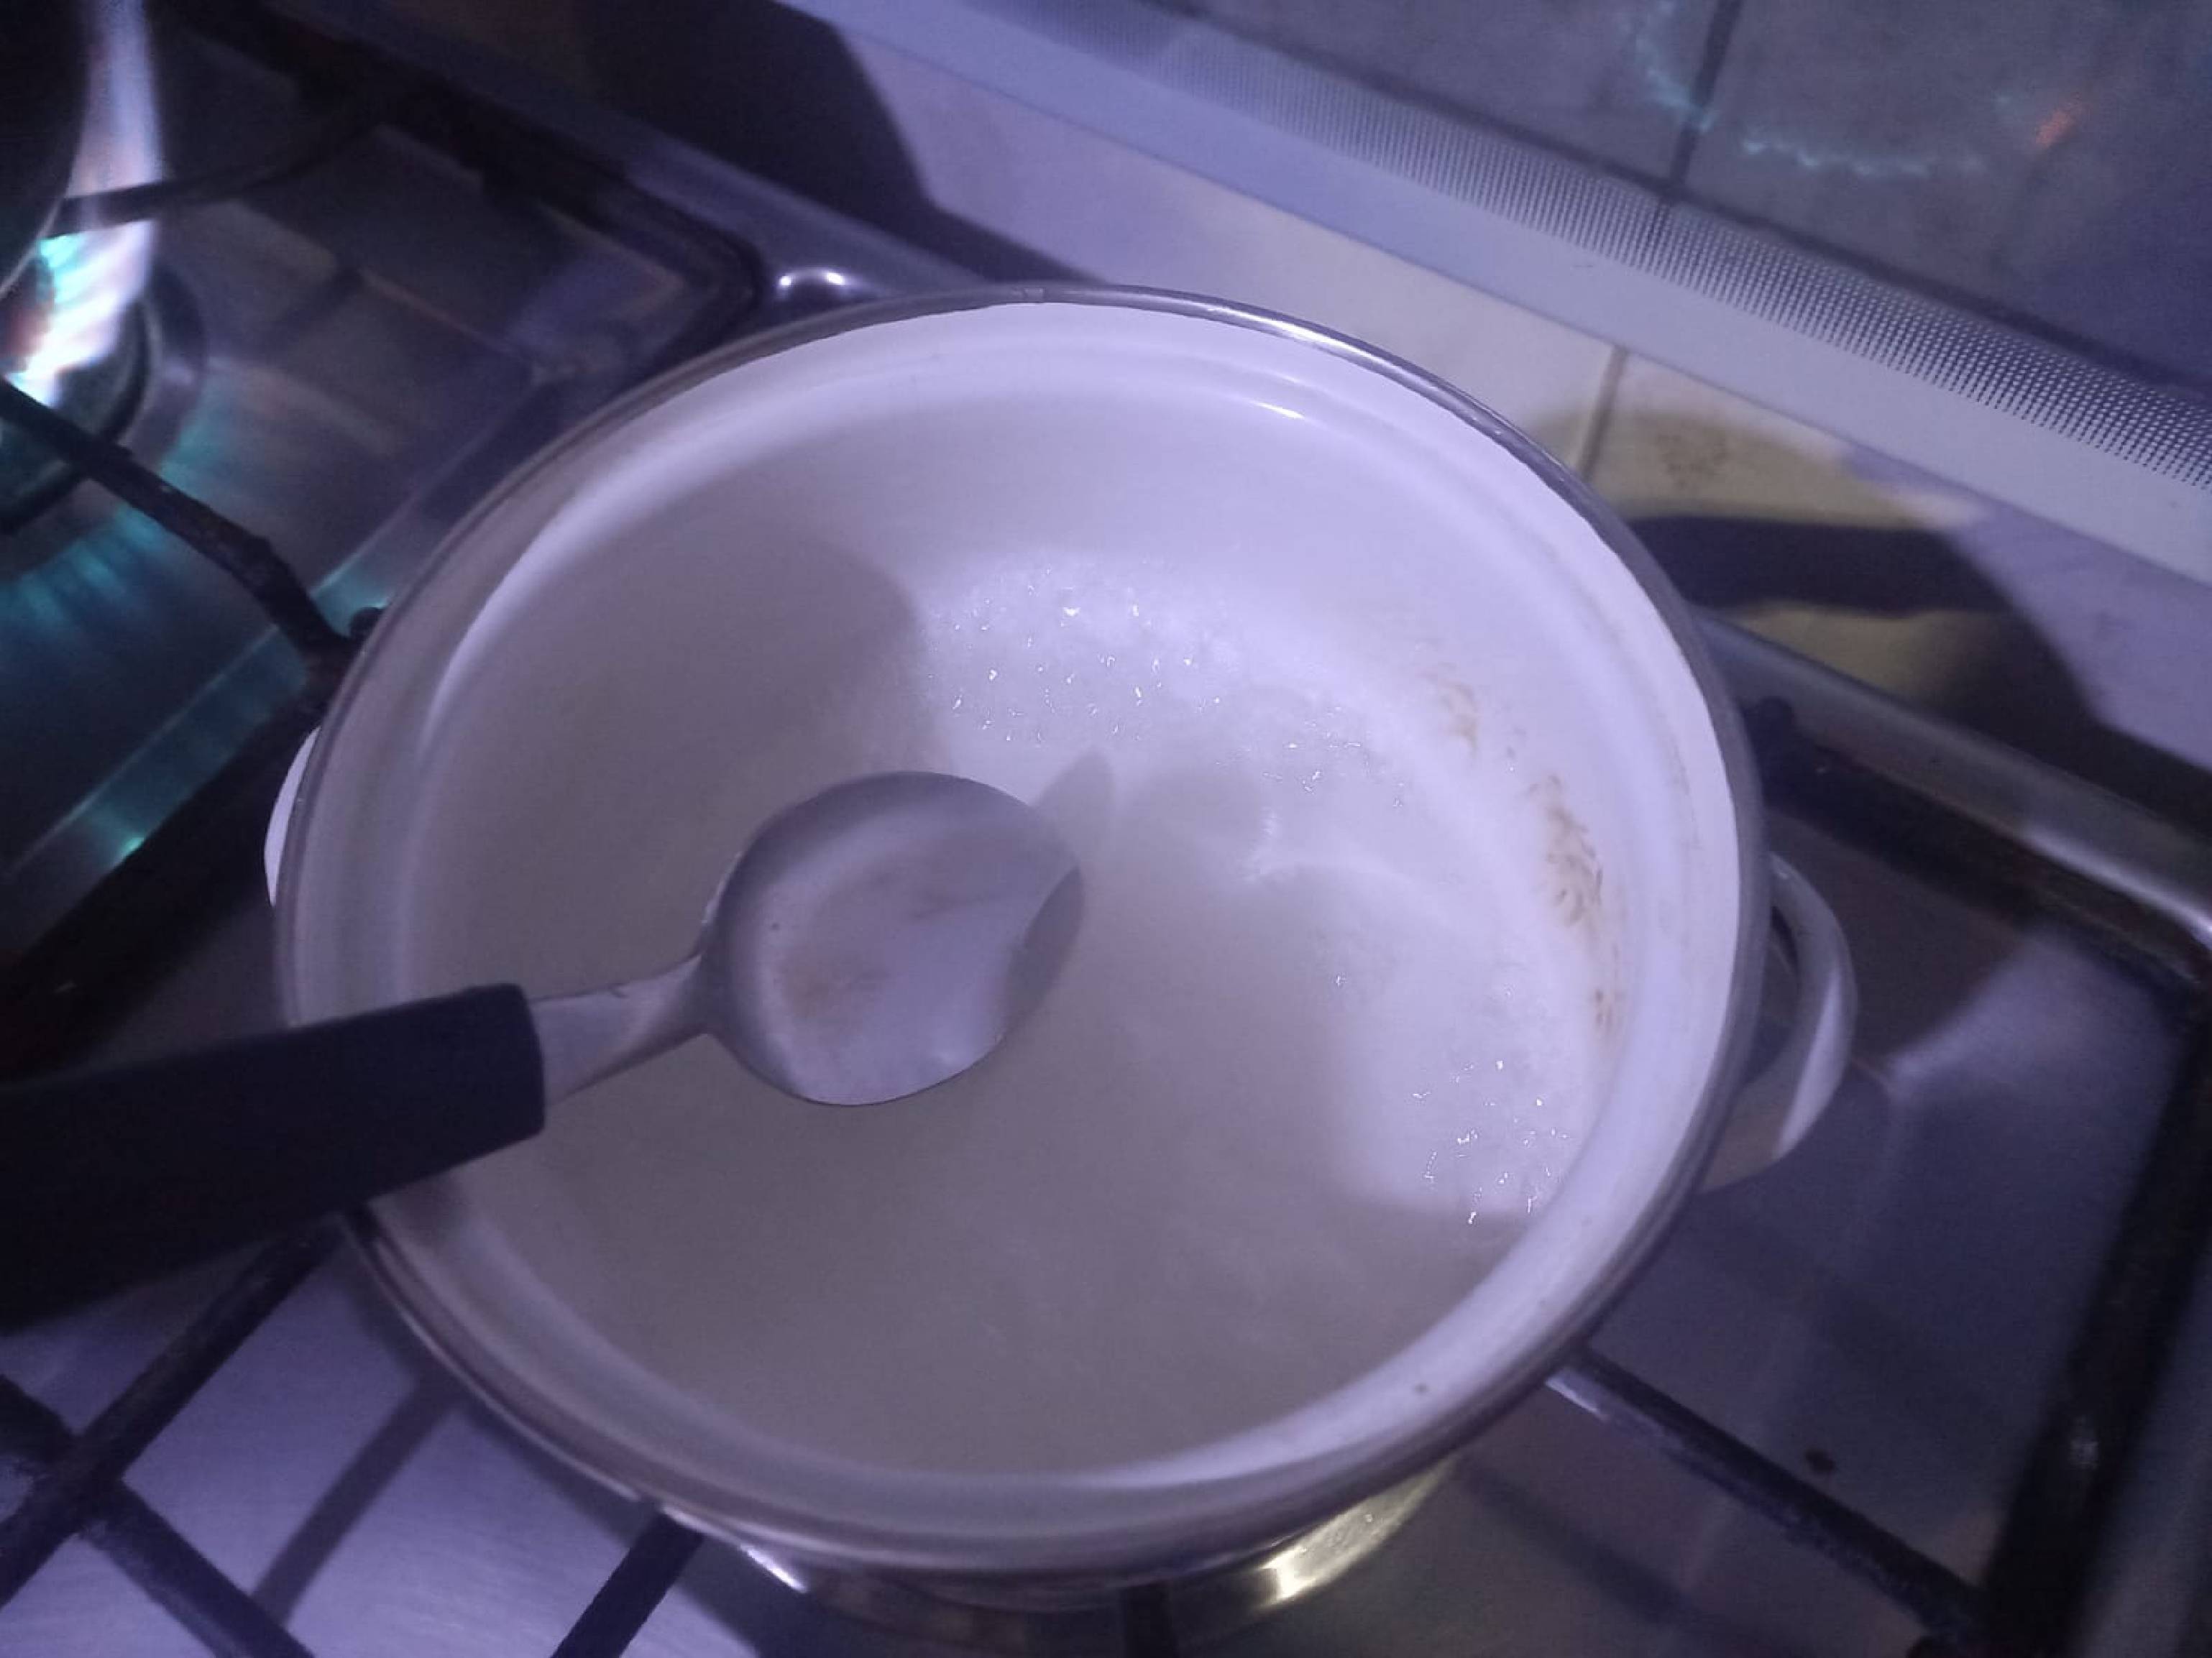
Carefully combine the water with the gelatin, making sure to mix until the solution is perfectly uniform, then pour it into the pot and bring to a boil.
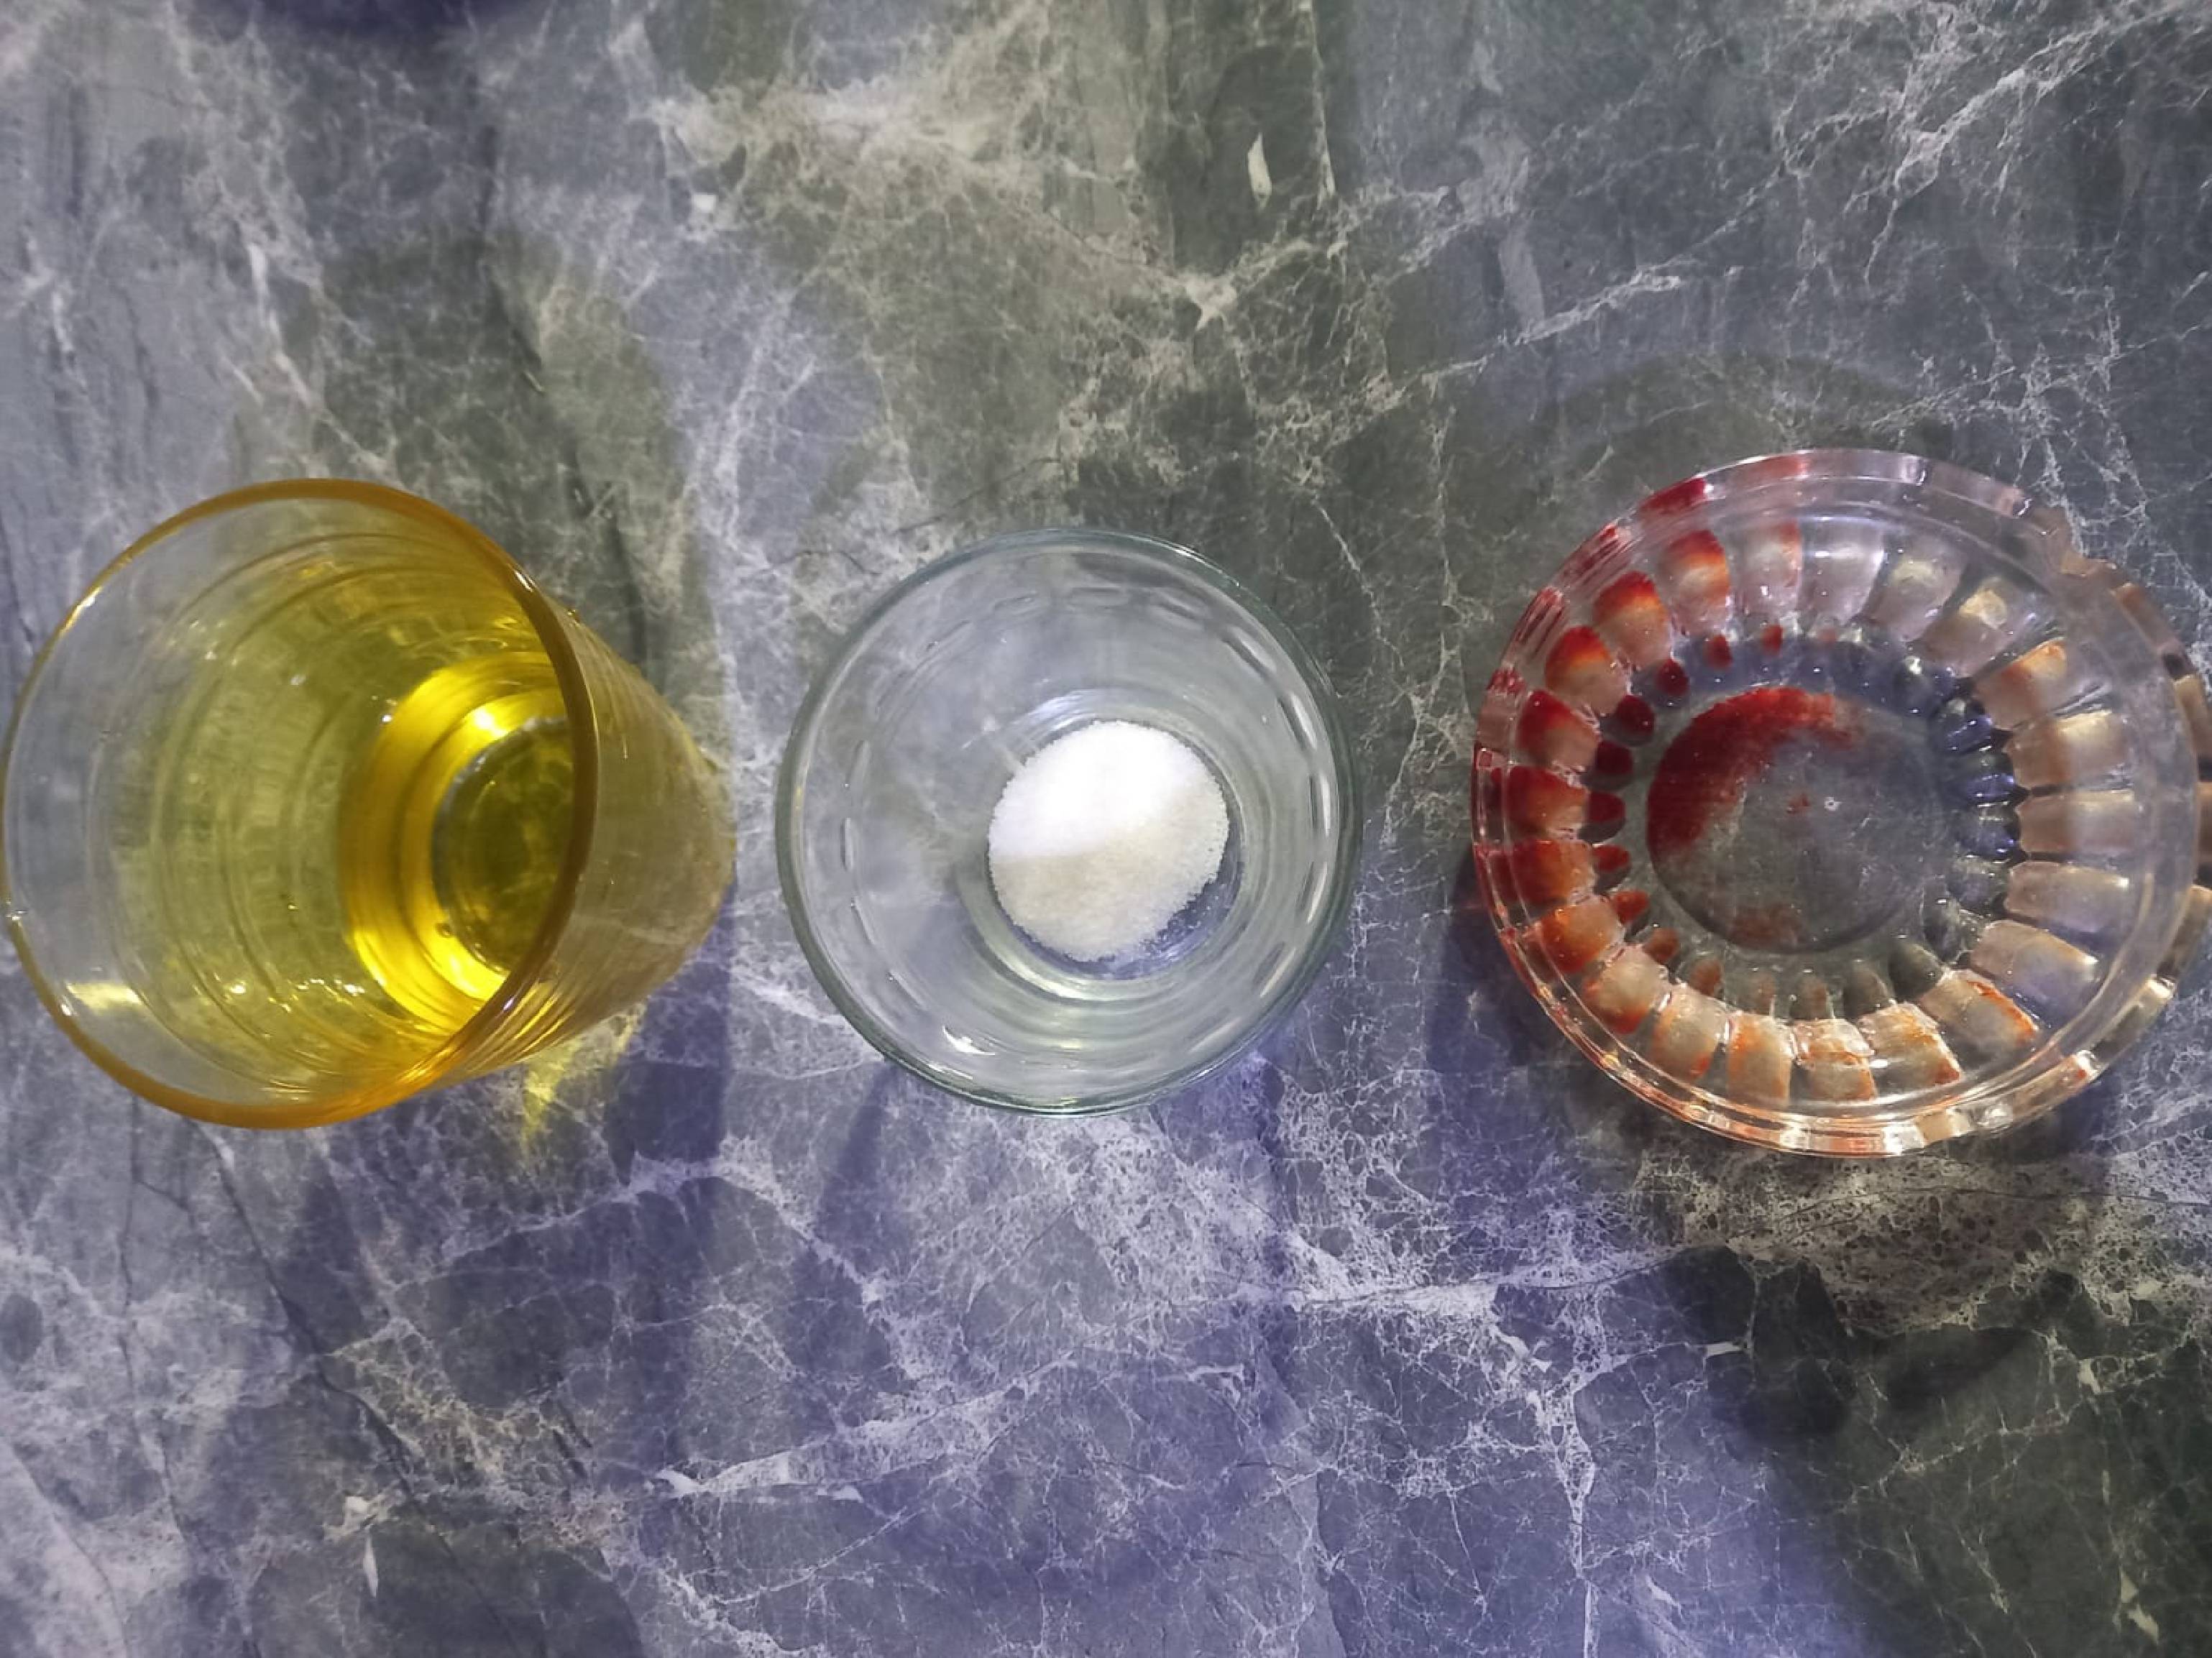
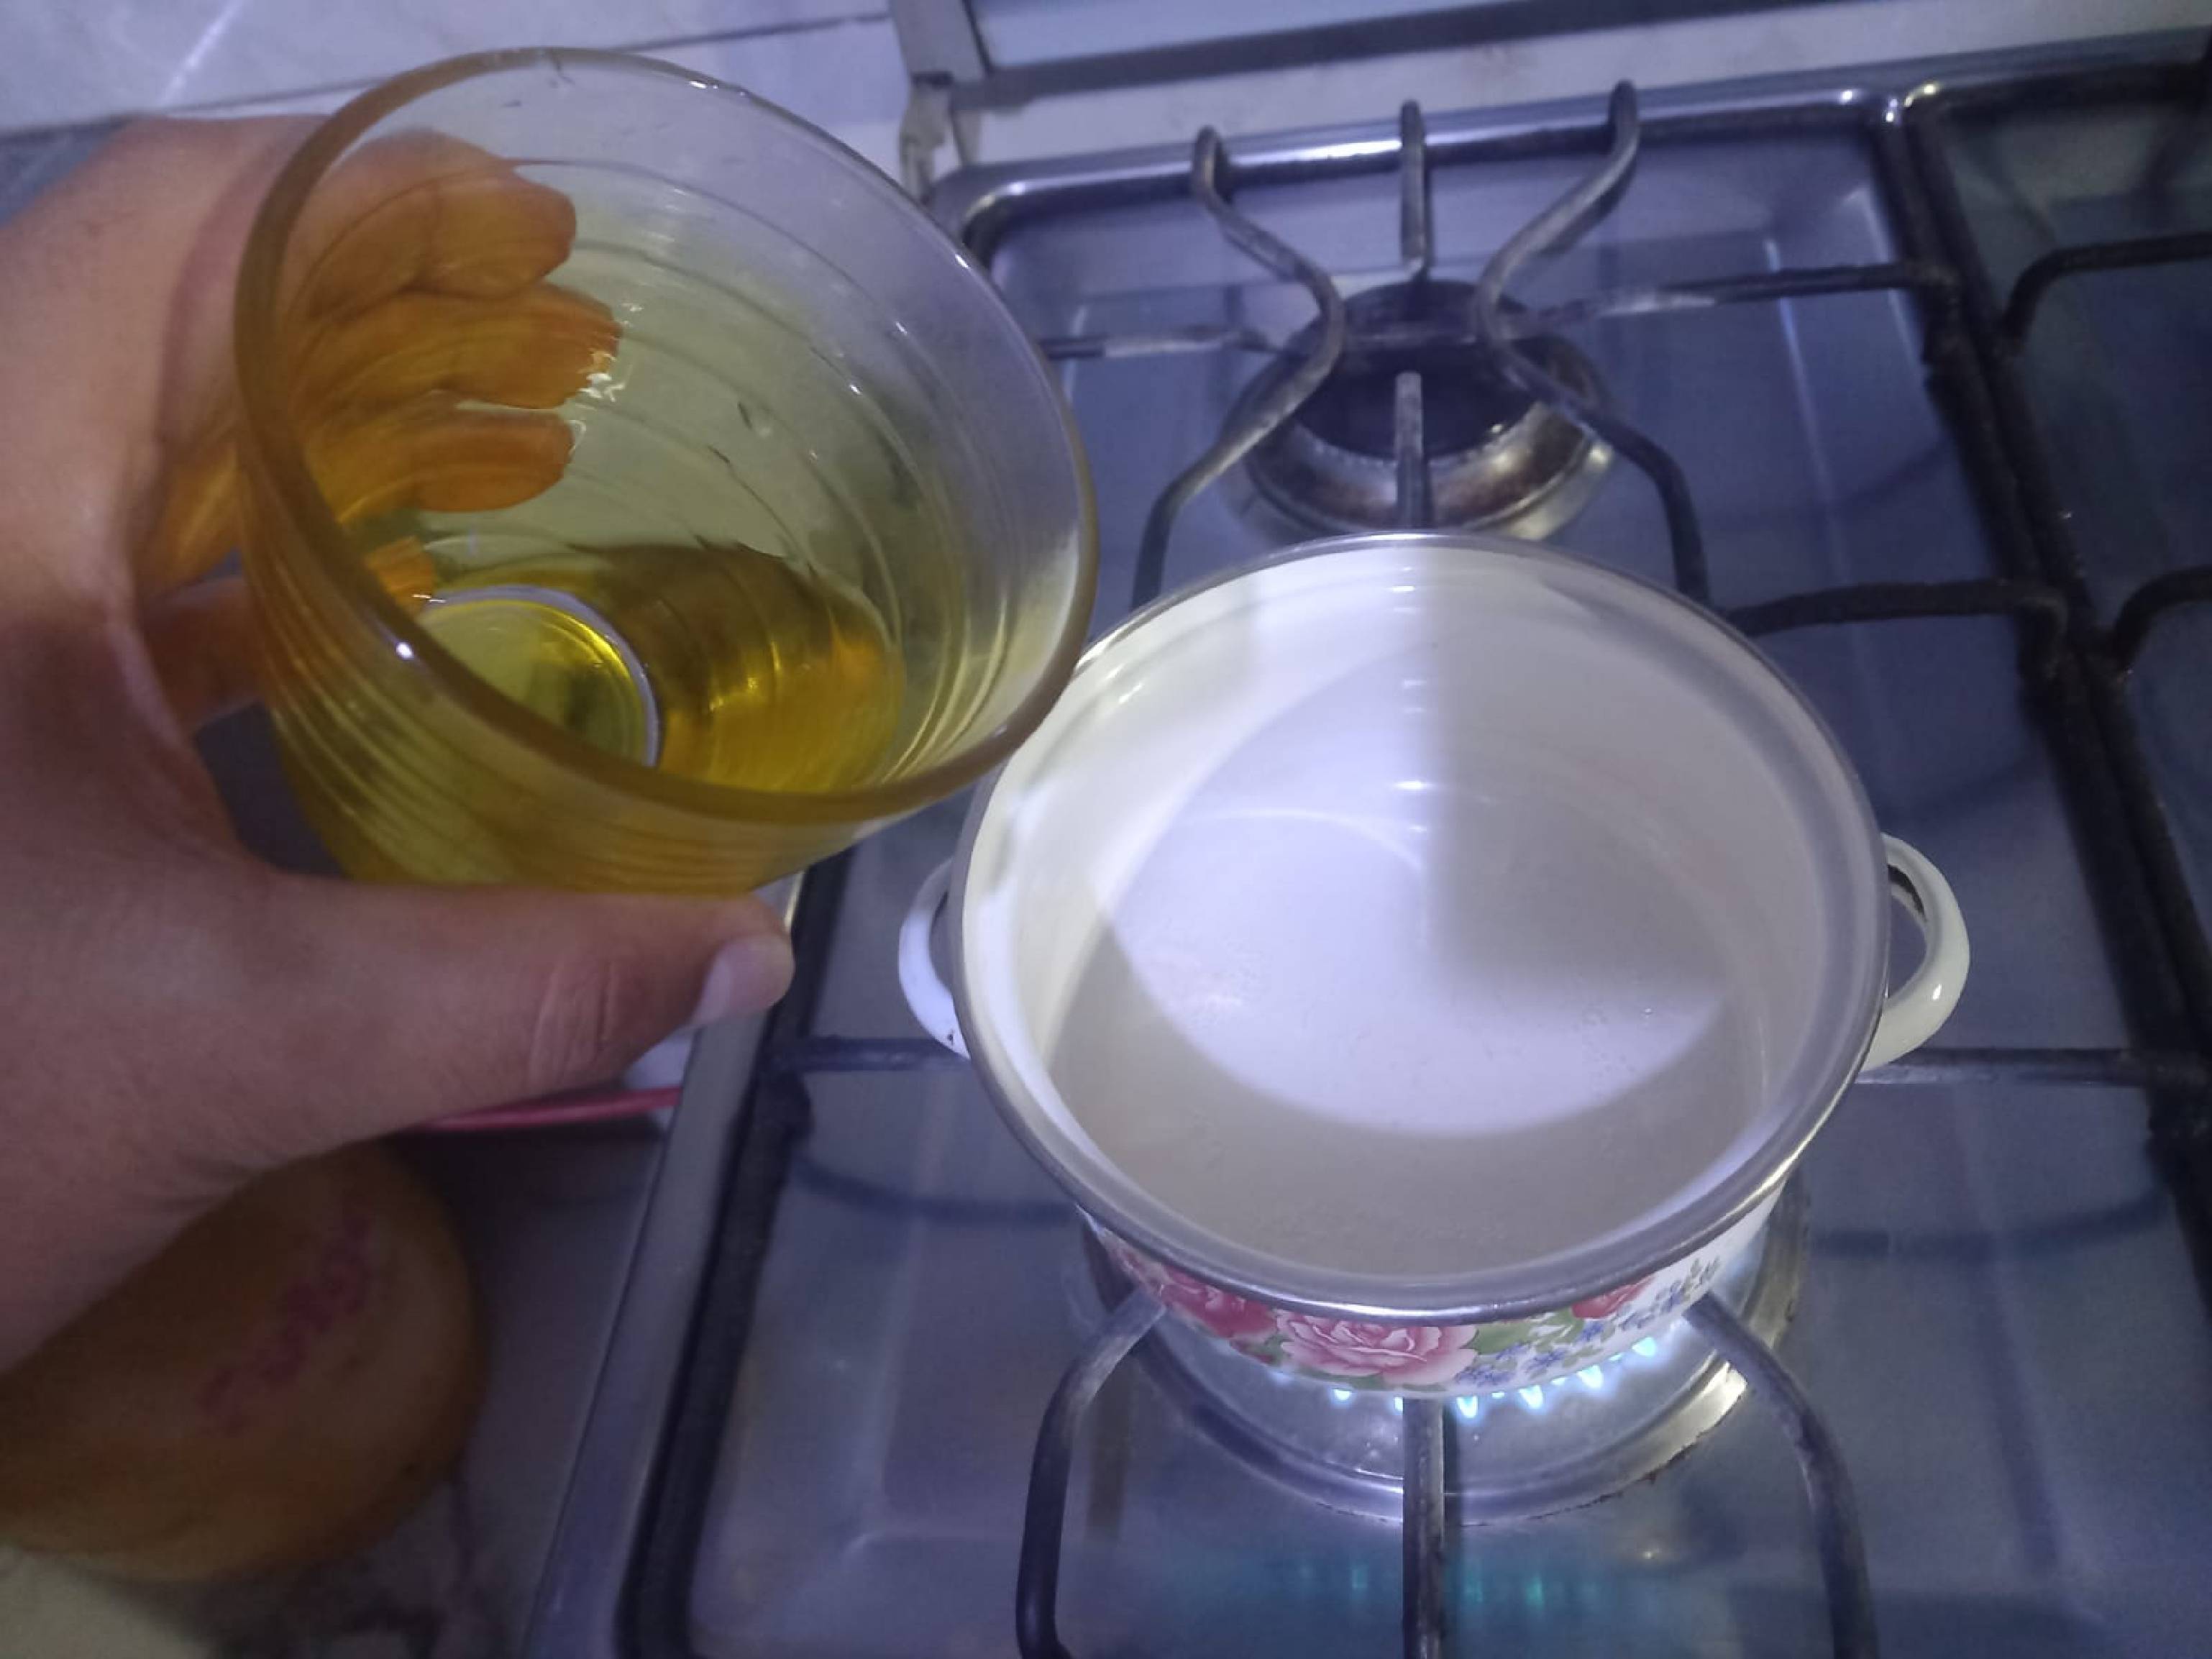
After obtaining a uniform mixture and bringing it to almost boiling point, proceed to add all the glycerin.
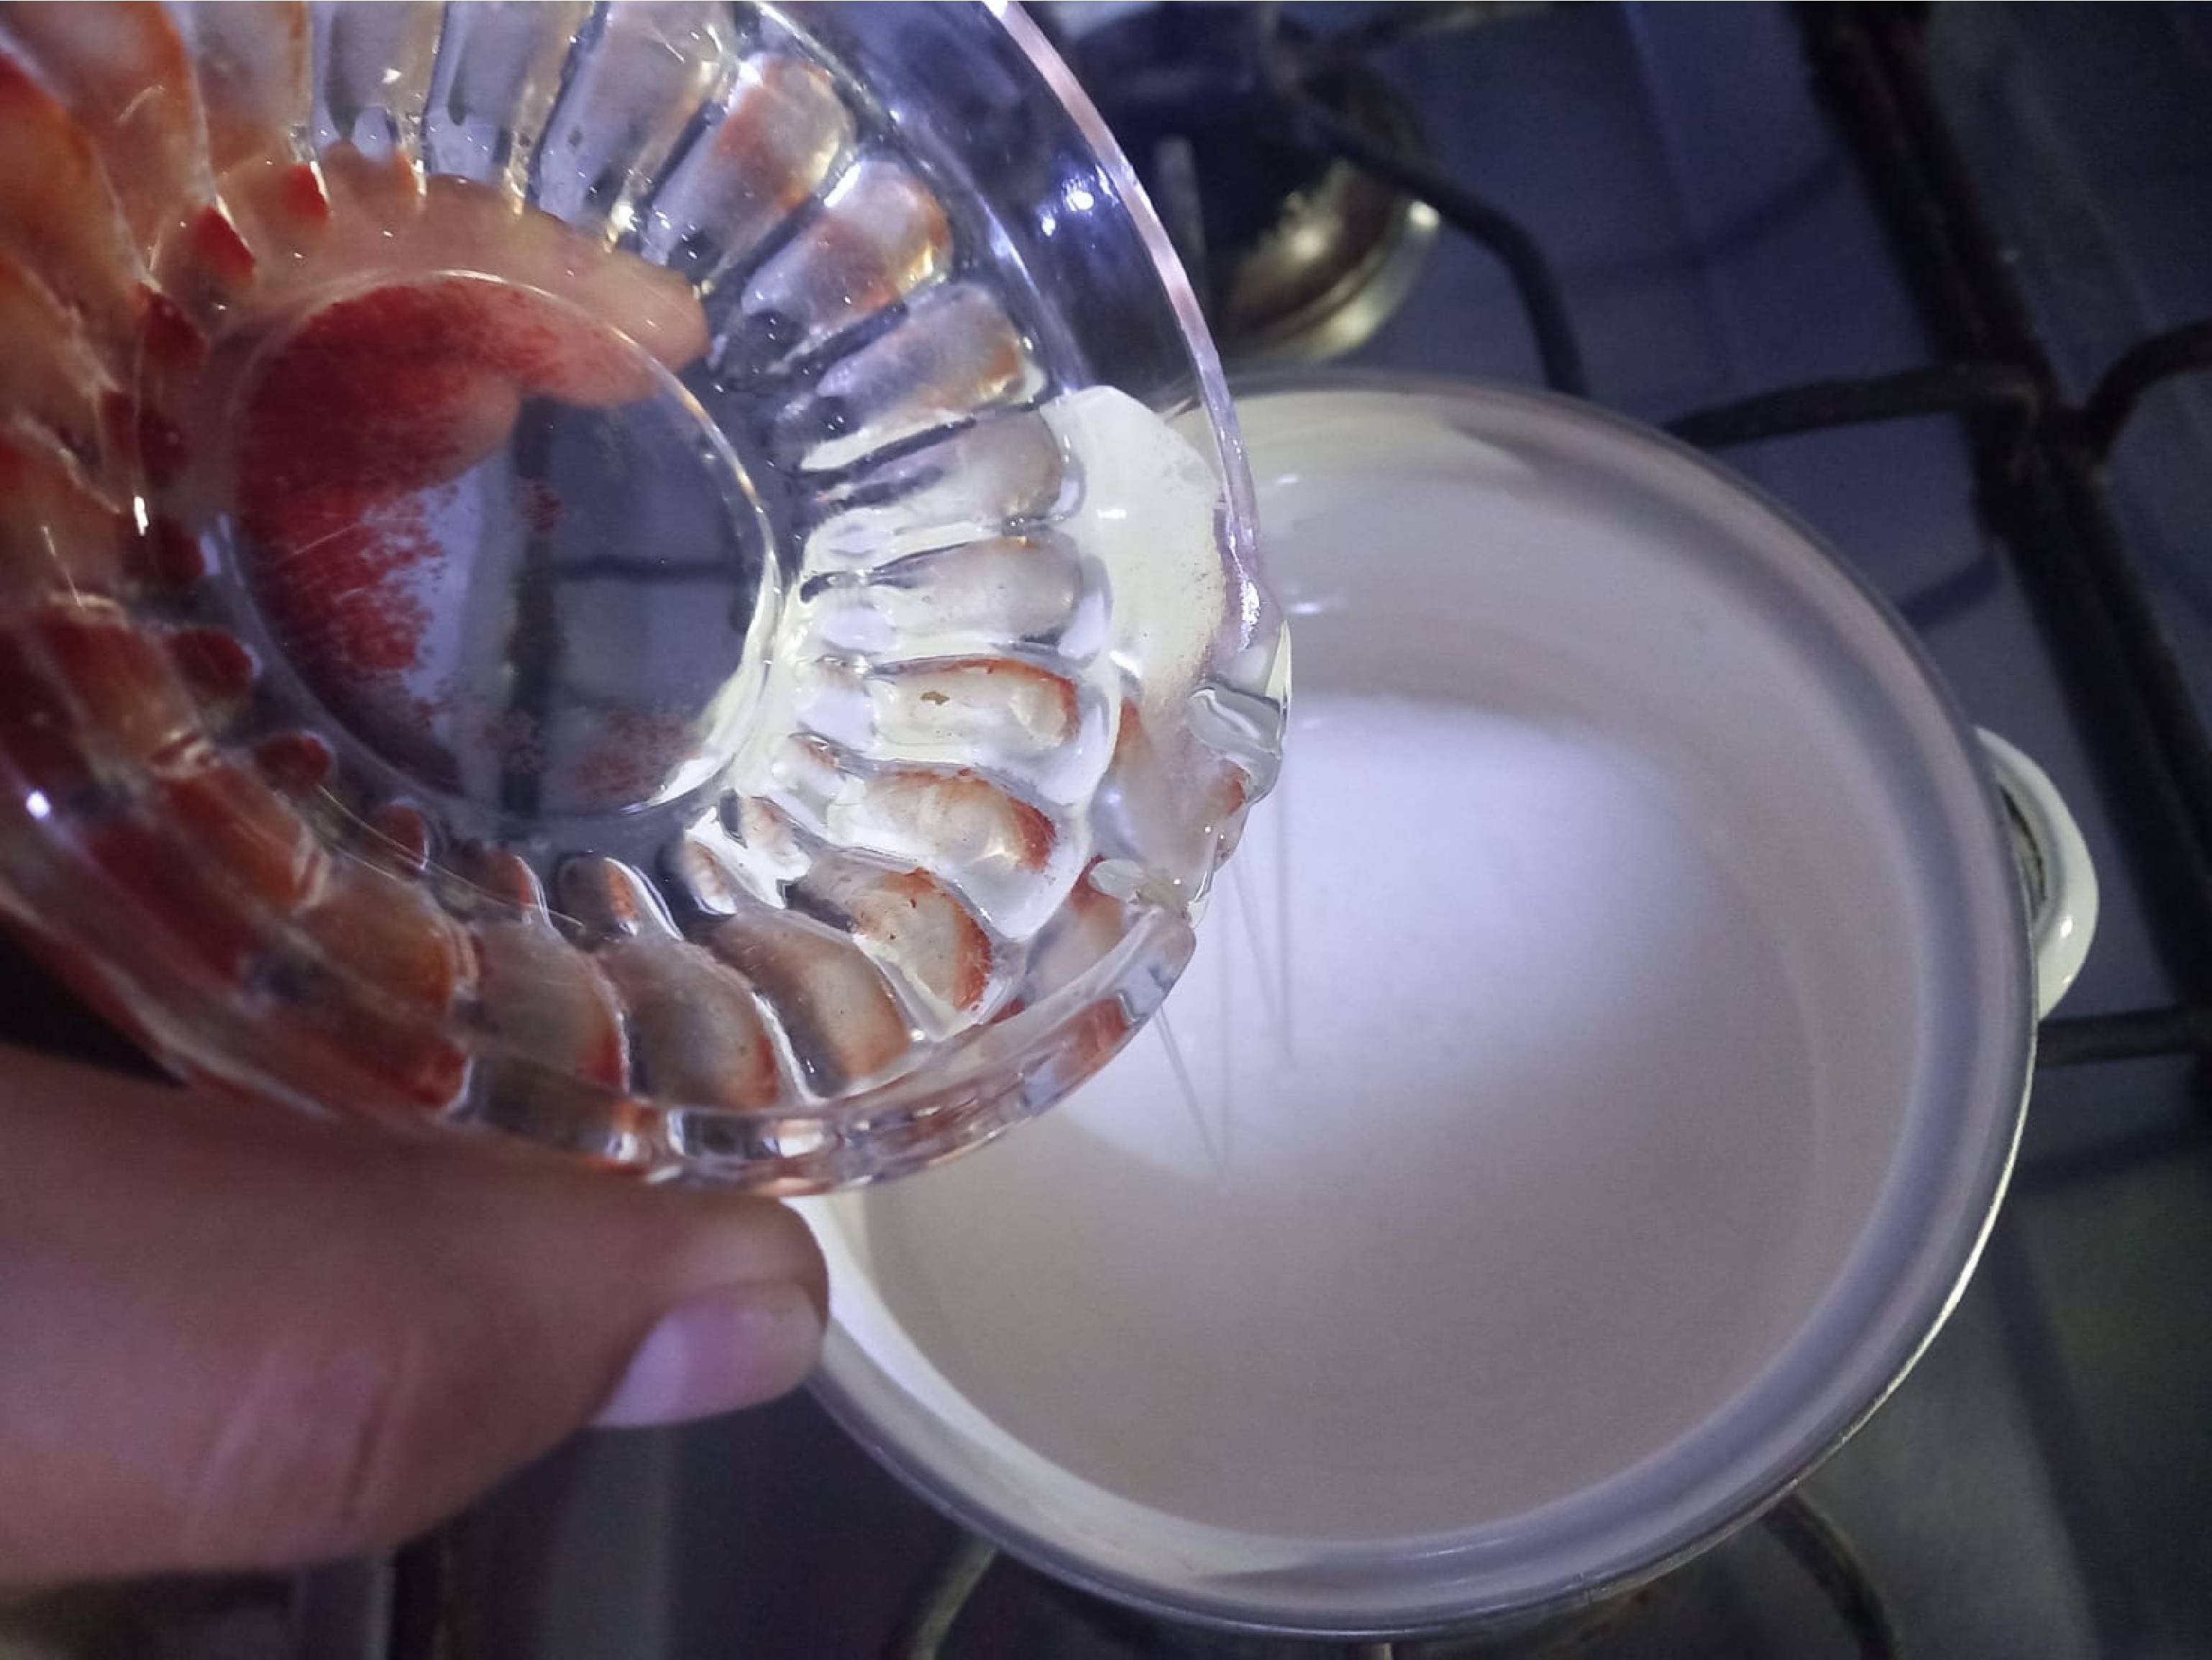
I made constant movements to ensure uniform mixing and let the mixture boil for 15 minutes.
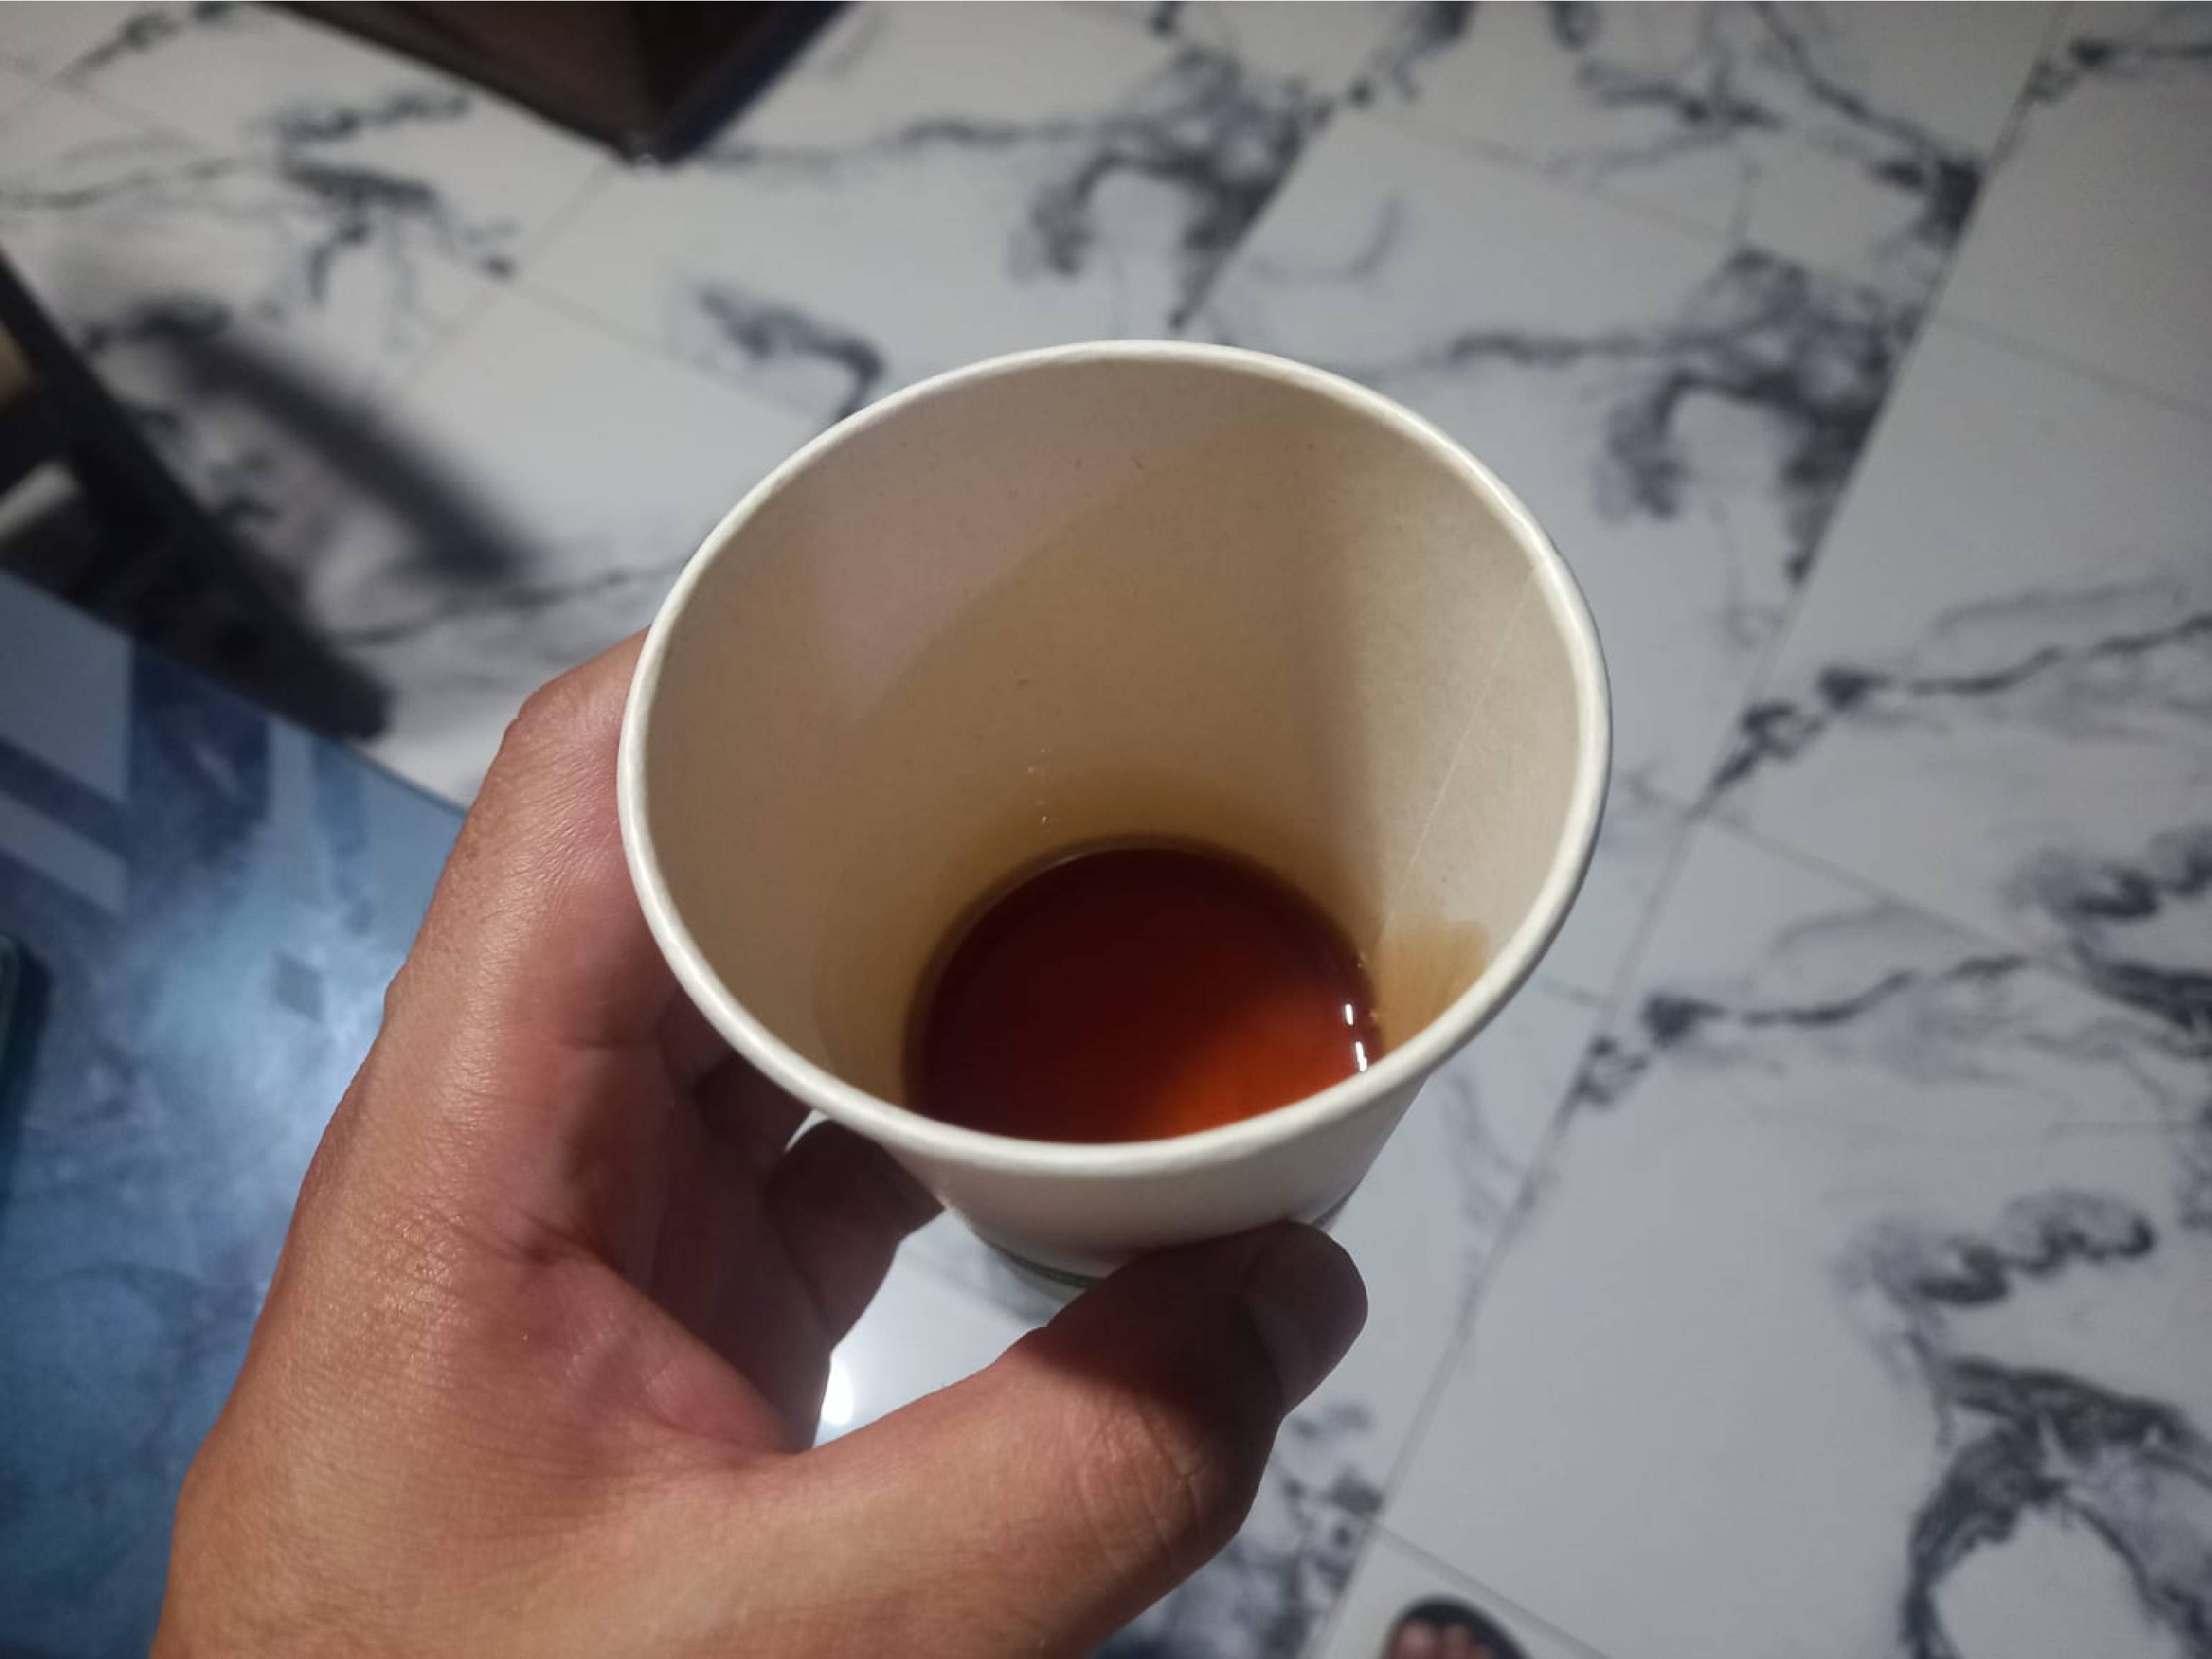
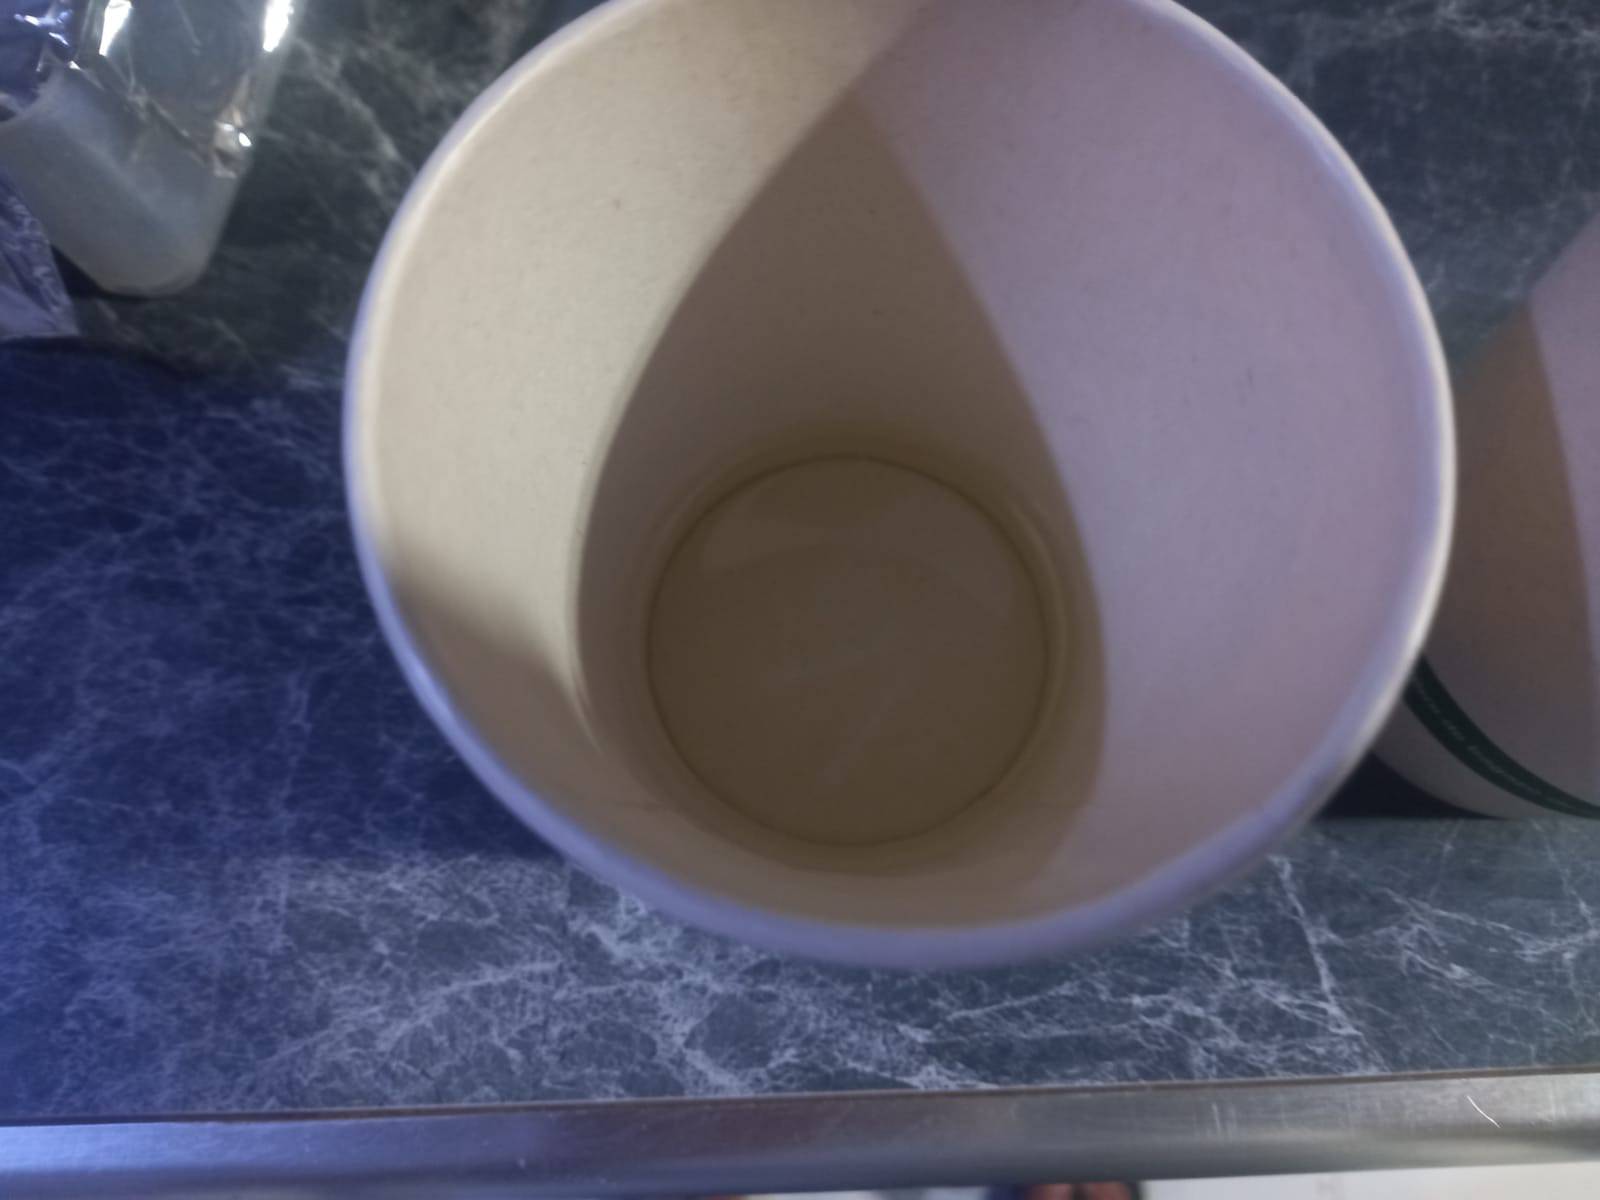
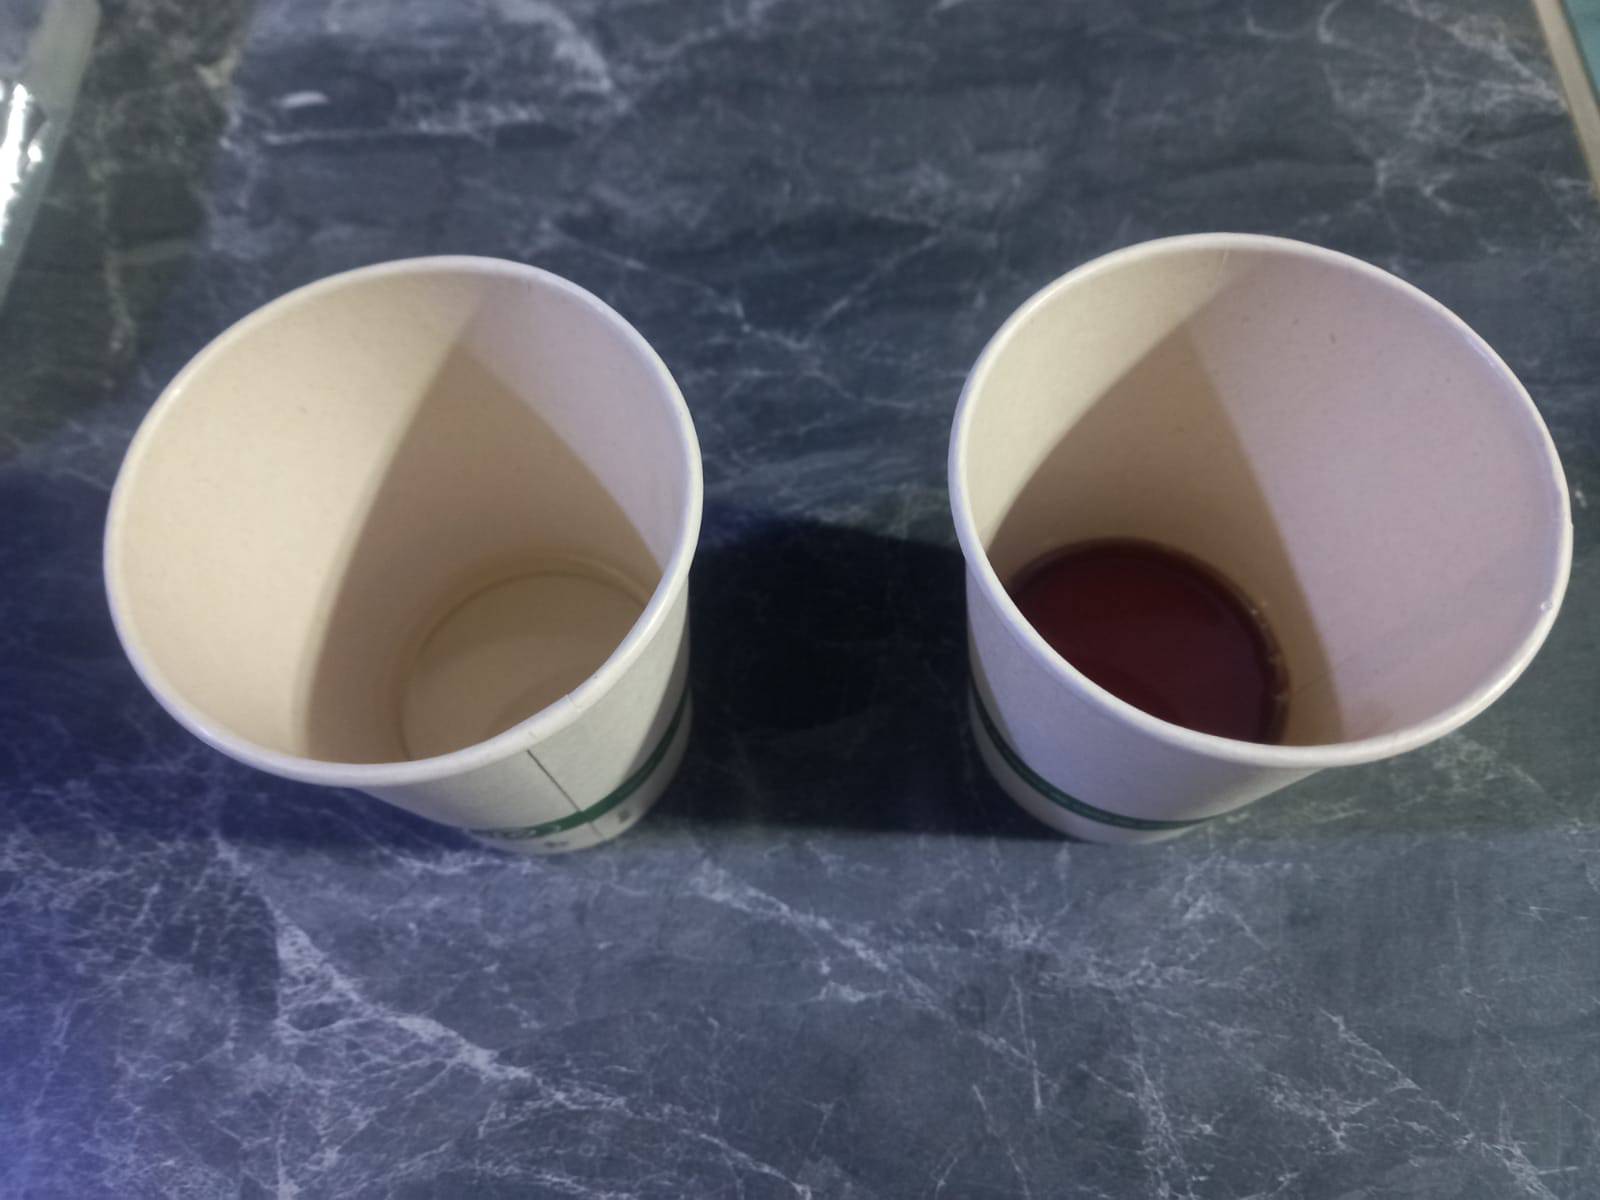
Oh no, it seems I let the mixture boil for too long and it turned a brown color. This was my first failed test, but it's definitely something to keep in mind for next time

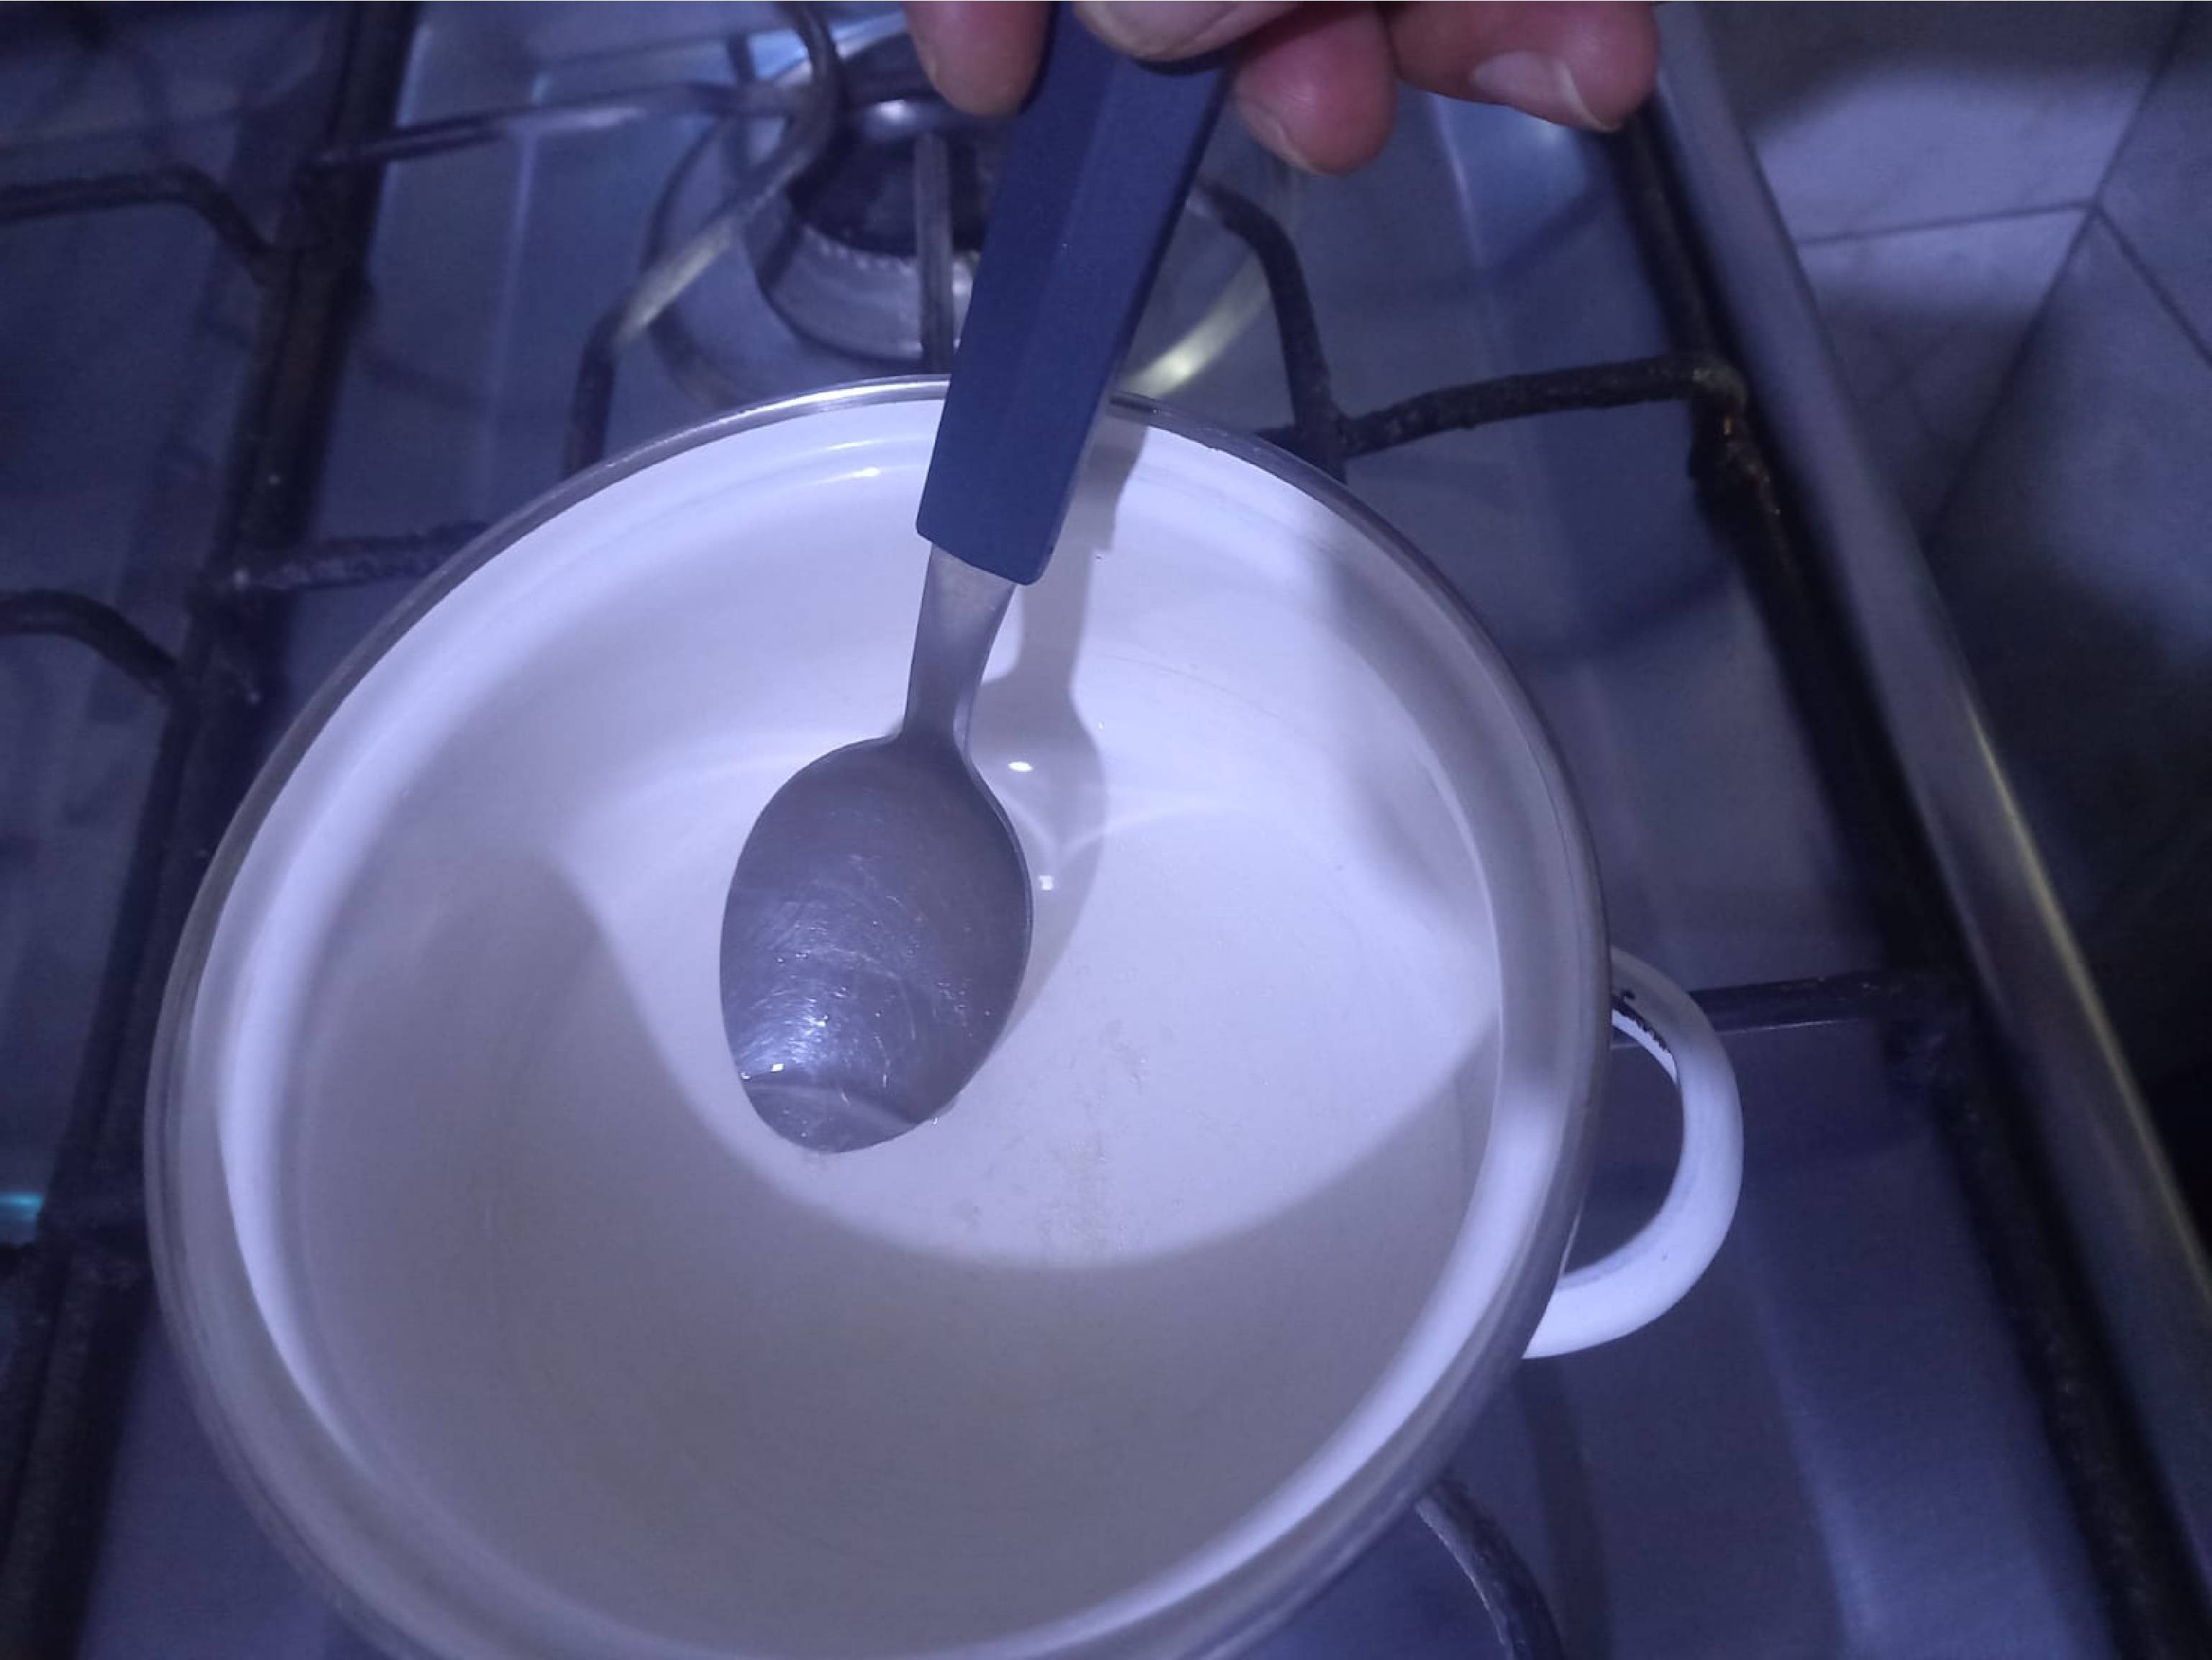
For this second test, I made sure to create a smooth mixture with gelatin in cold water. Once the mixture was obtained, I proceeded to heat it on the stove to 70% of its capacity. Then I brought it to a boil immediately and poured in the glycerin.

After 12 minutes, the mixture looks uniform and foaming is noticeable. At this point, I turned off the stove and let the mixture cool.
As you can see, the result is an excellent finish, with a transparent color, unlike the first test that acquired a brown tone.
After experimentation, I shared the results obtained with my colleague Renso. In my case, I plan to use the created biomaterial to protect a specific plate. This exchange of information and experiences allowed us to enrich our knowledge and explore new applications for biomaterials in our individual projects.

This experience was extremely enriching, as I learned to make my own materials, adding one more skill to my learning list at Fabacademy. Additionally, I gained knowledge on how to calculate the exact time to remove a biomaterial before it deteriorates. This process has been valuable and has given me a deeper understanding of the world of biomaterials and their application in future projects.
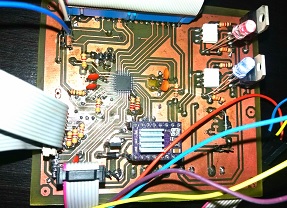
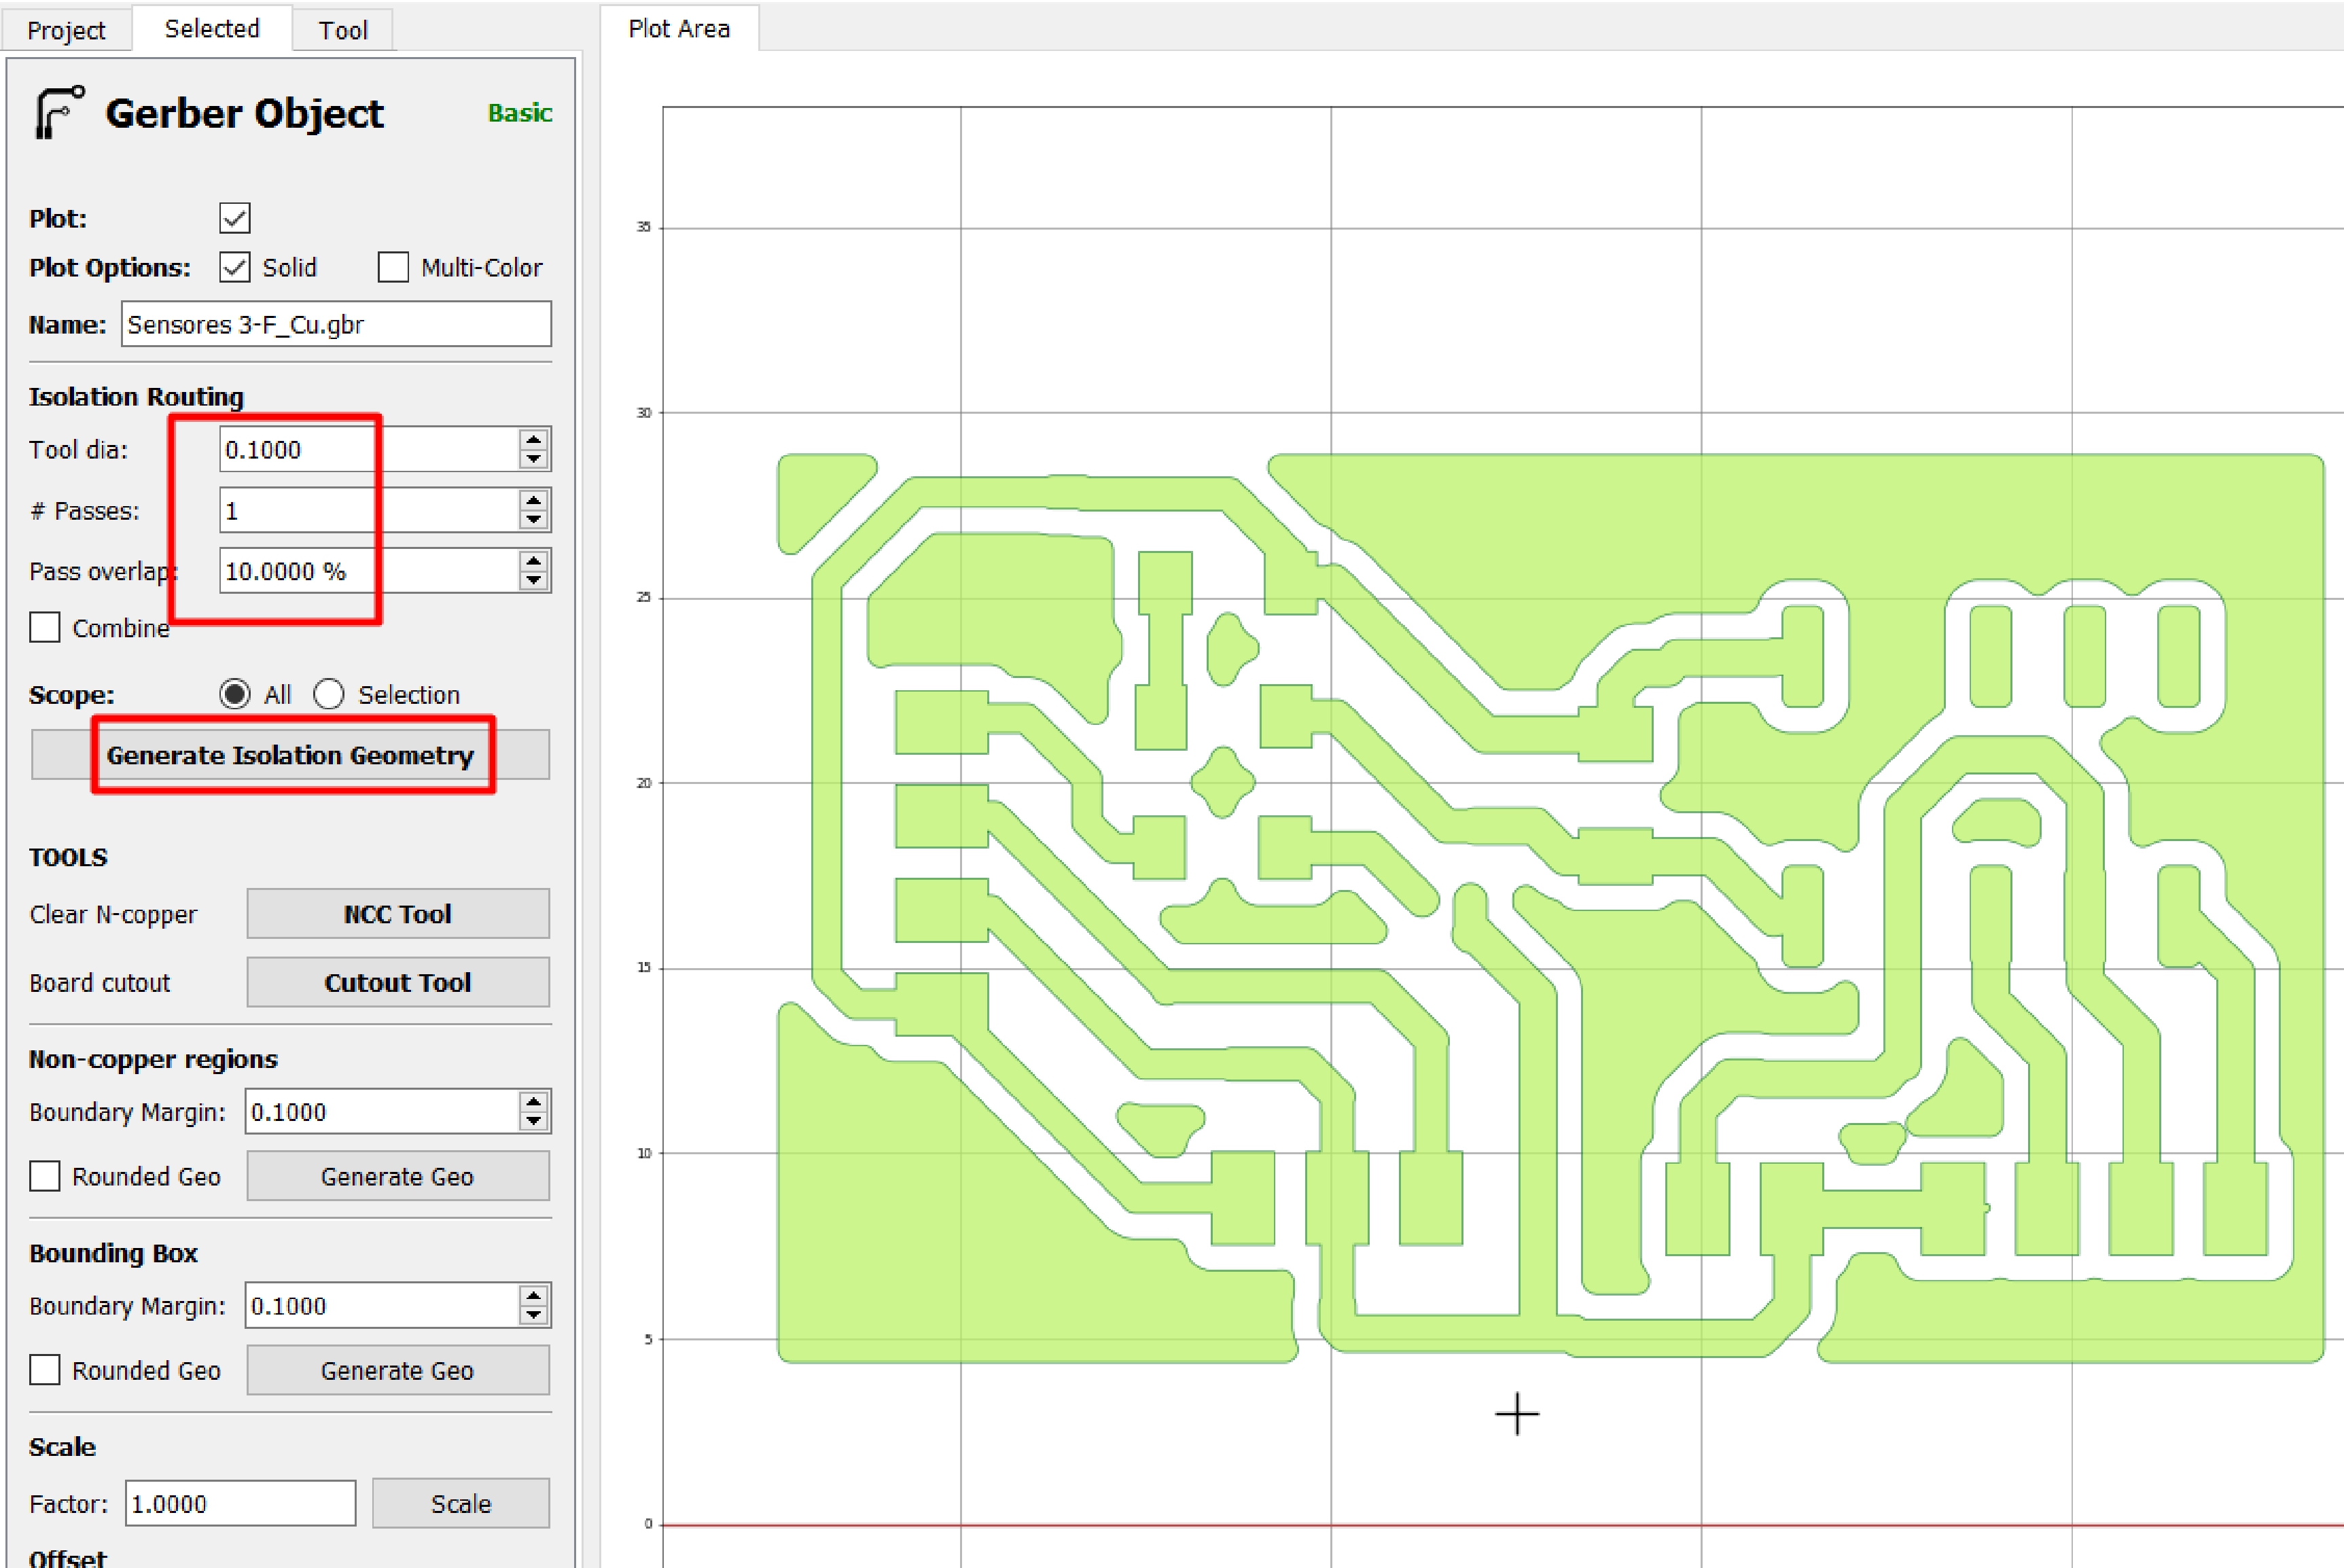
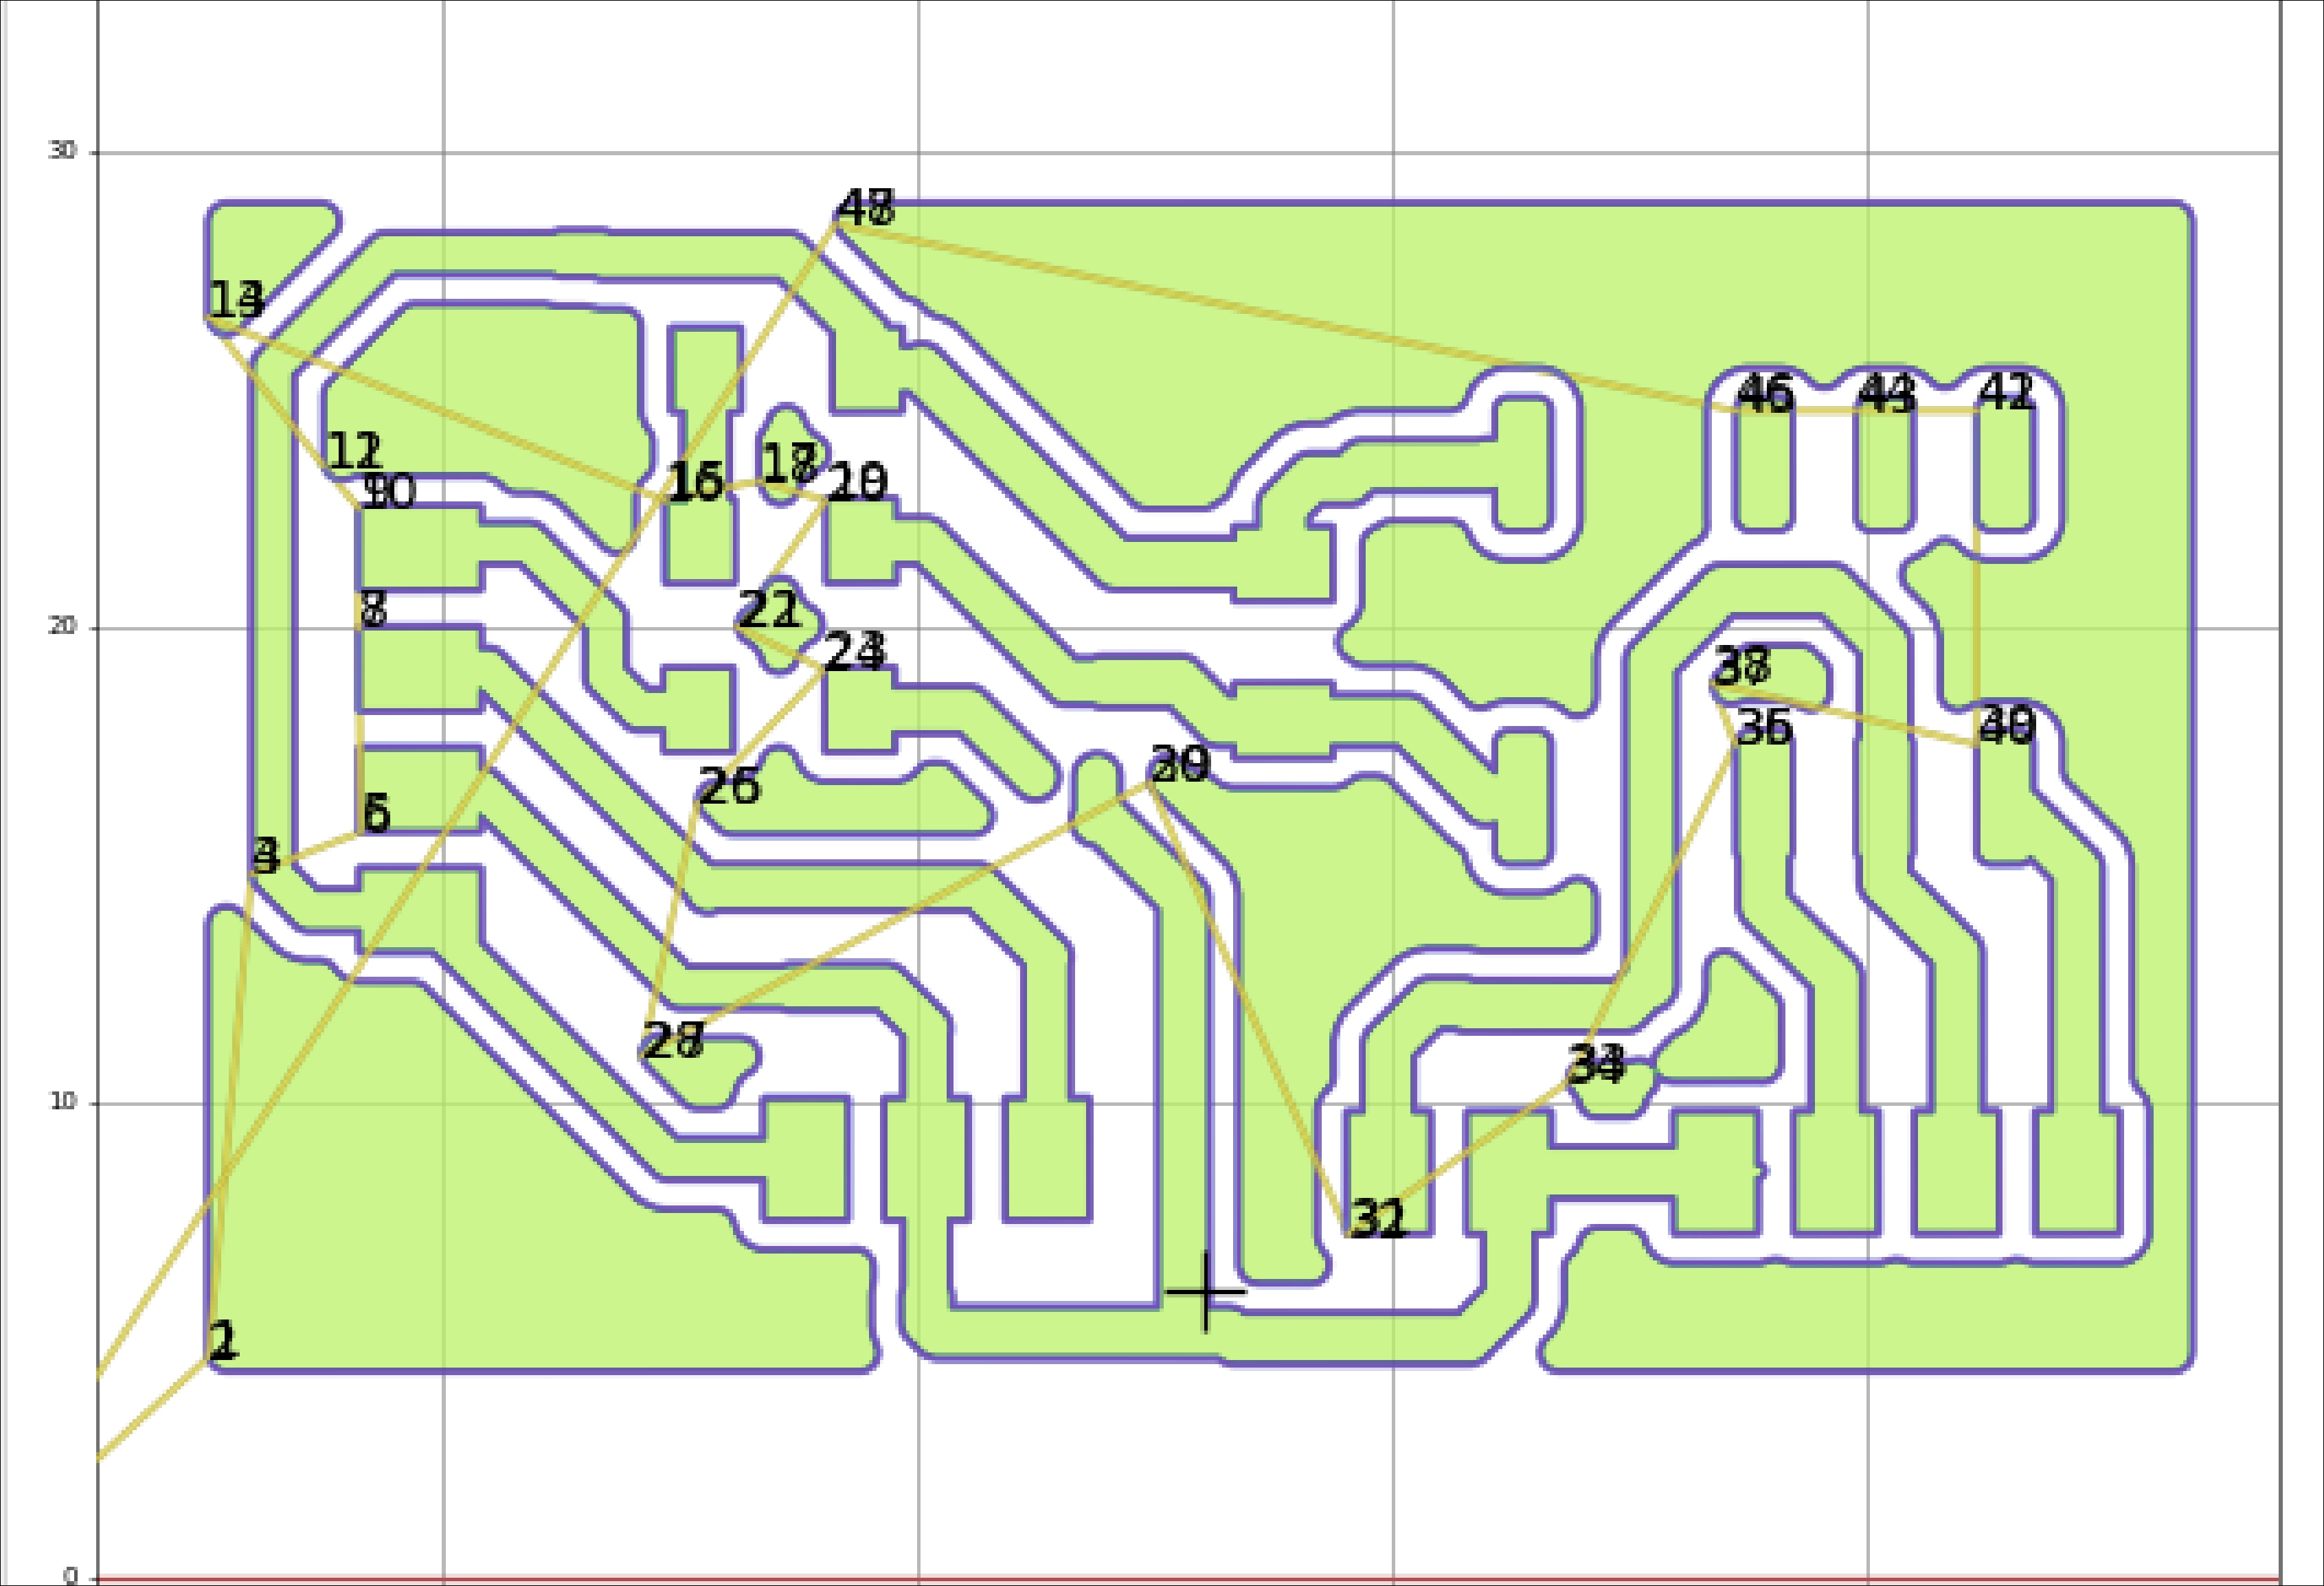
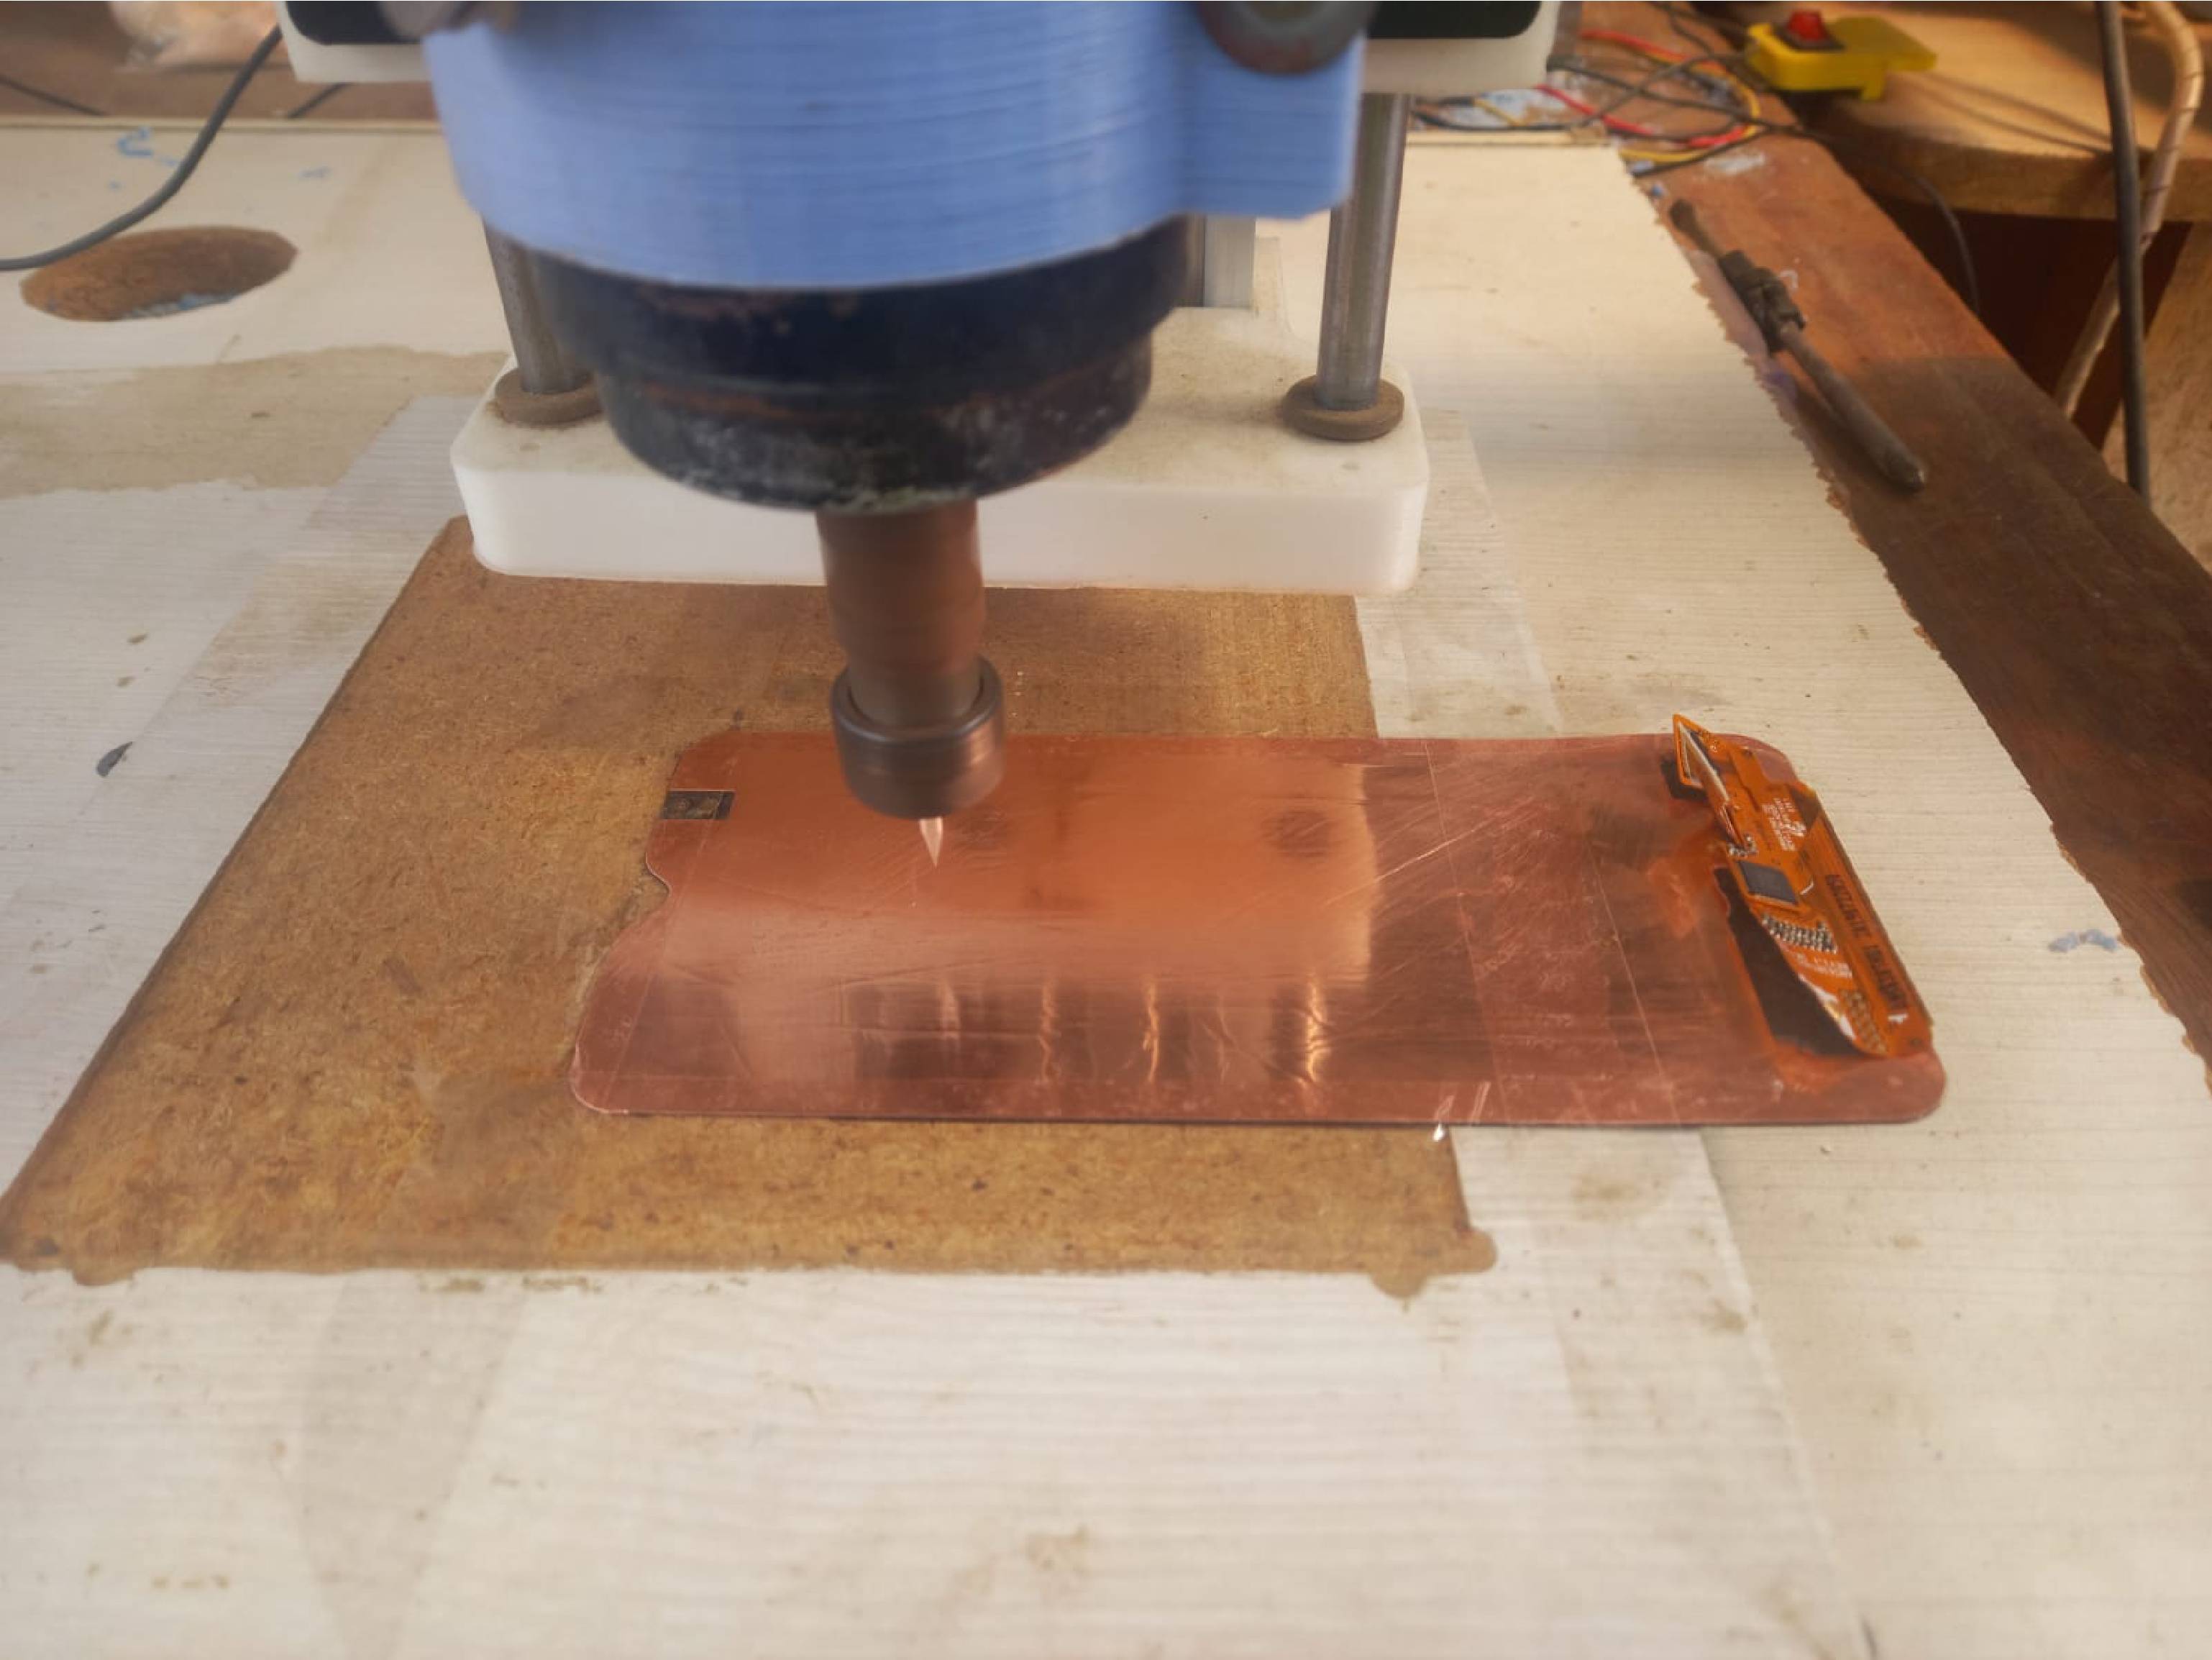
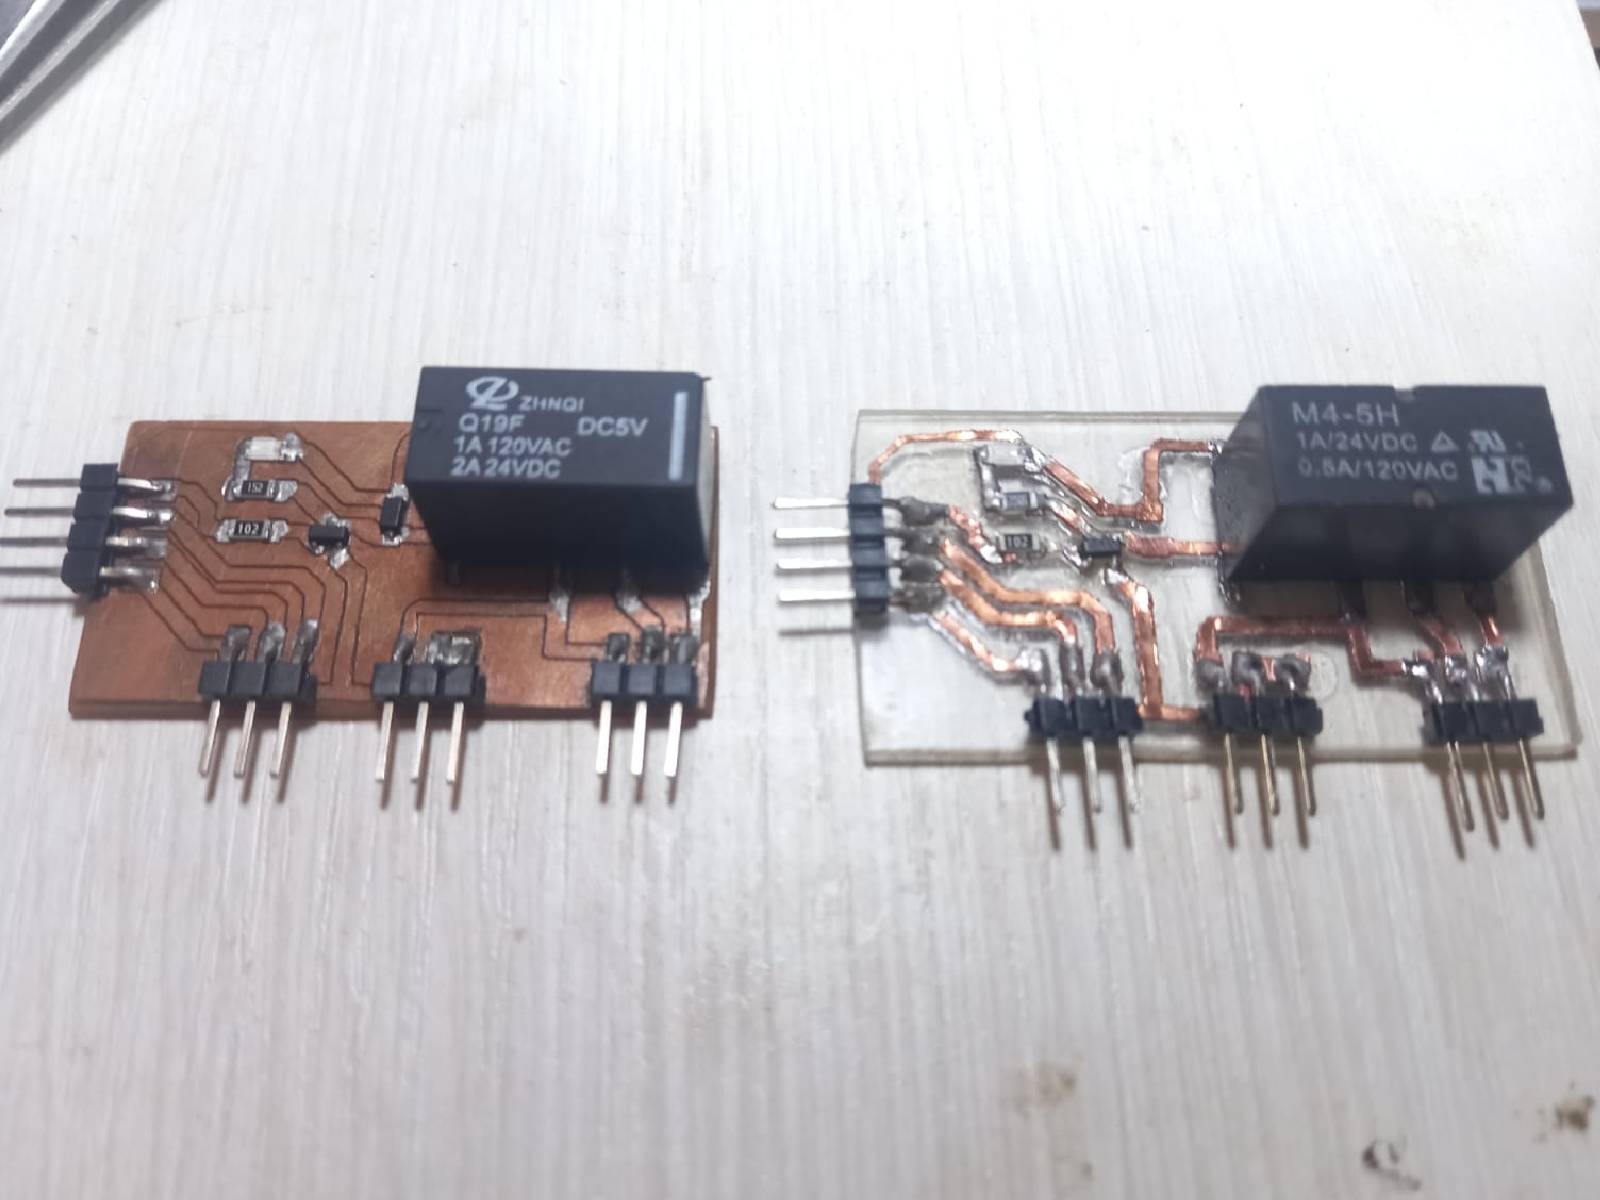
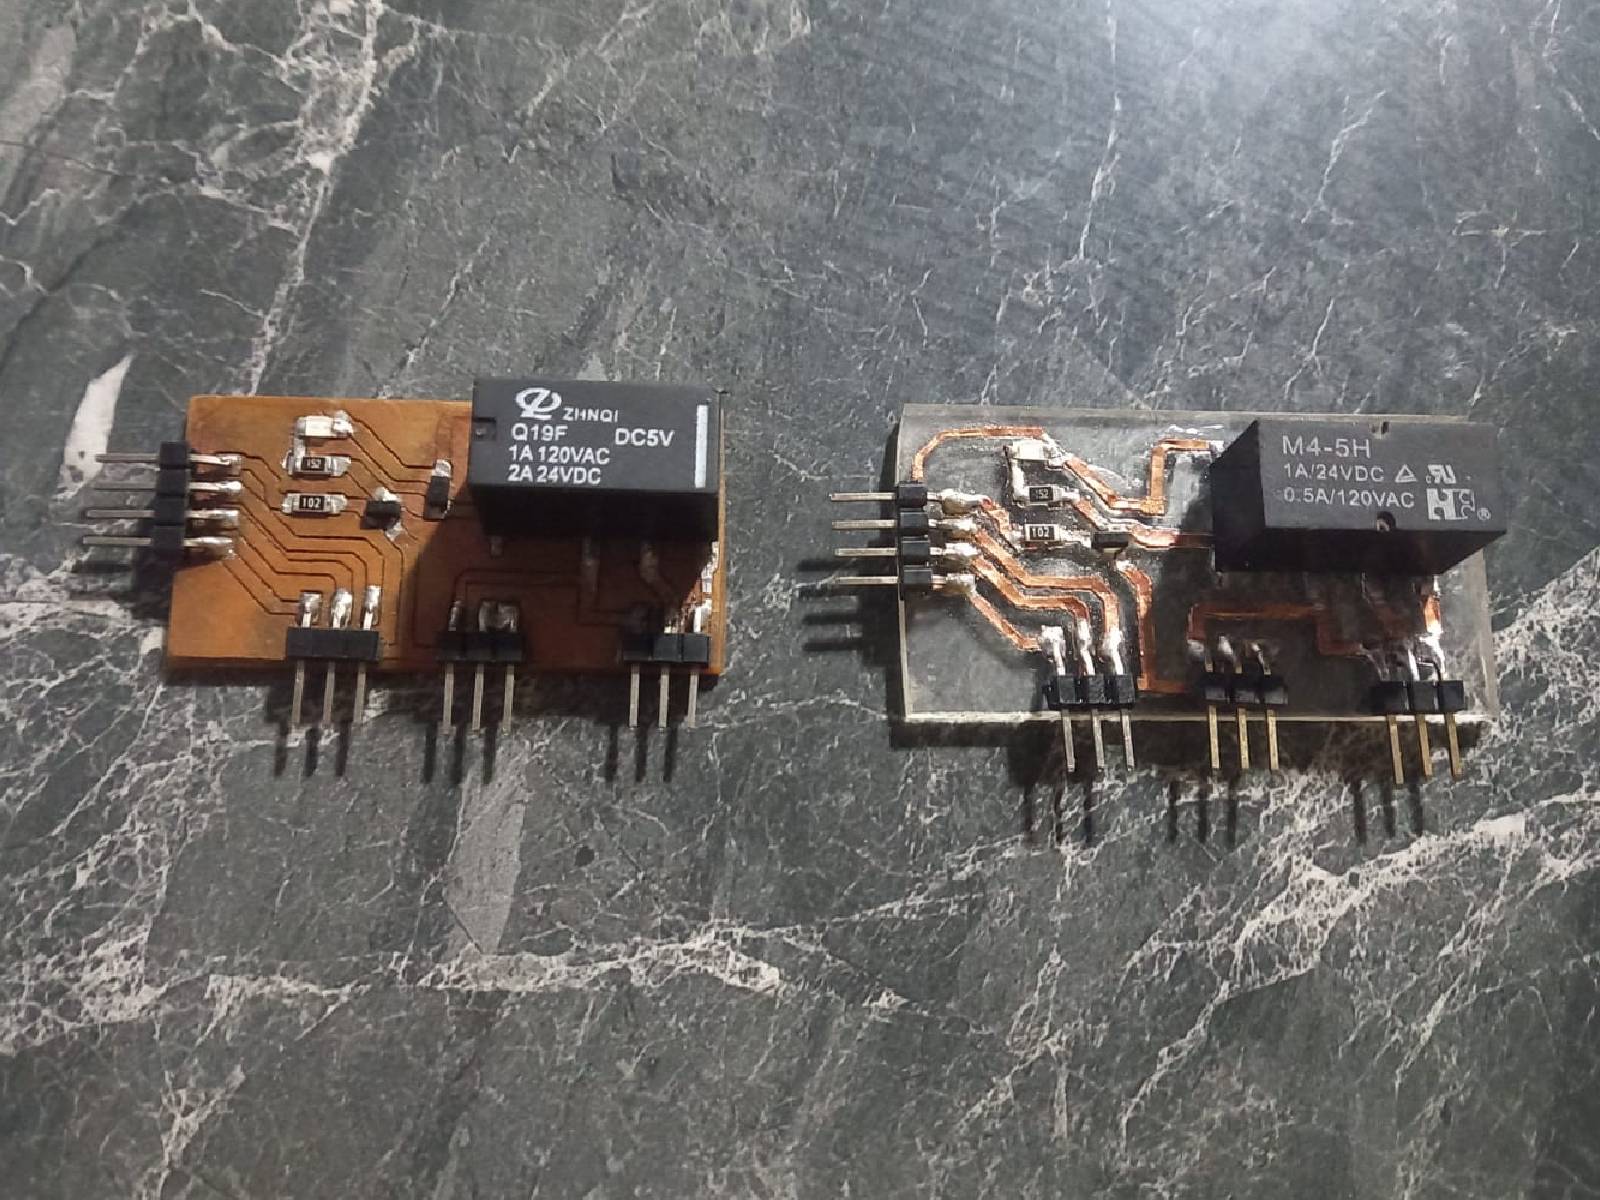
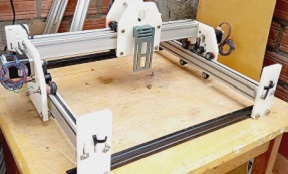
This week, in my individual project, I recycled copper from cell phone screens to make a relay module to control a 12-volt solenoid valve. I used FlatCAM software for design and G-code generation, then used my own home-made CNC to carry out the manufacturing process.
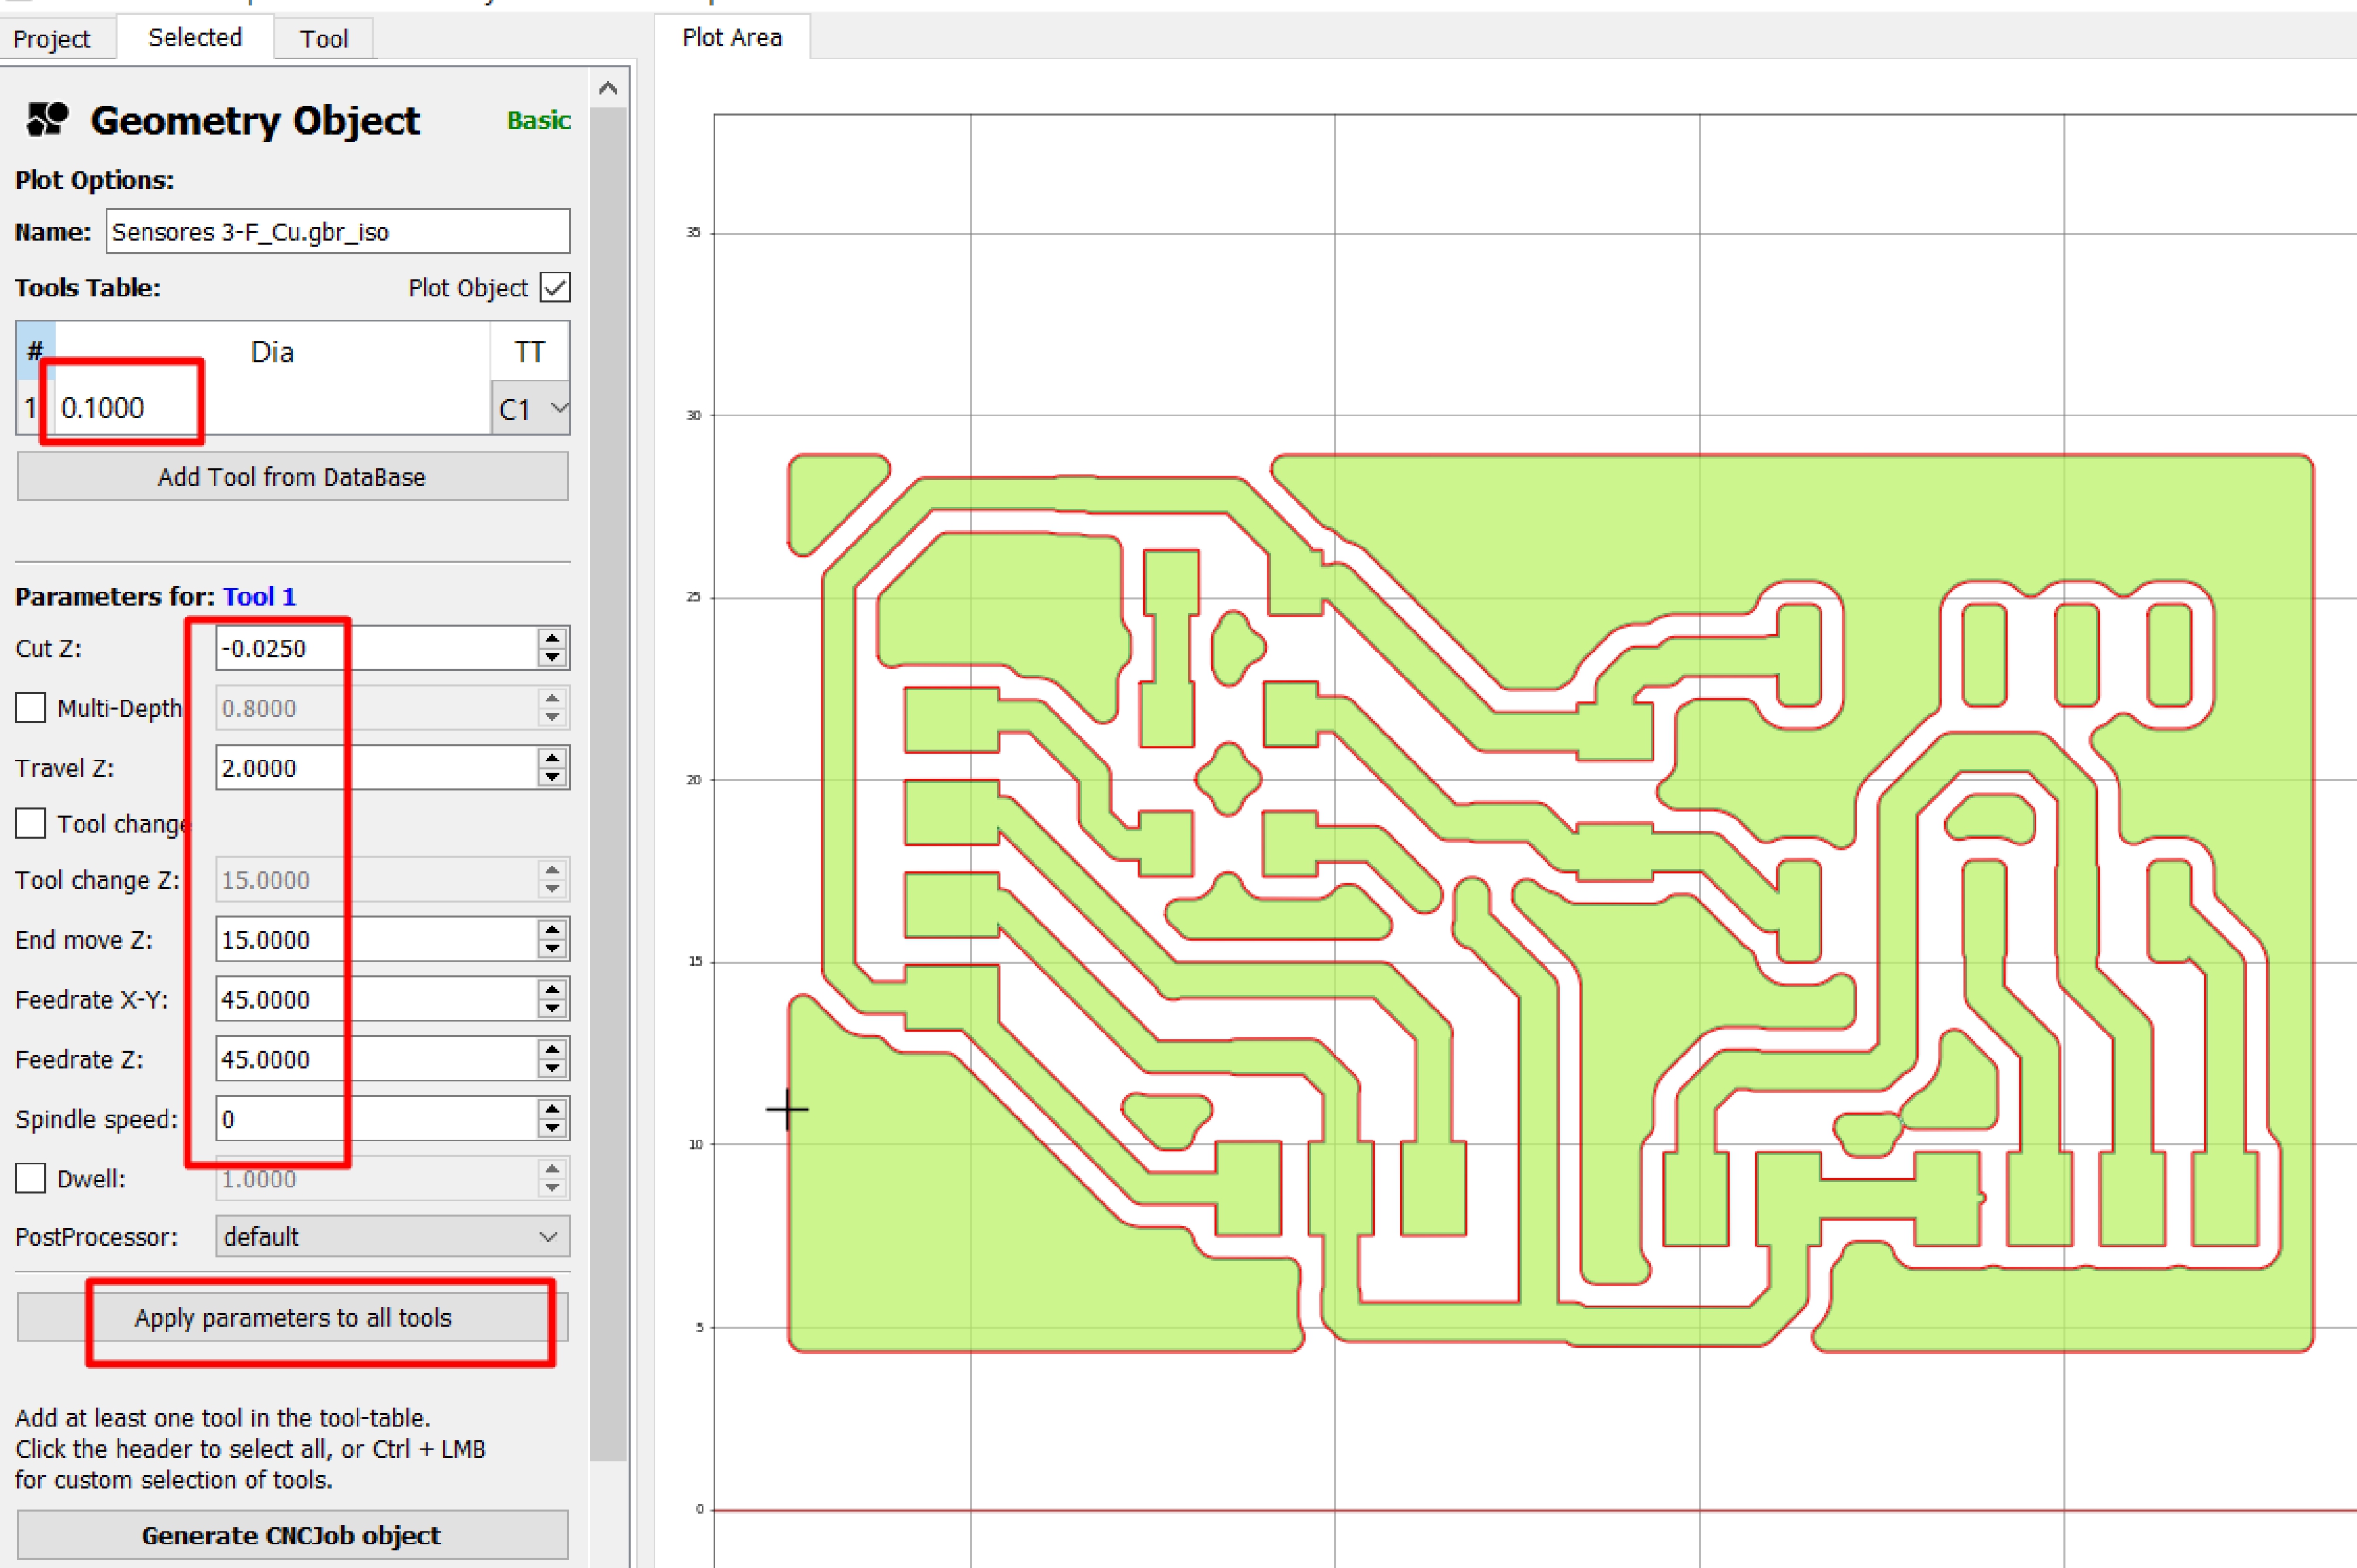
After generating the G code, we are ready to move forward to the manufacturing process. To start this exciting adventure, we got an A50 cell phone screen. It's time to get to work!
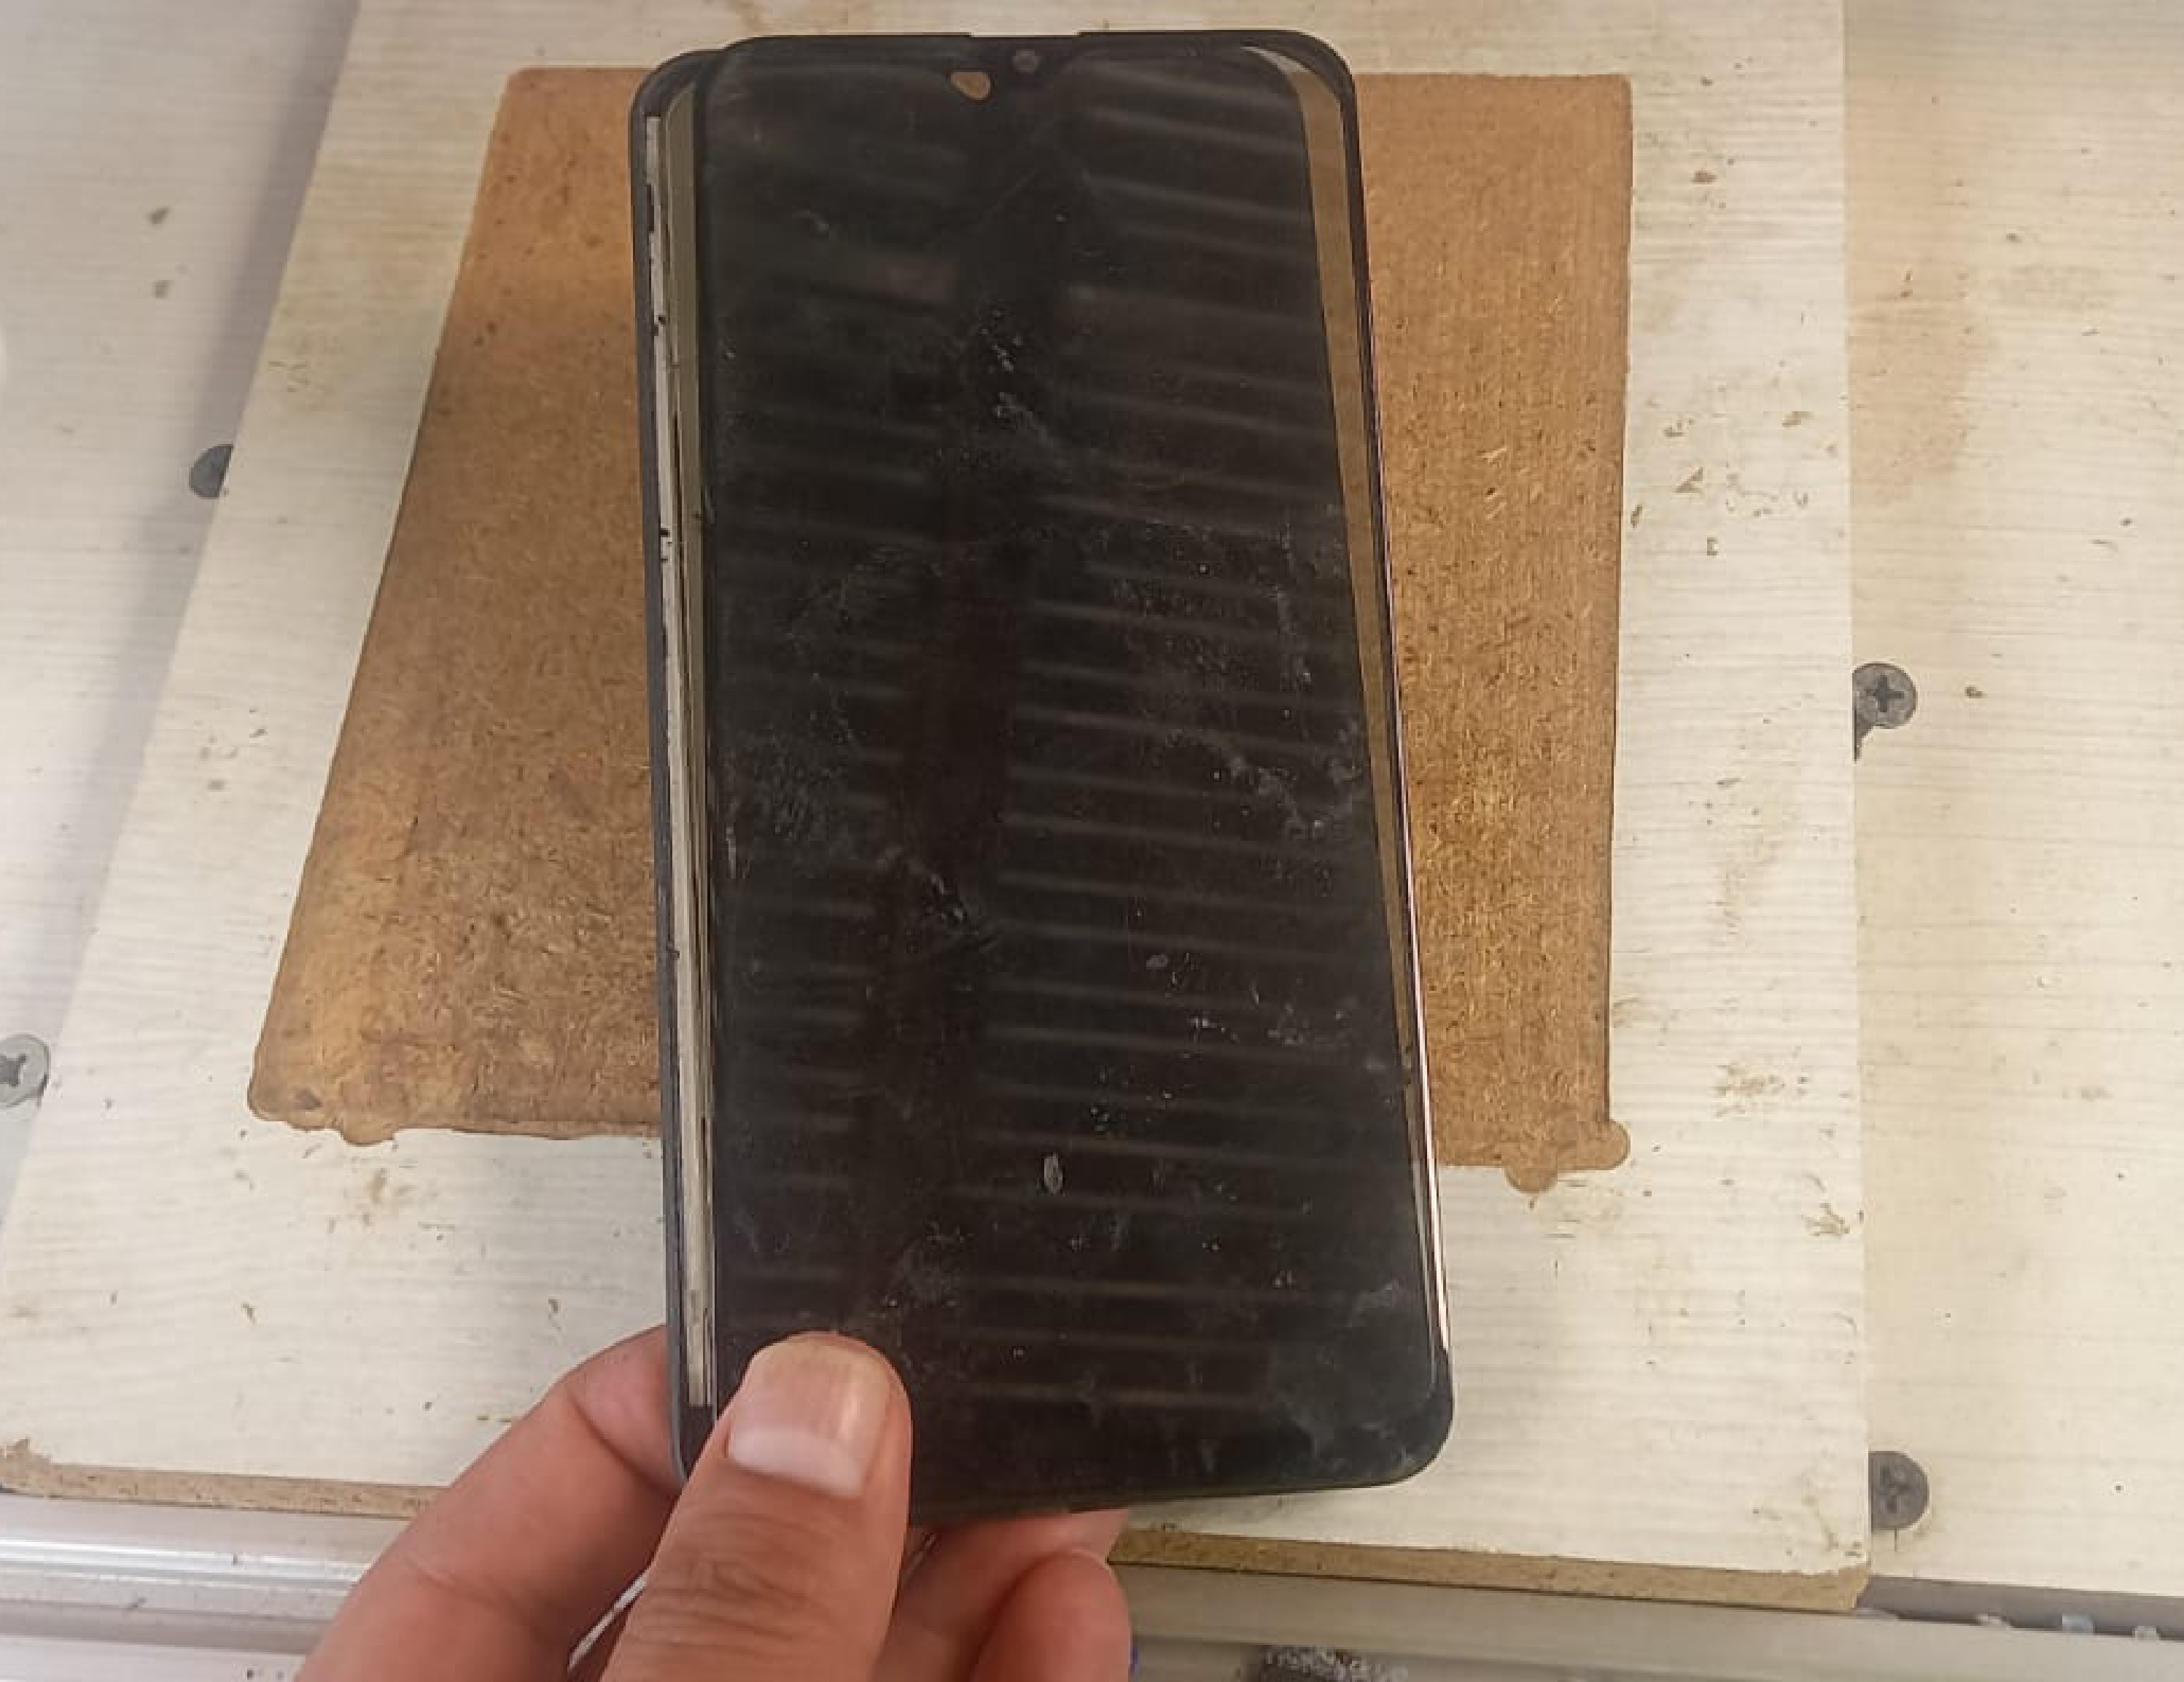
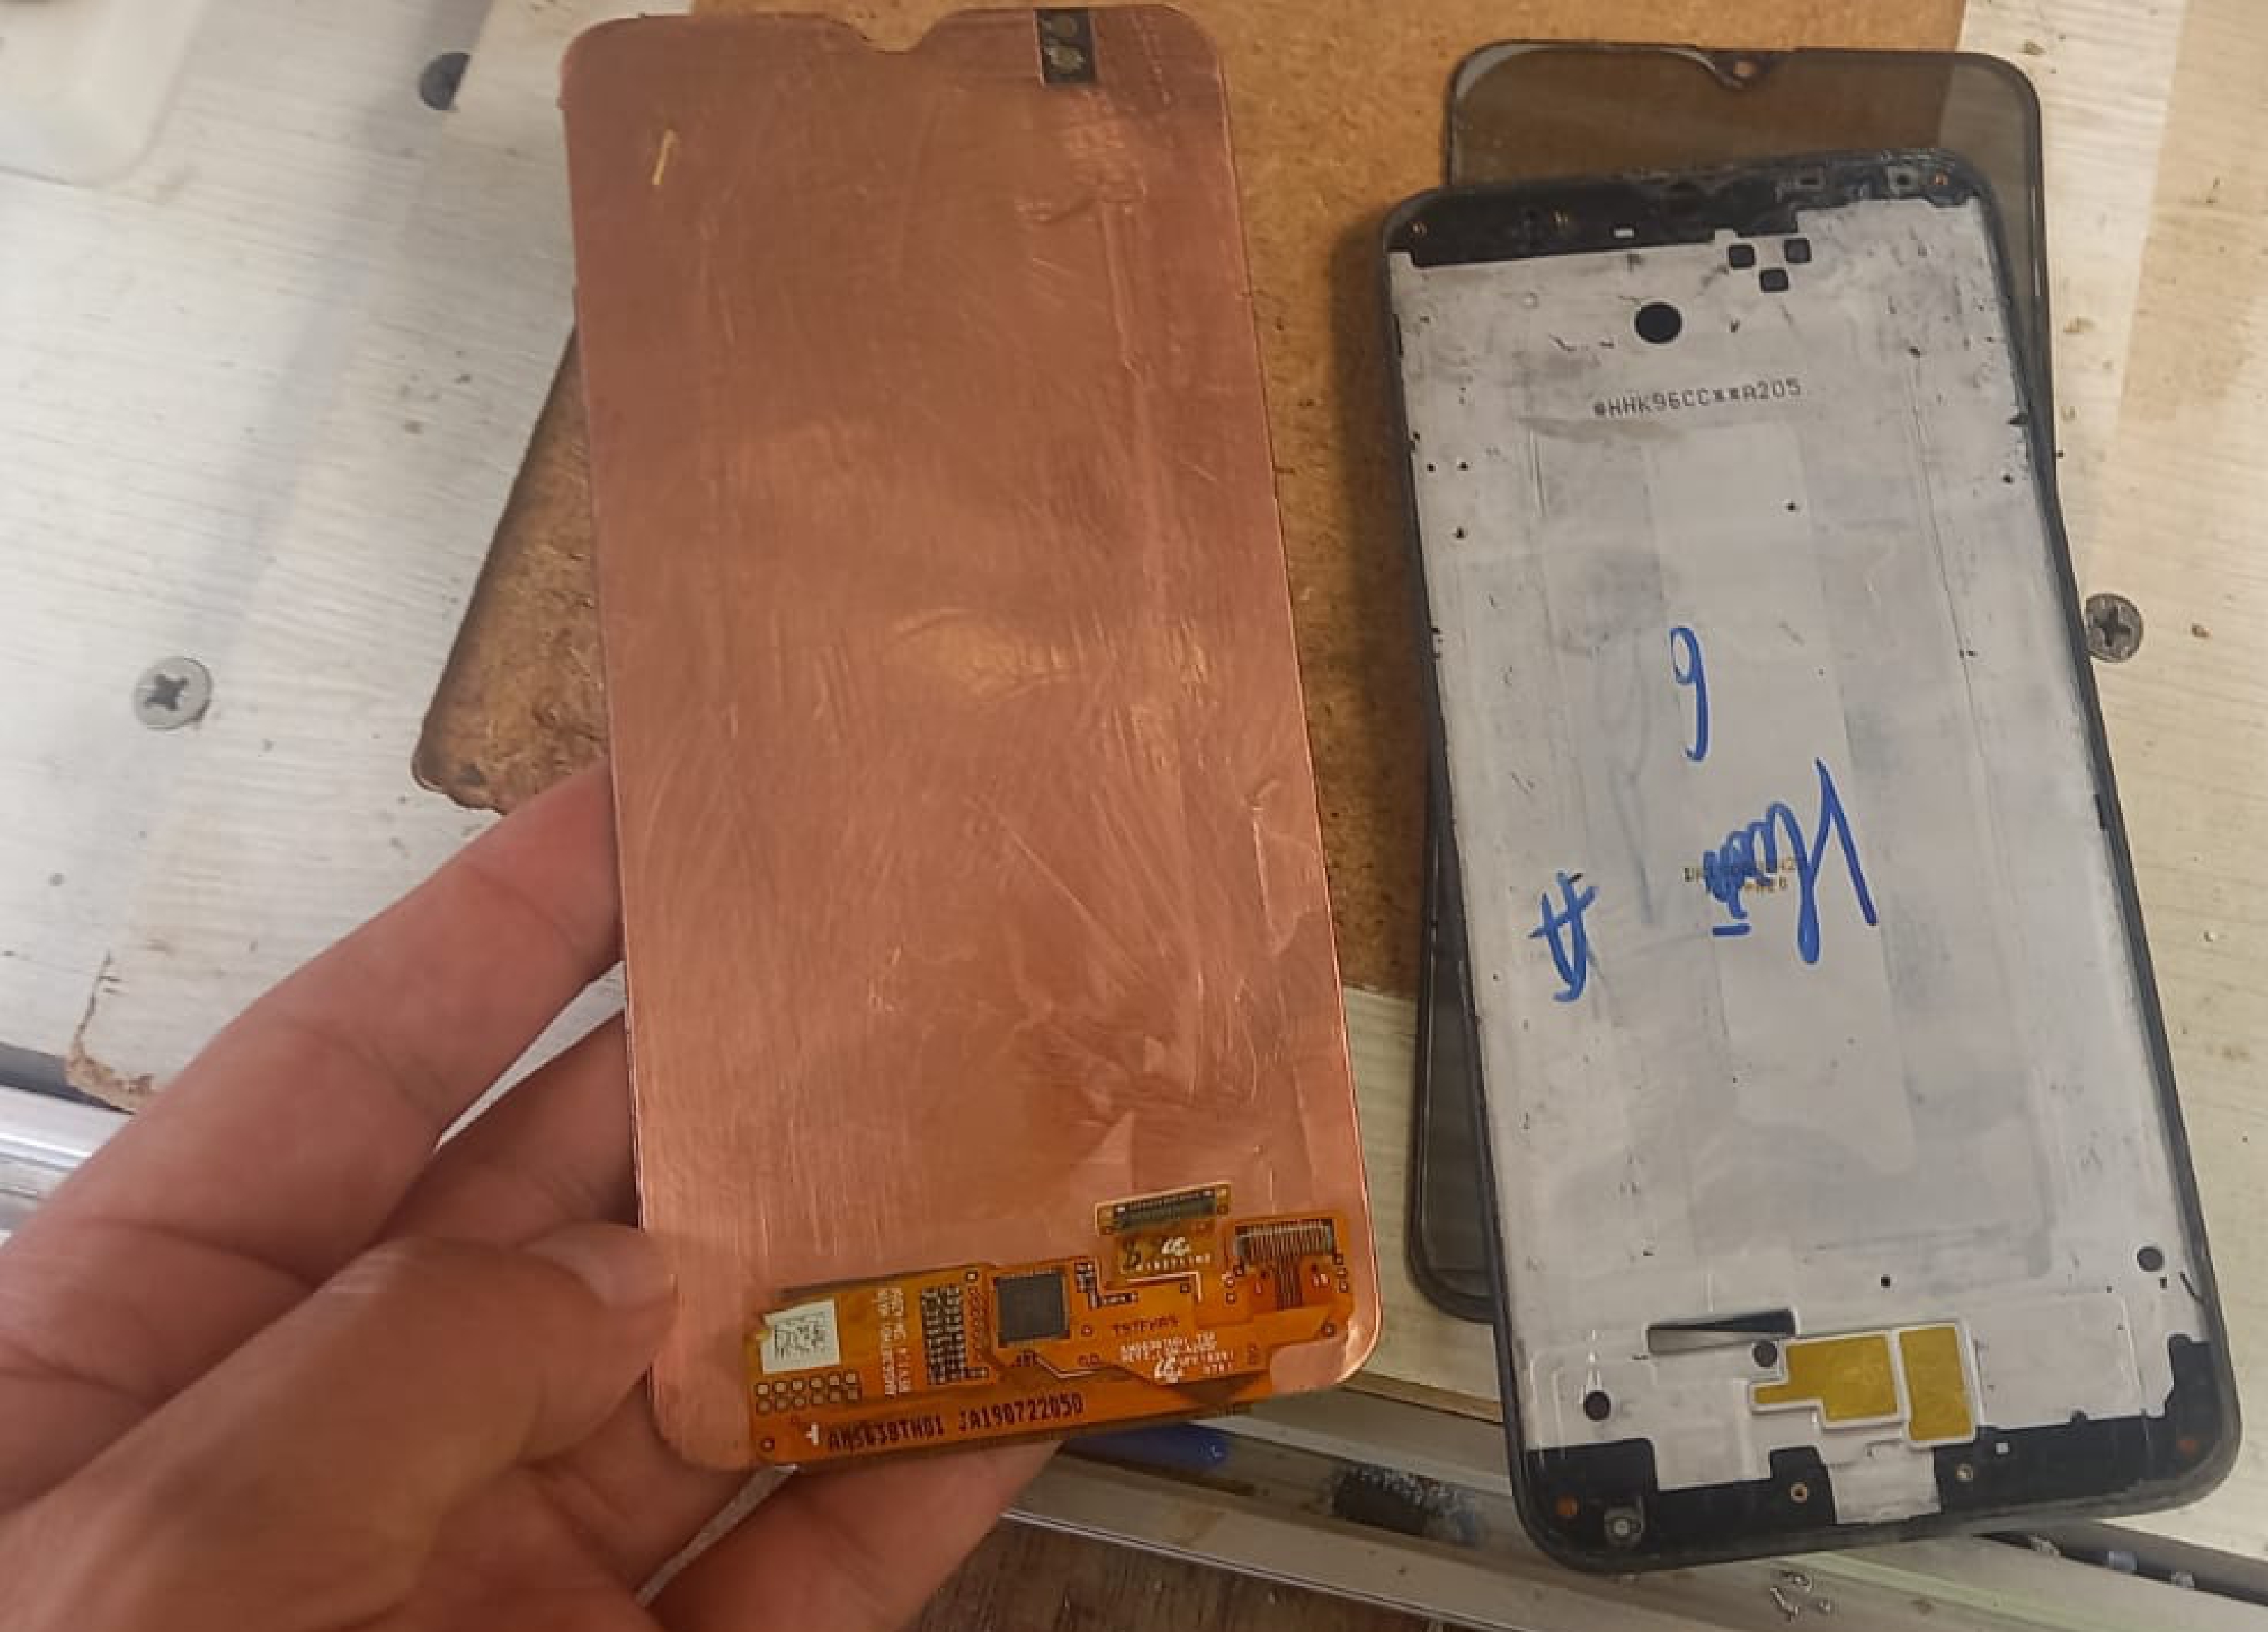
After carefully disassembling the screen, we ended up with a lot of flexible copper, which was exciting given the potential for reuse. Now, we prepare for the next step: placing this material on the CNC machine to start the machining process. It is an exciting time to see how this recycled material will be transformed into a useful and functional component for our project.
In the following video, the machining process is detailed, and you can see that it is progressing satisfactorily. Furthermore, it is gratifying to know that this method allows us to reuse multiple defective cell phone screens, giving them a new useful life.
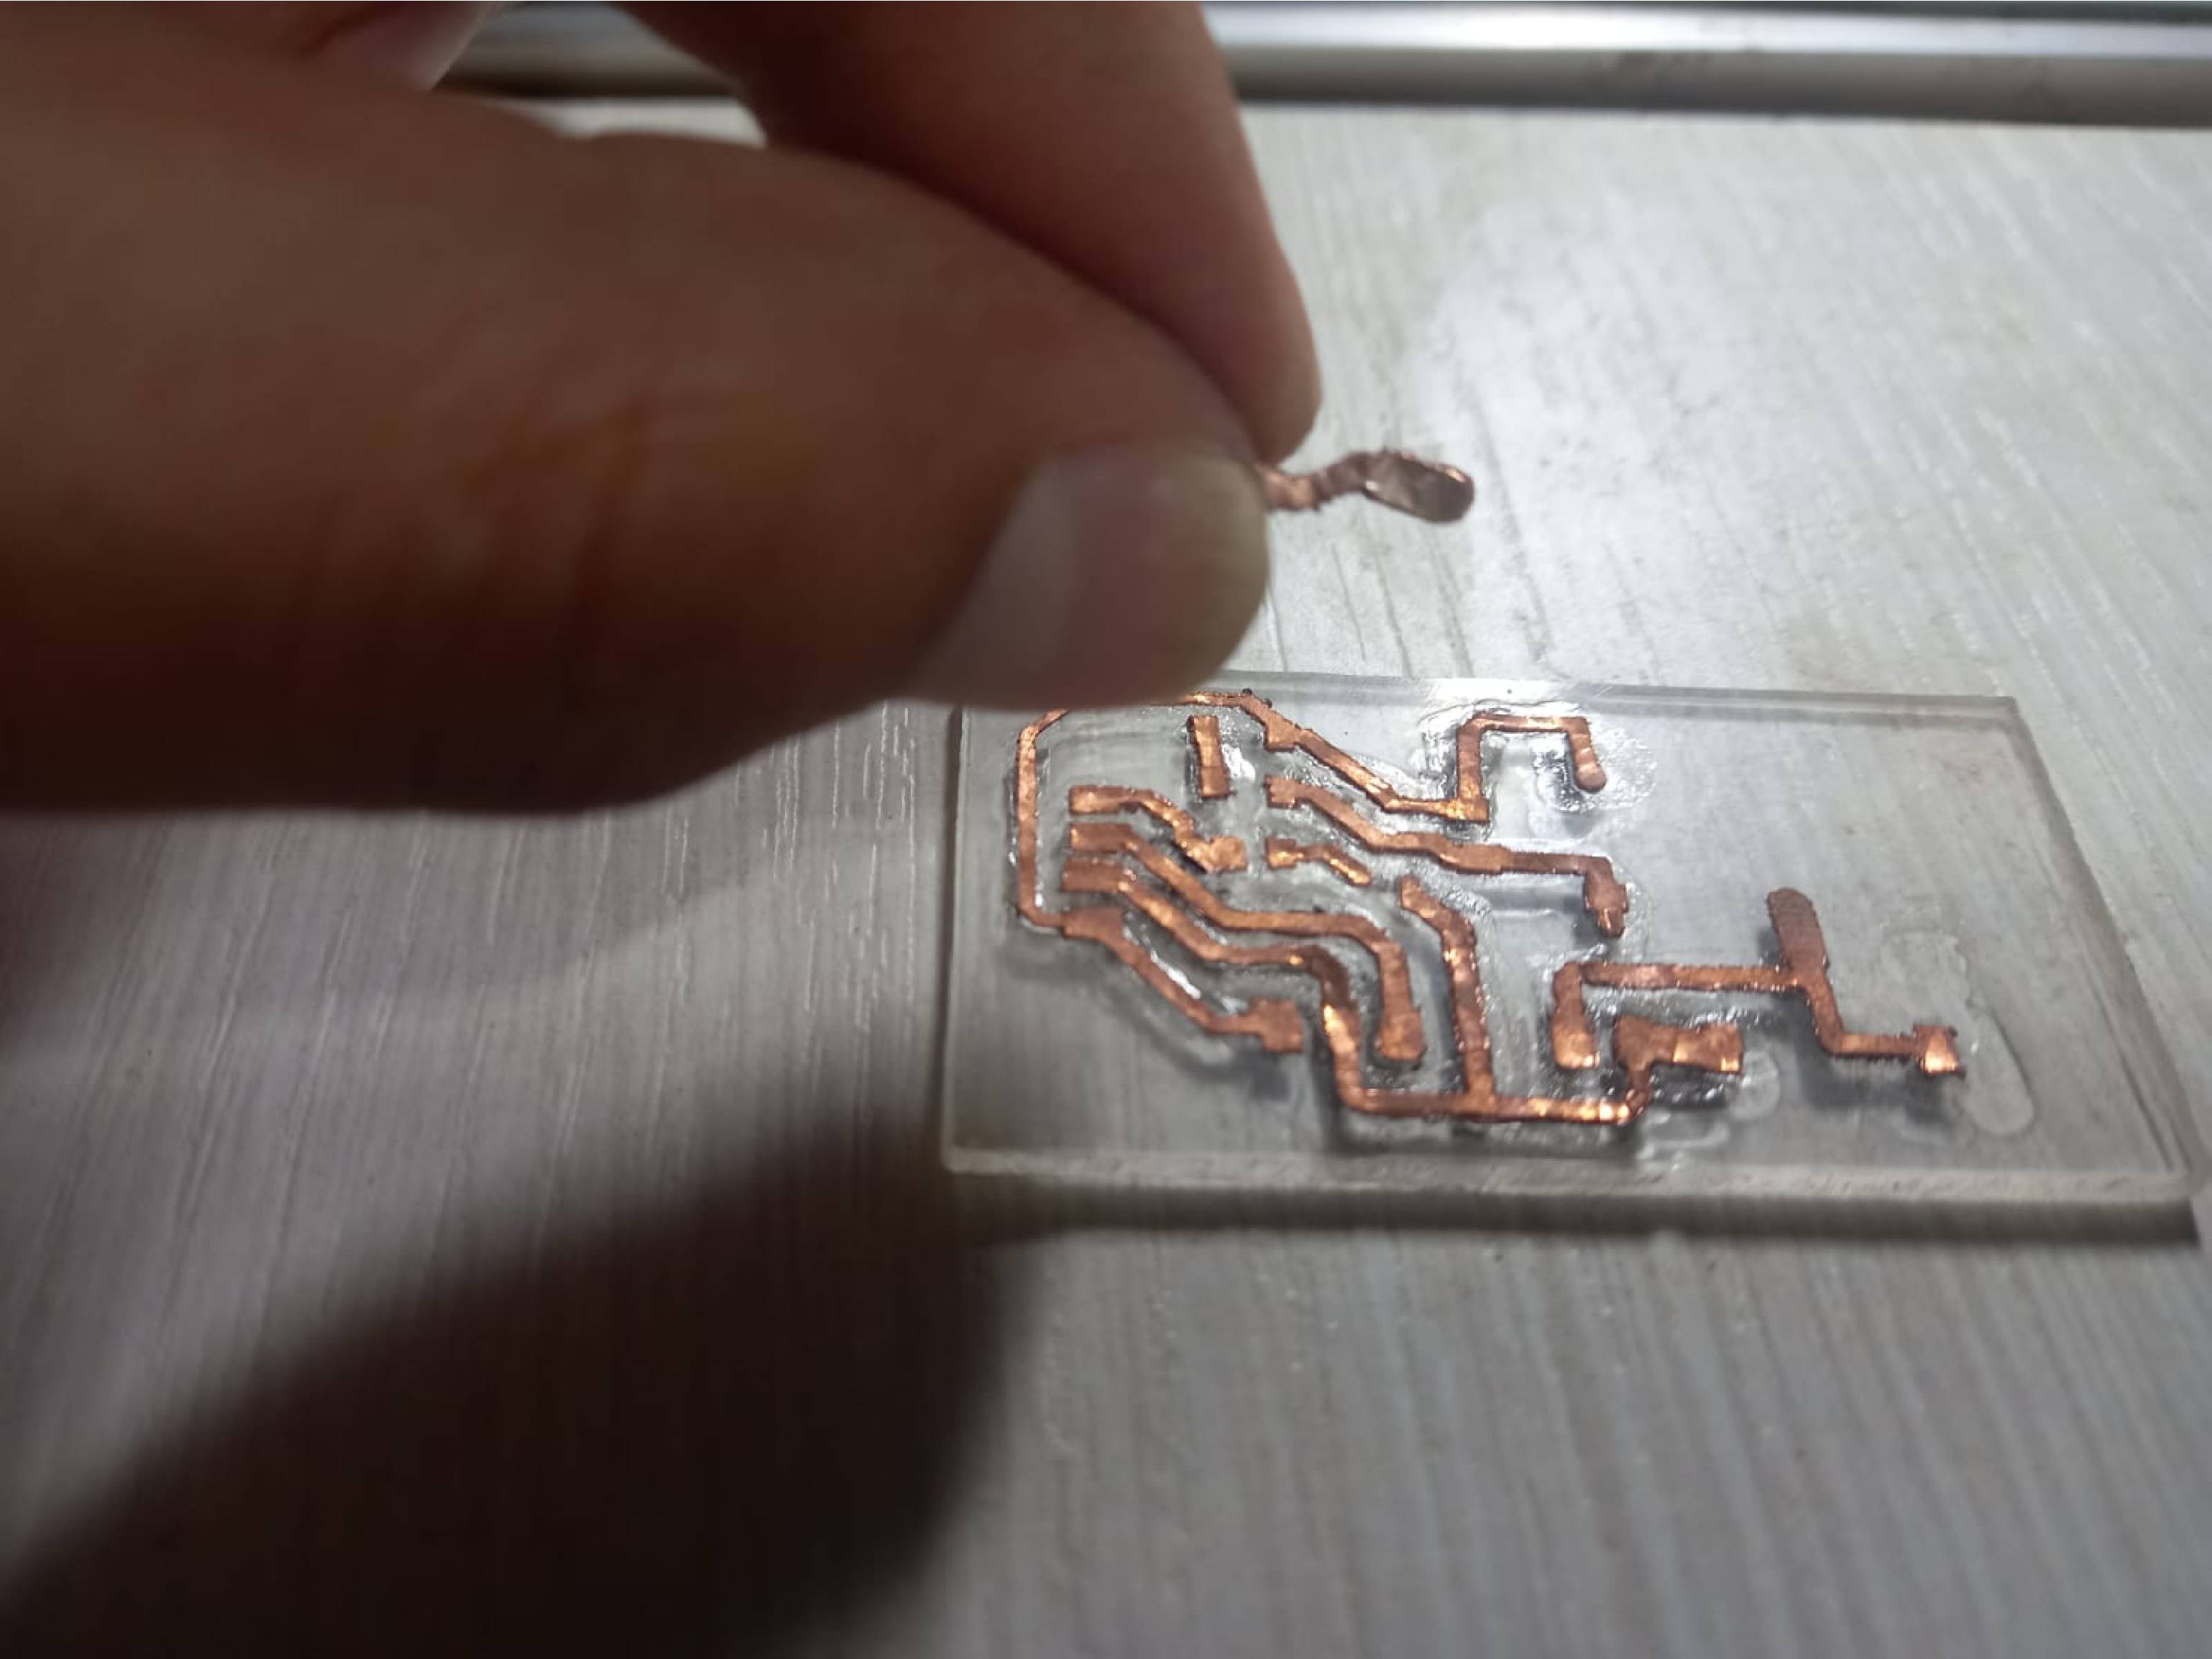
In this next video, the process of eliminating unused material to obtain the final circuit is presented. It is a crucial stage where meticulous extraction is carried out to preserve only what is necessary.
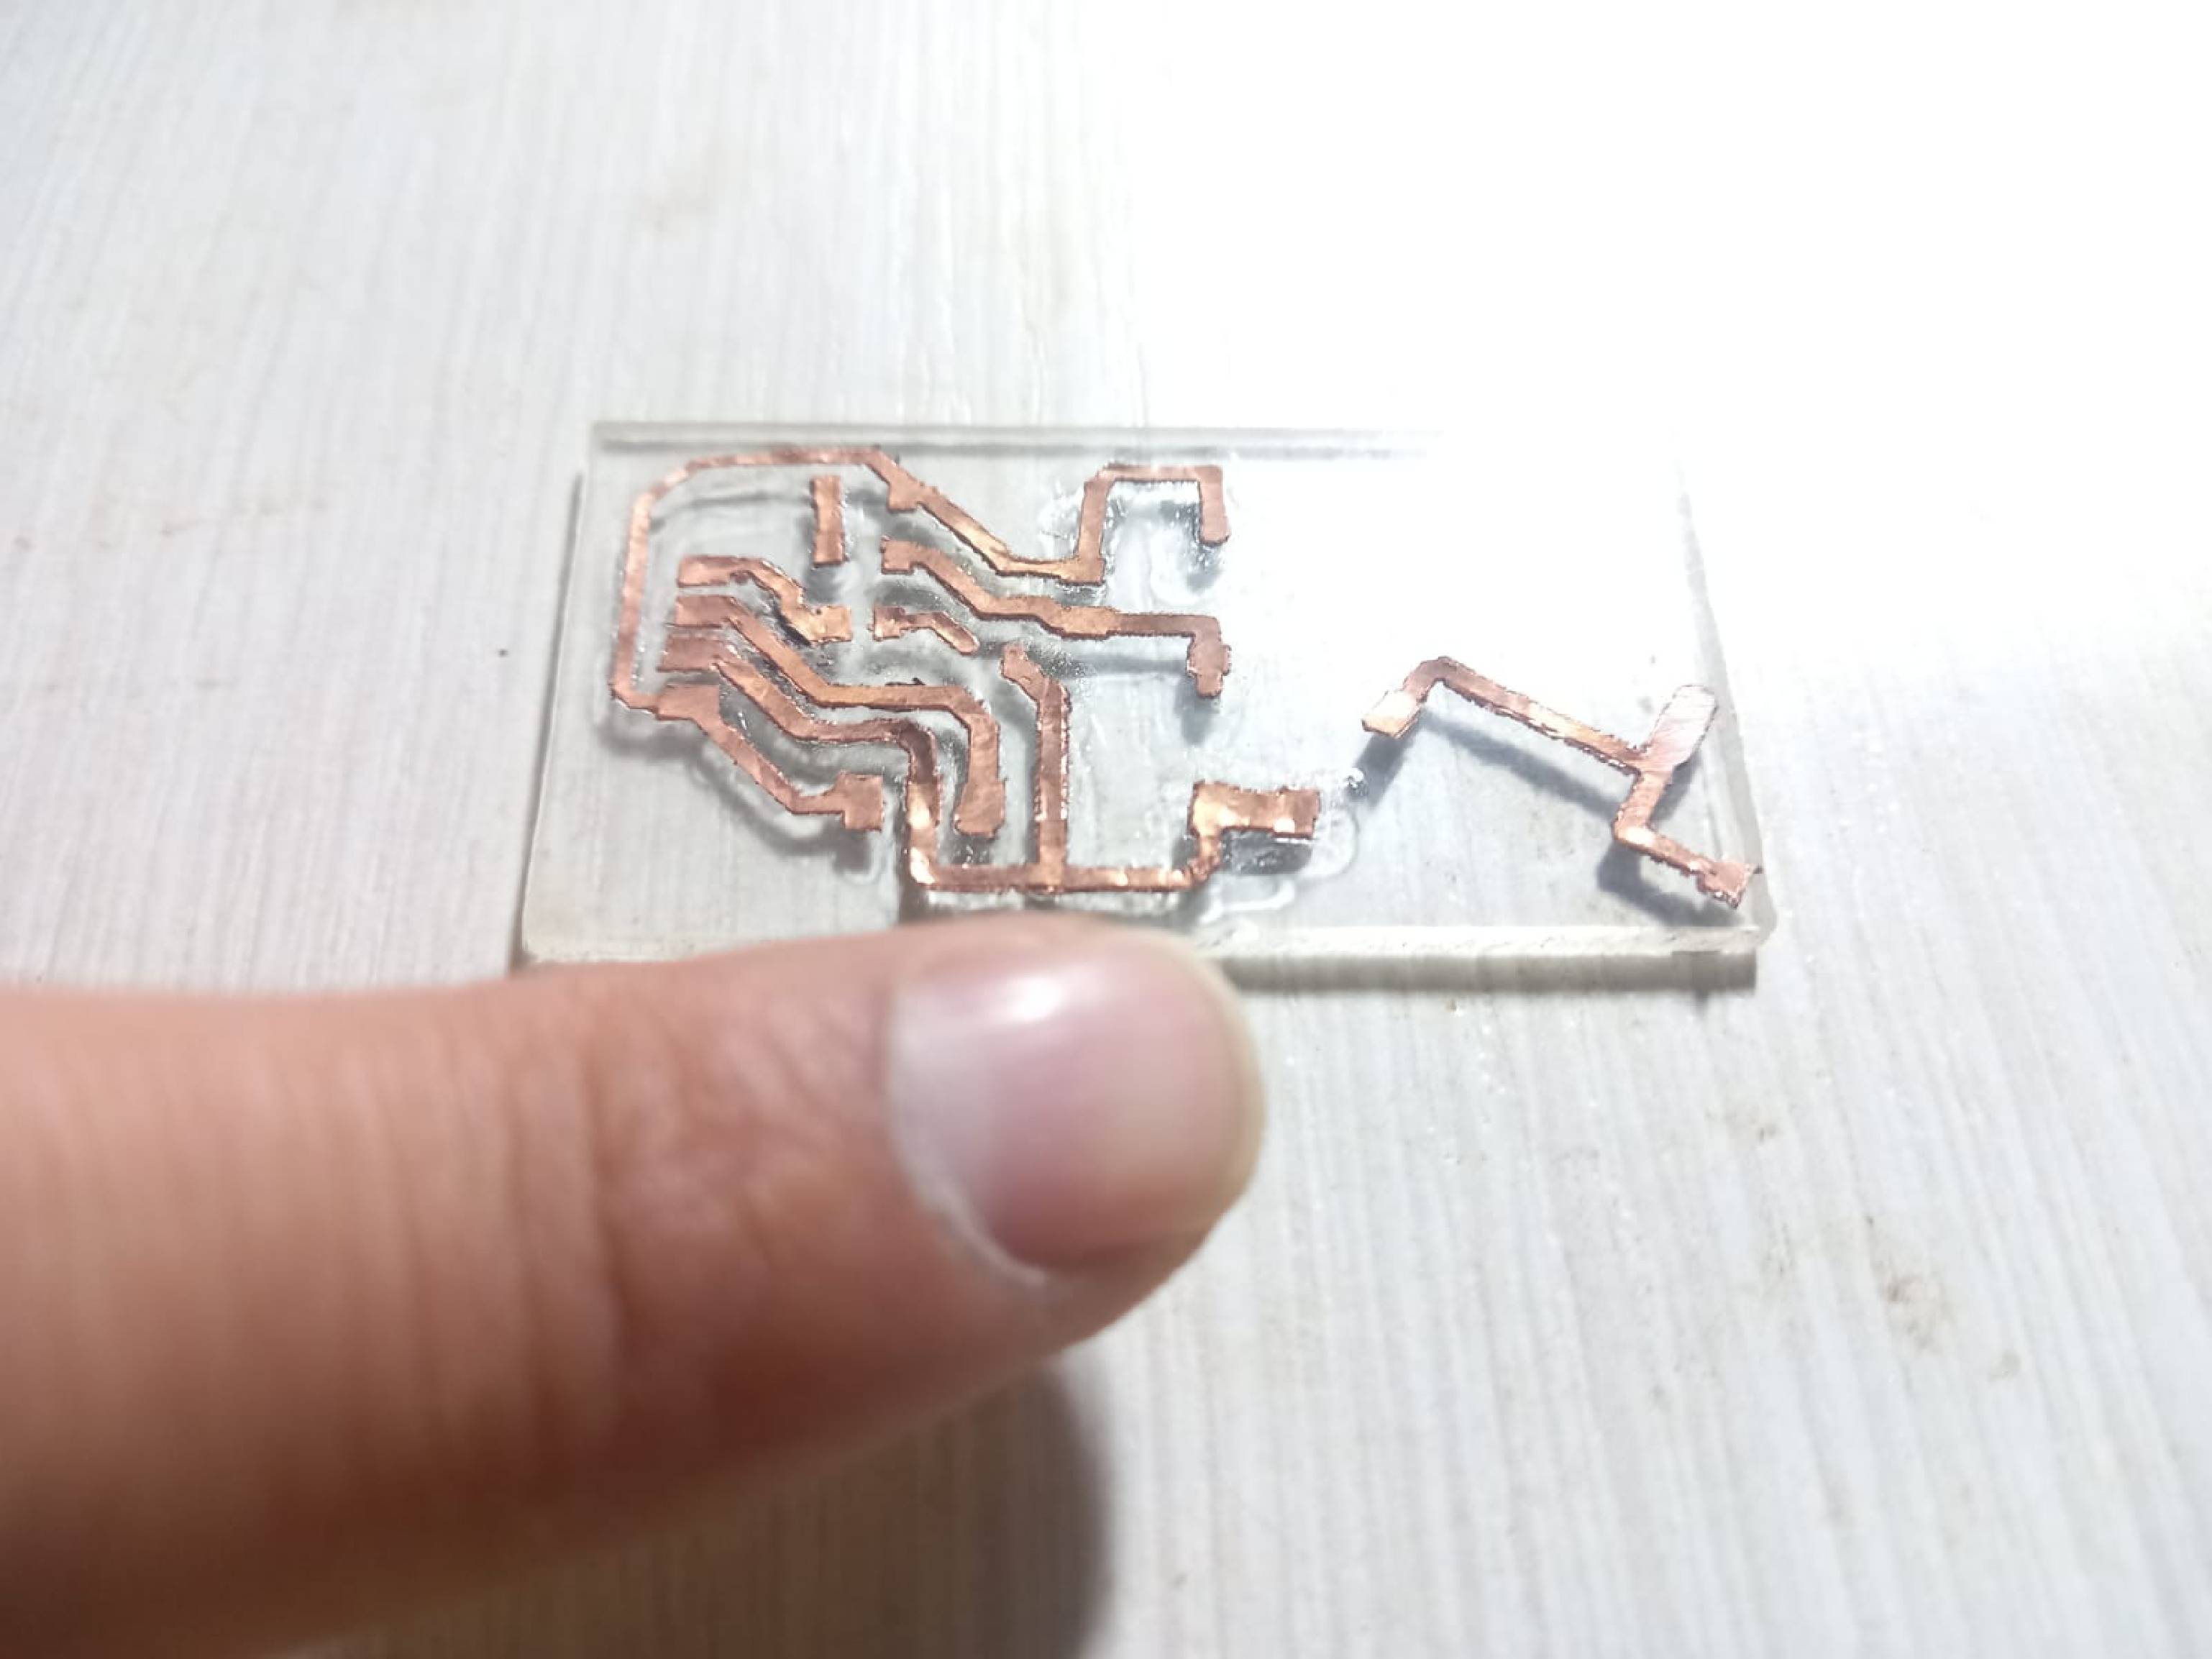
The next step involves carefully transferring the tracks to a sheet of acrylic. This process requires meticulous attention and patience to ensure an accurate and error-free transfer.
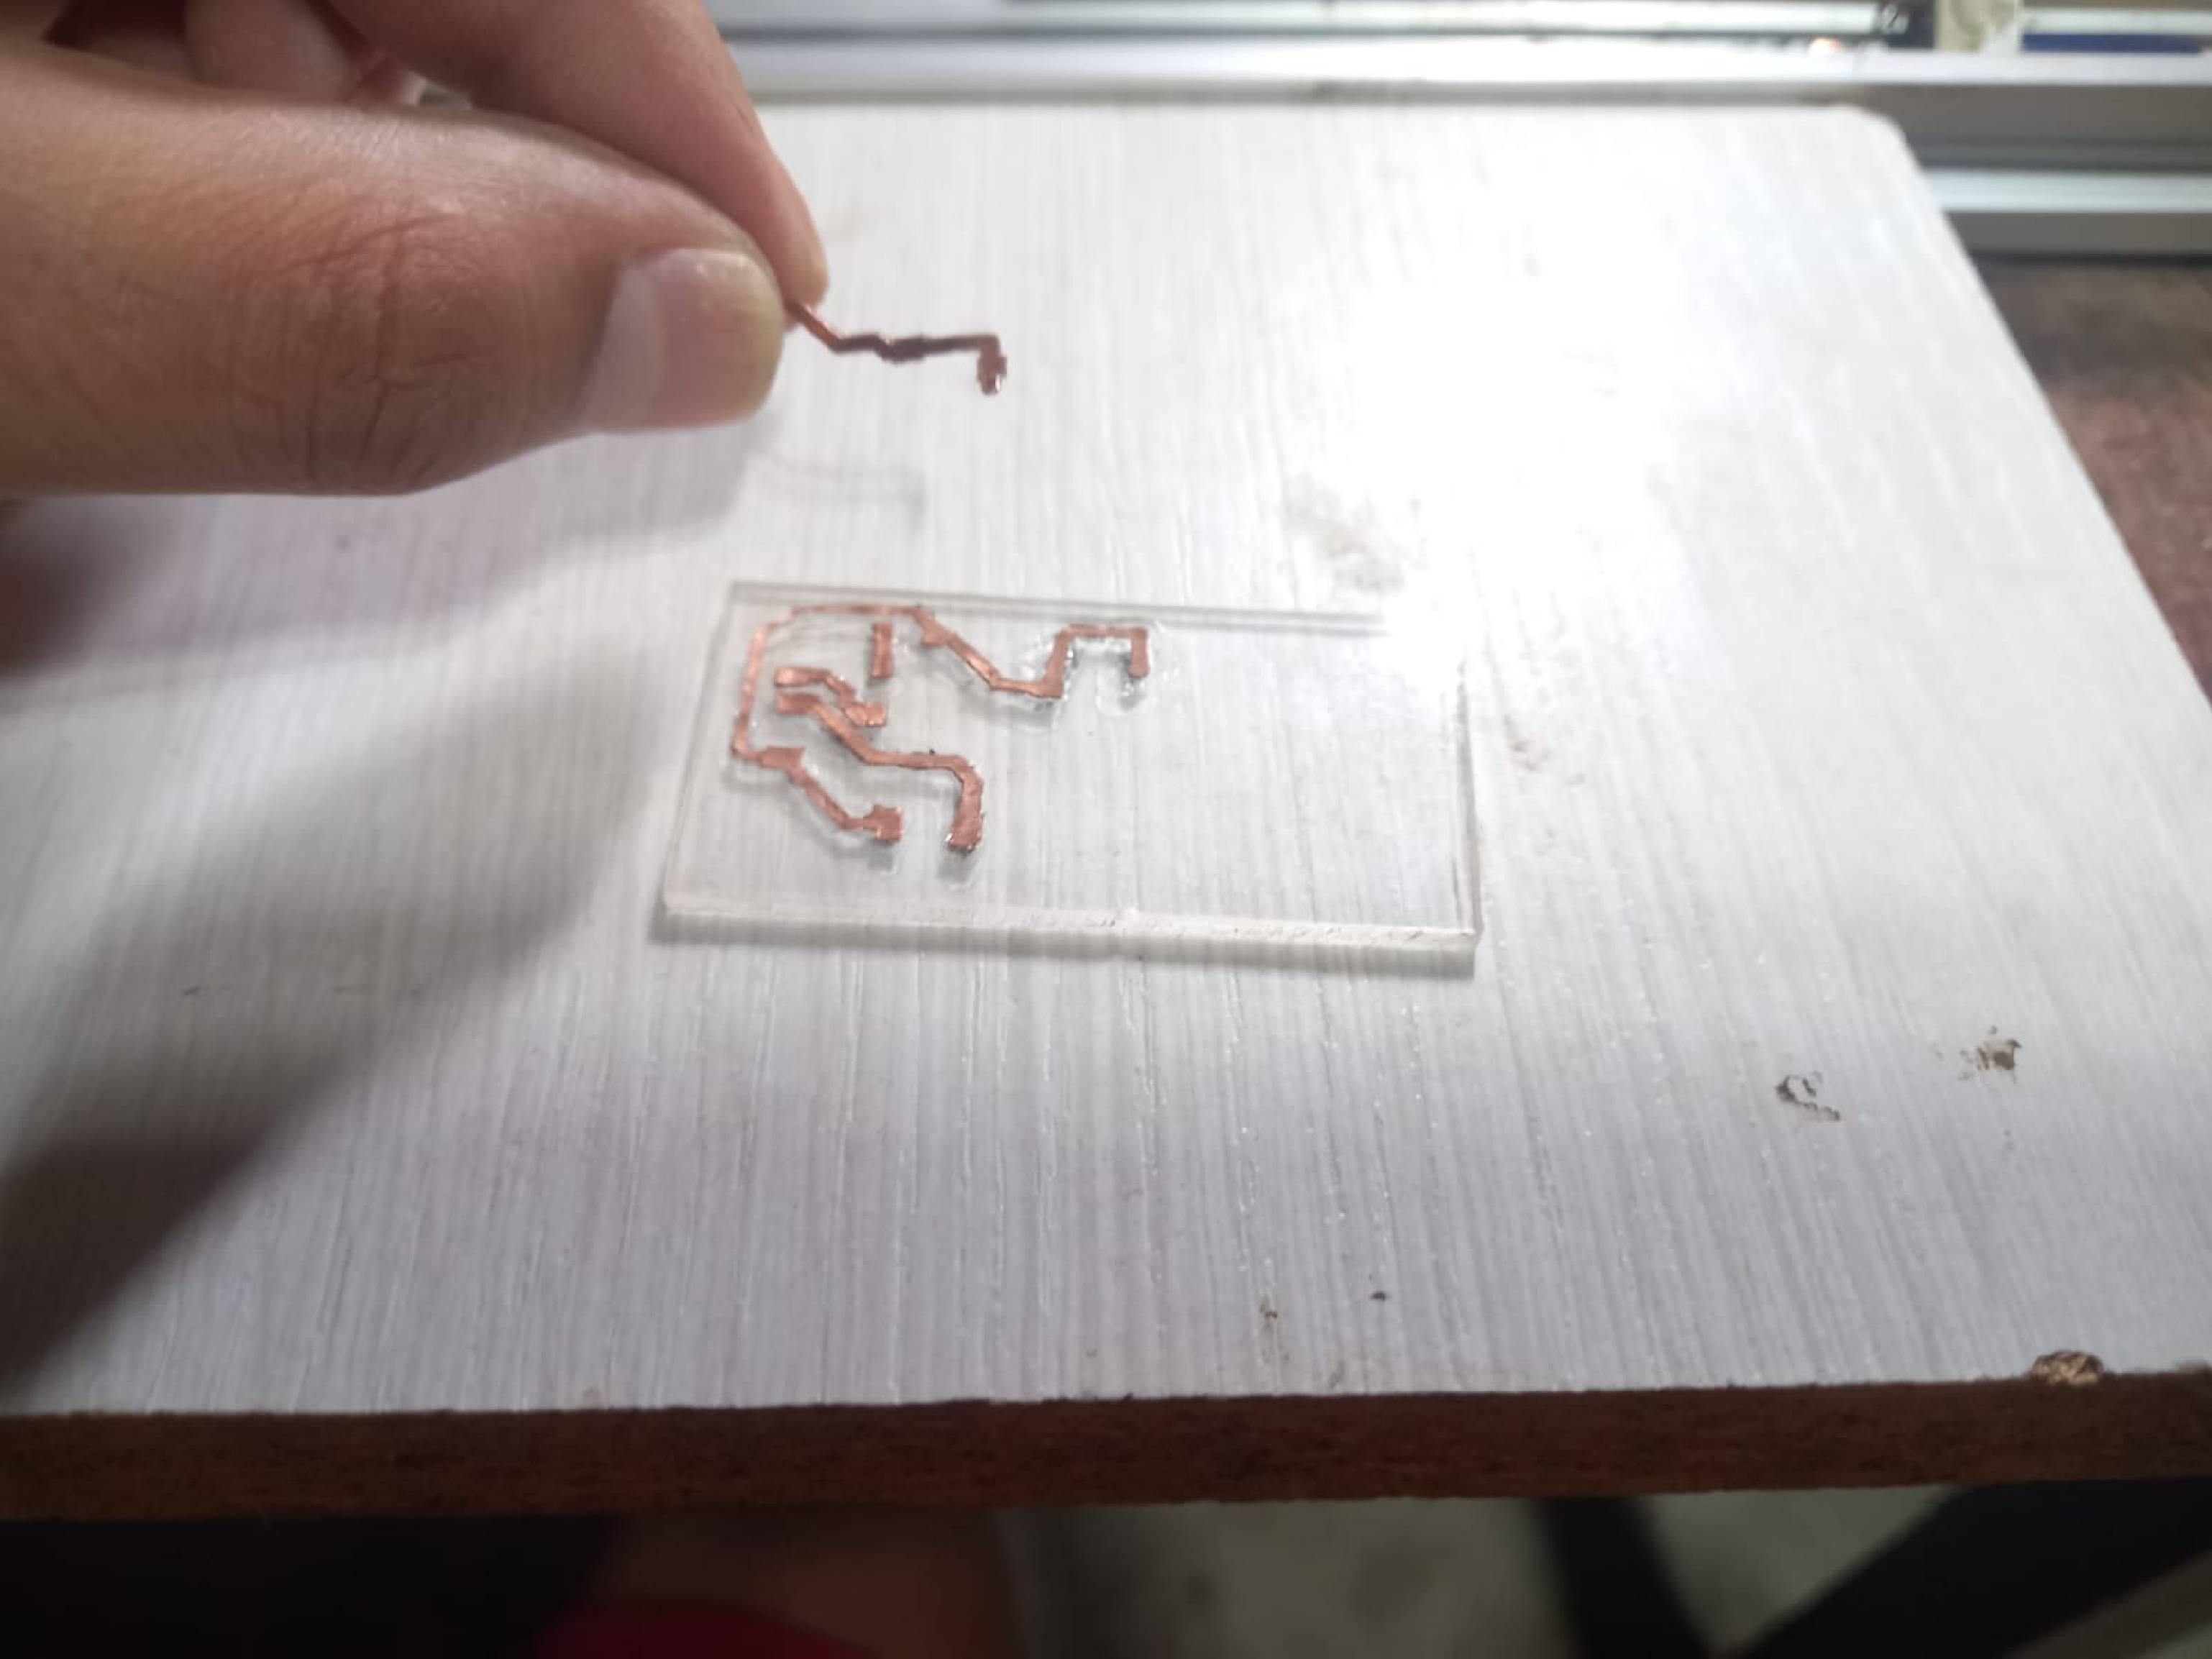
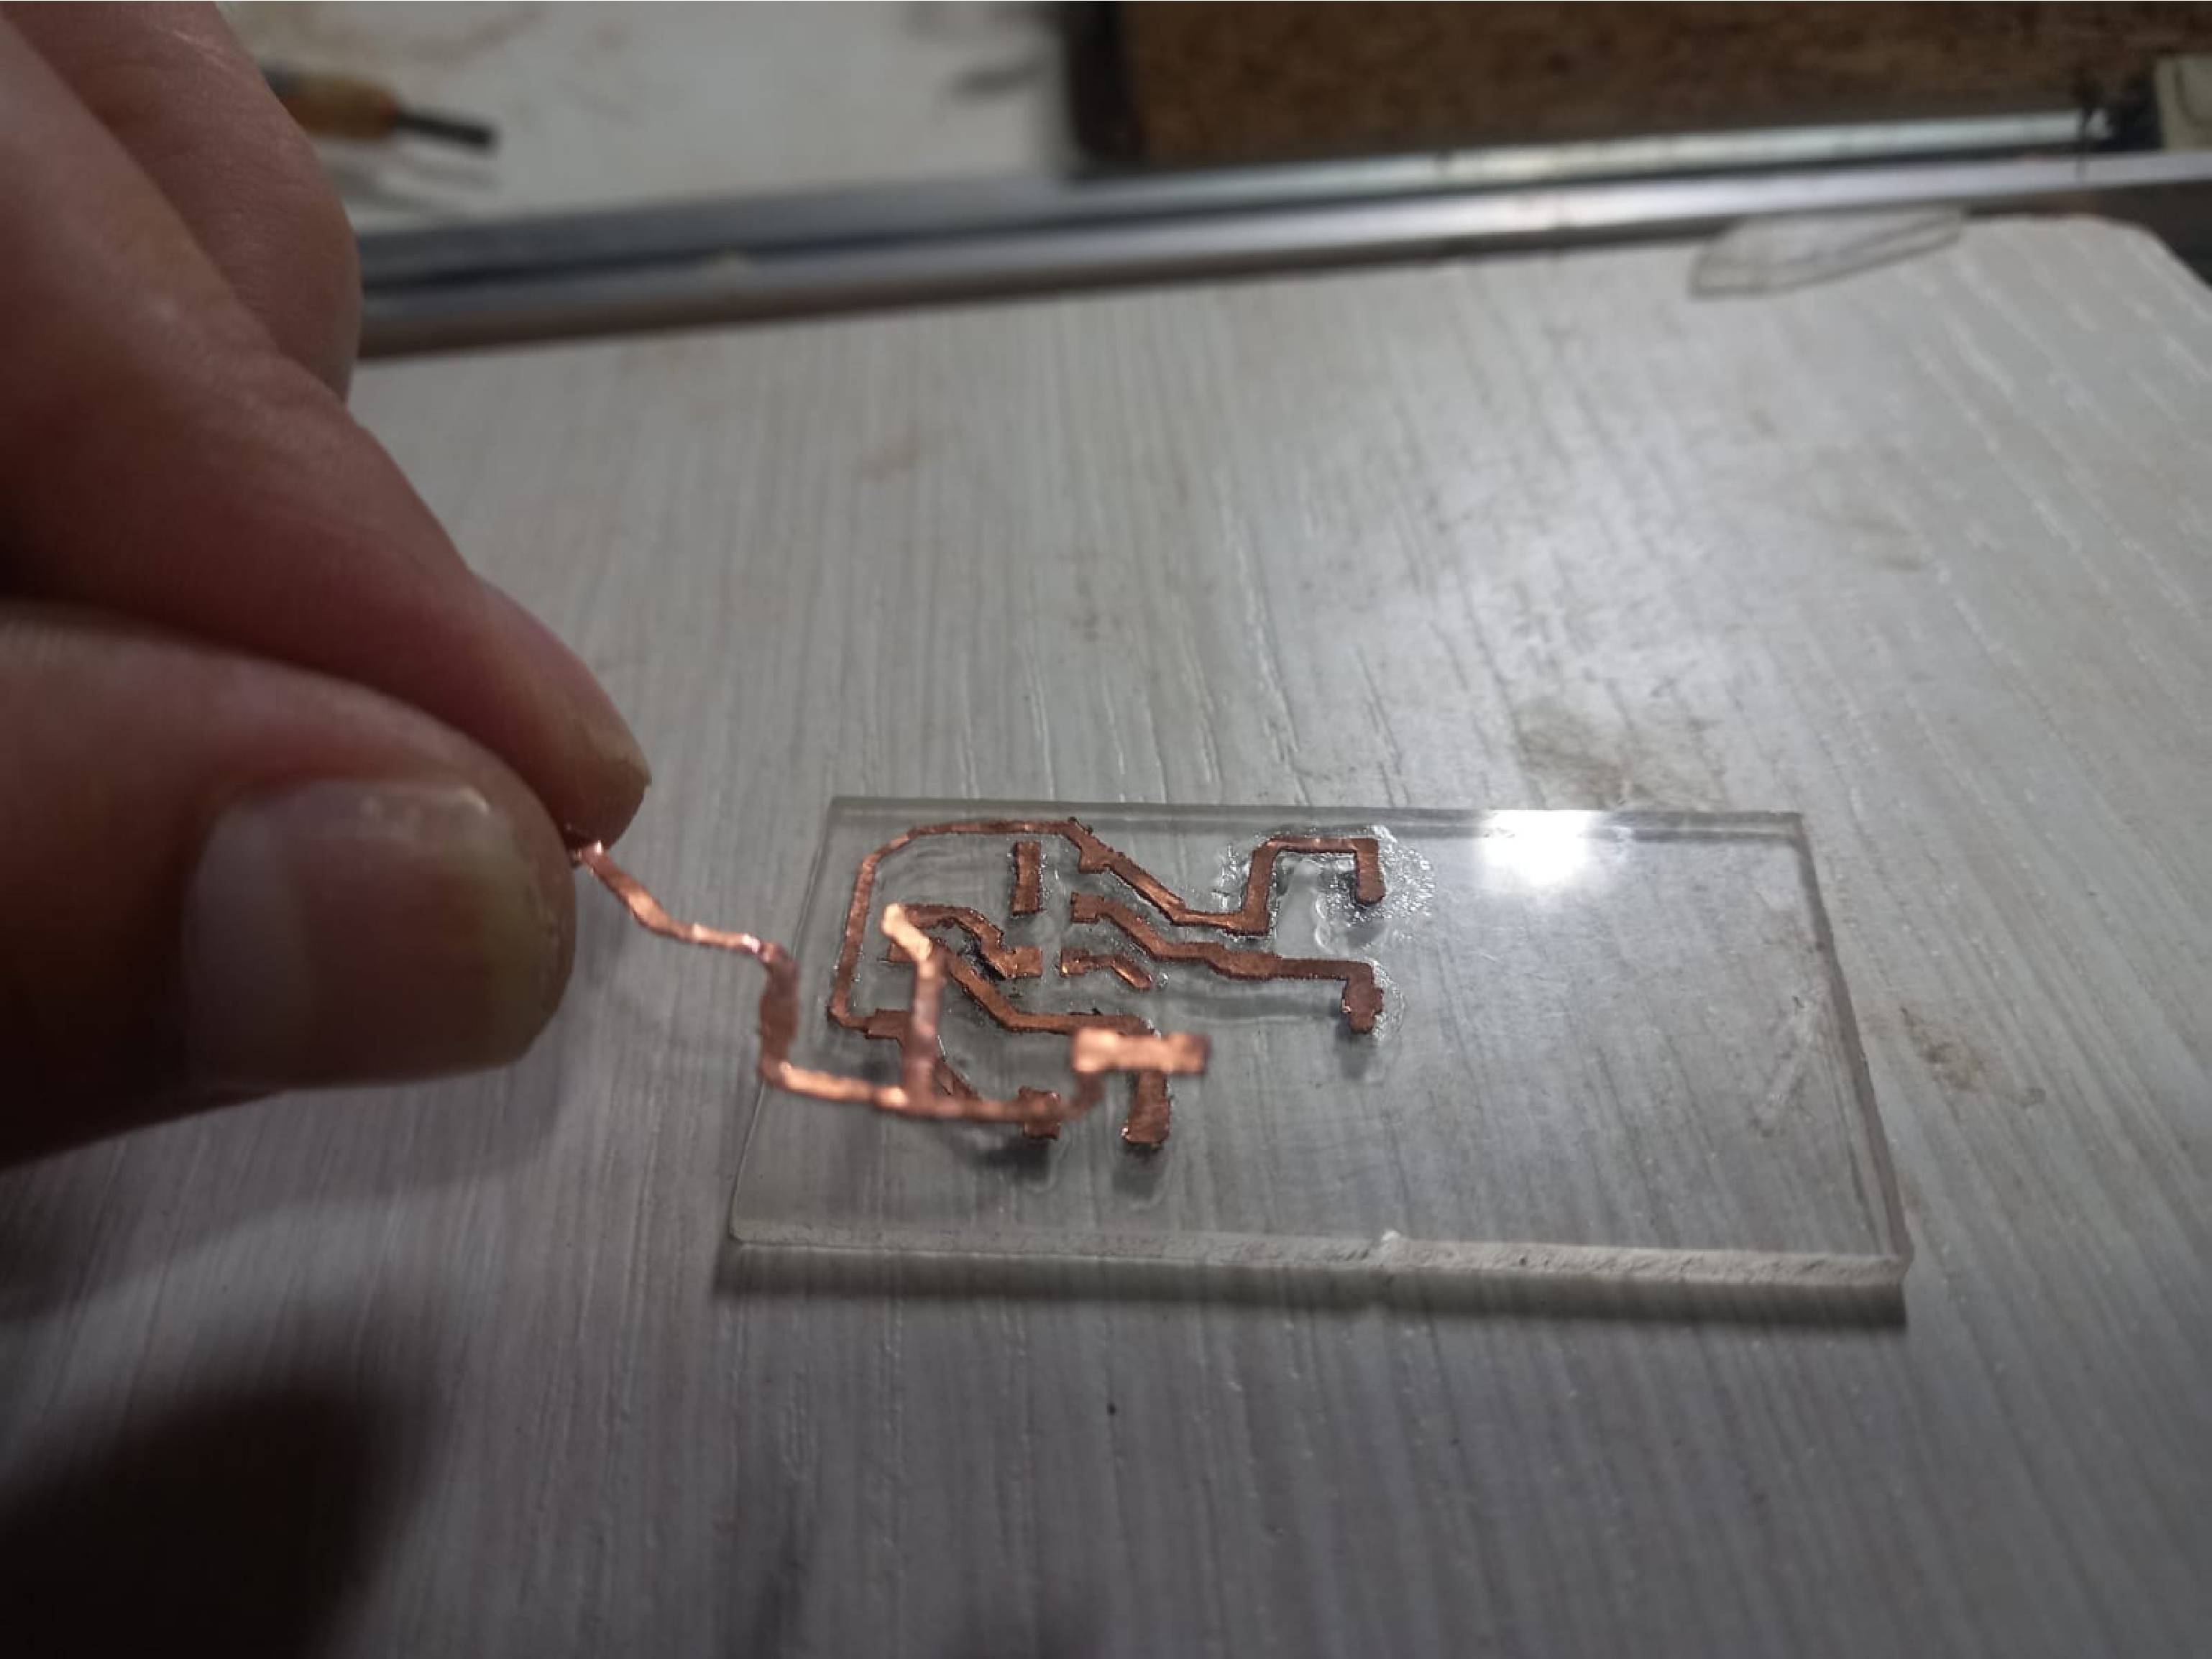
This step is crucial as it requires meticulous attention and patience to achieve a perfect transfer. Every detail counts to ensure that the transfer is error-free and that the final result is impeccable.
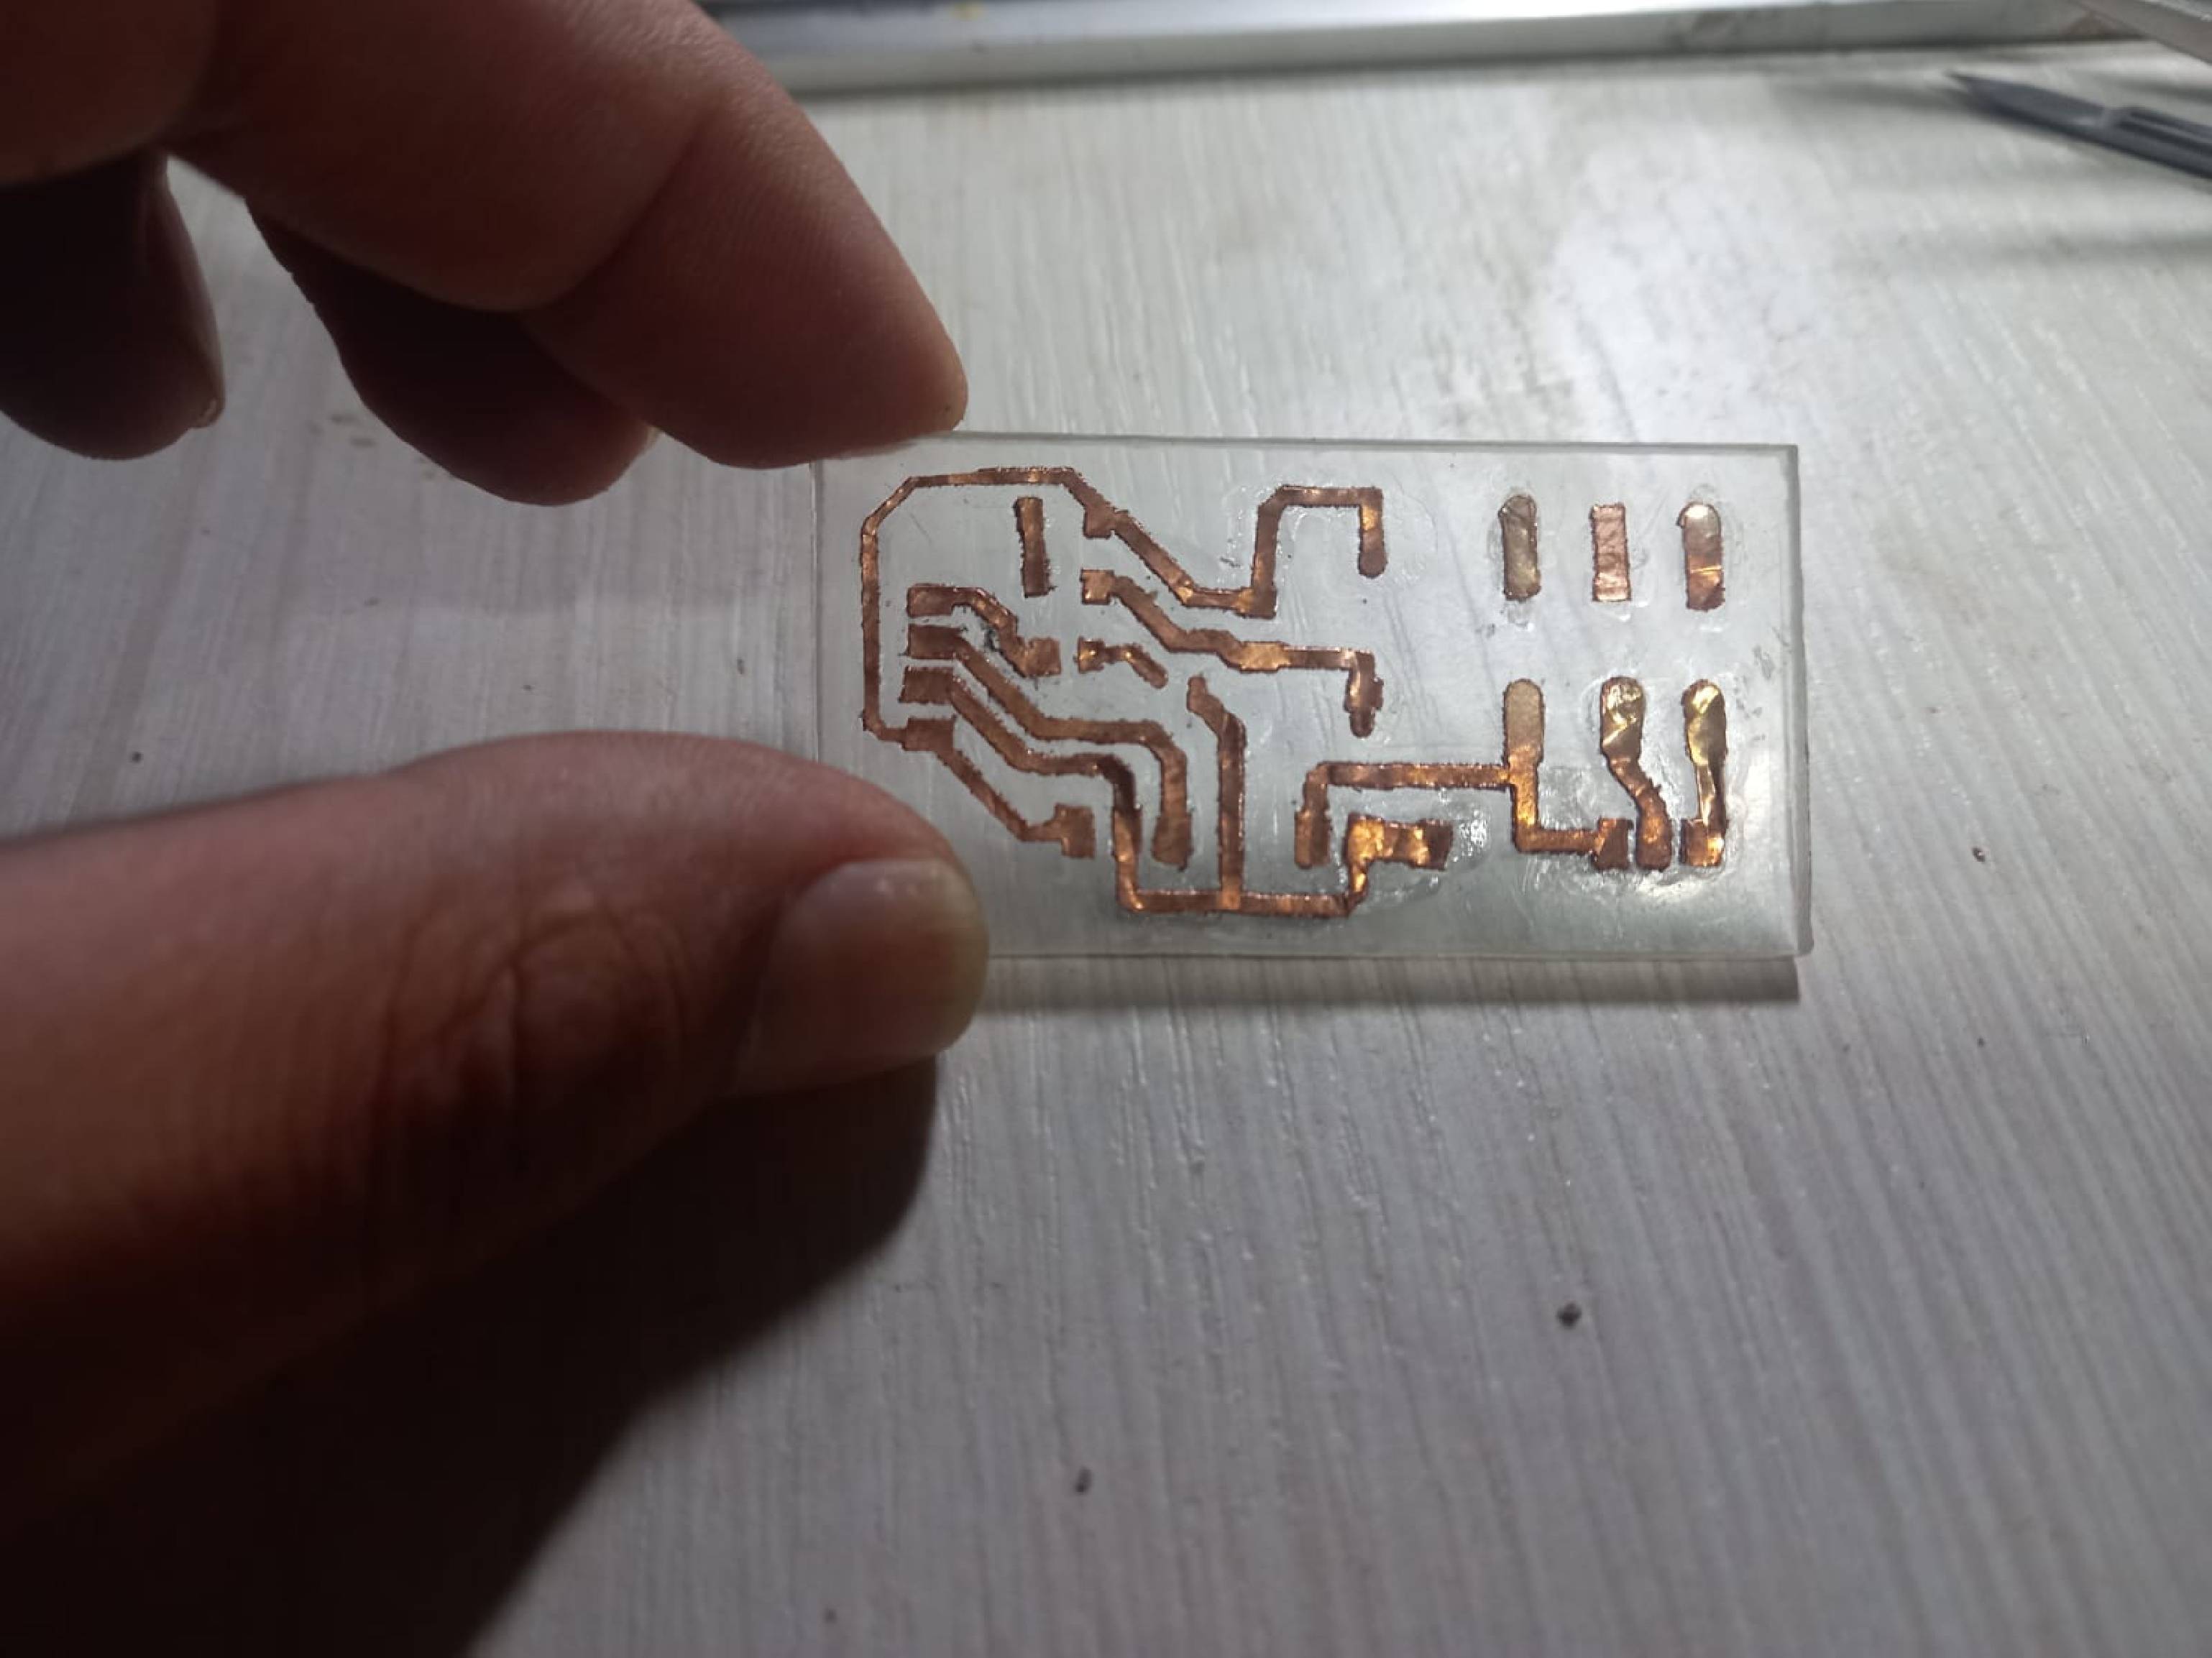
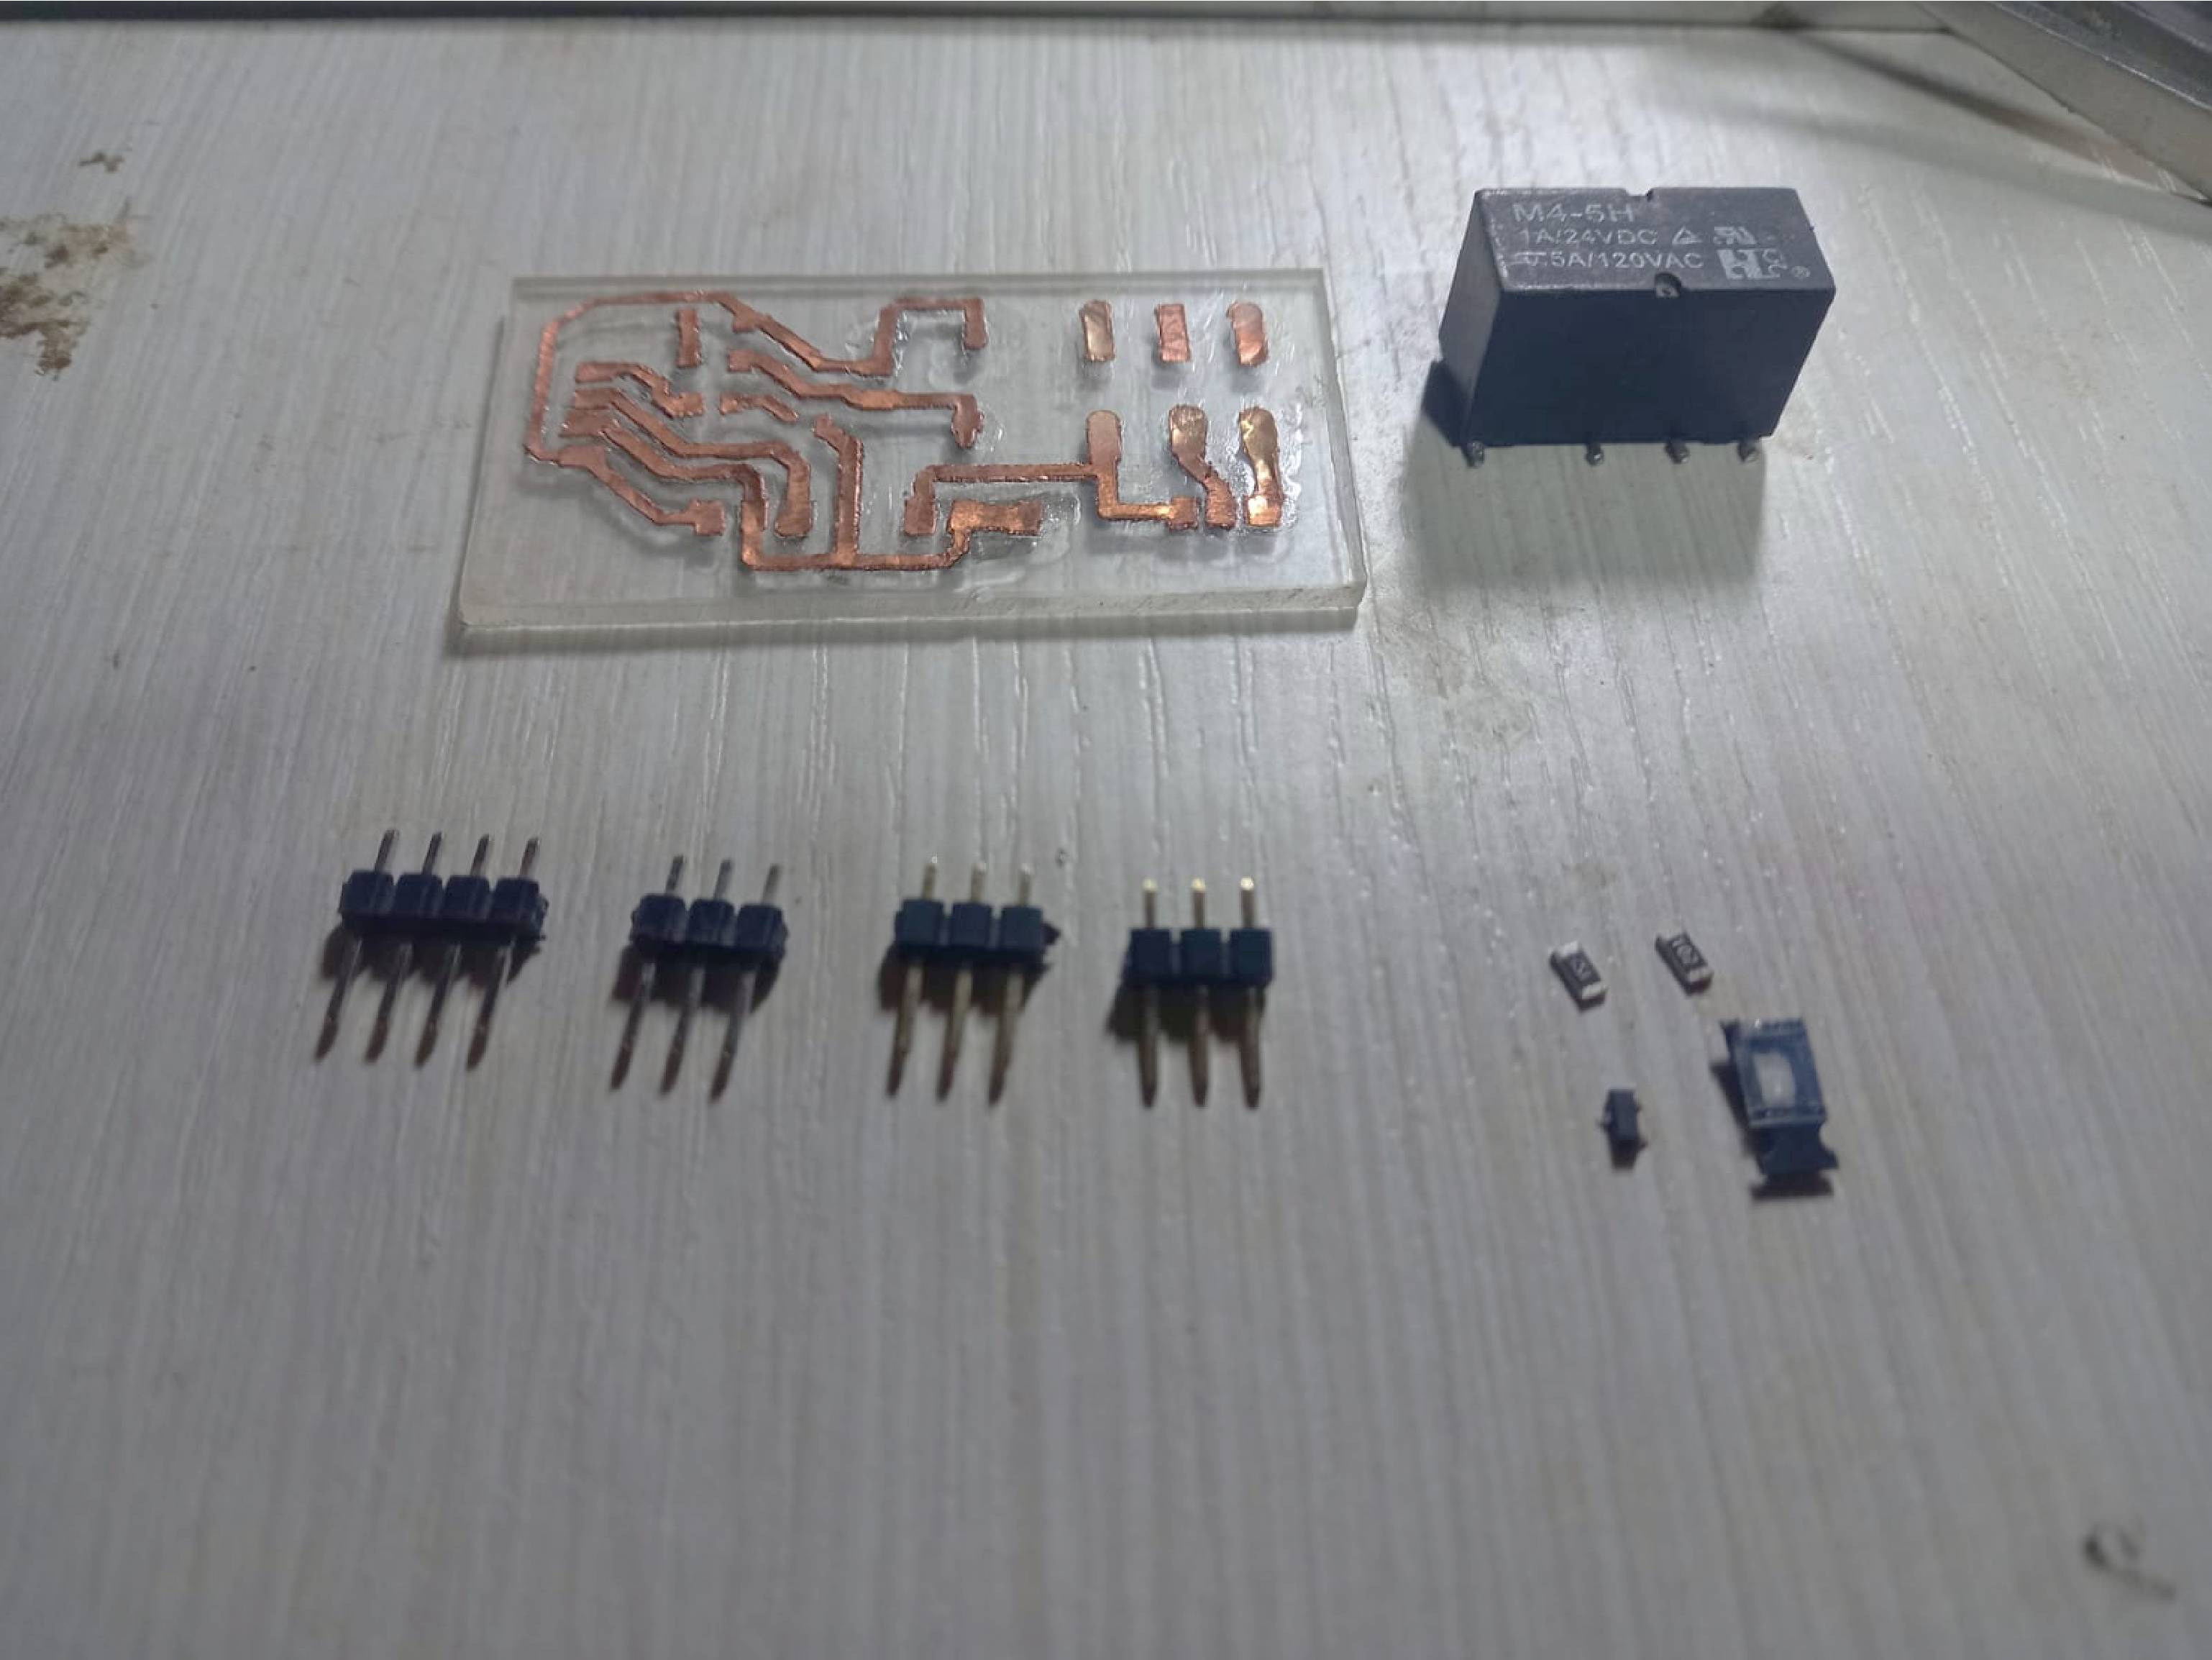
Once the transfer of all tracks is complete, the next step is to carefully select the components that will be used or soldered into this small module.
Listed below are all the components that will be used in the project:
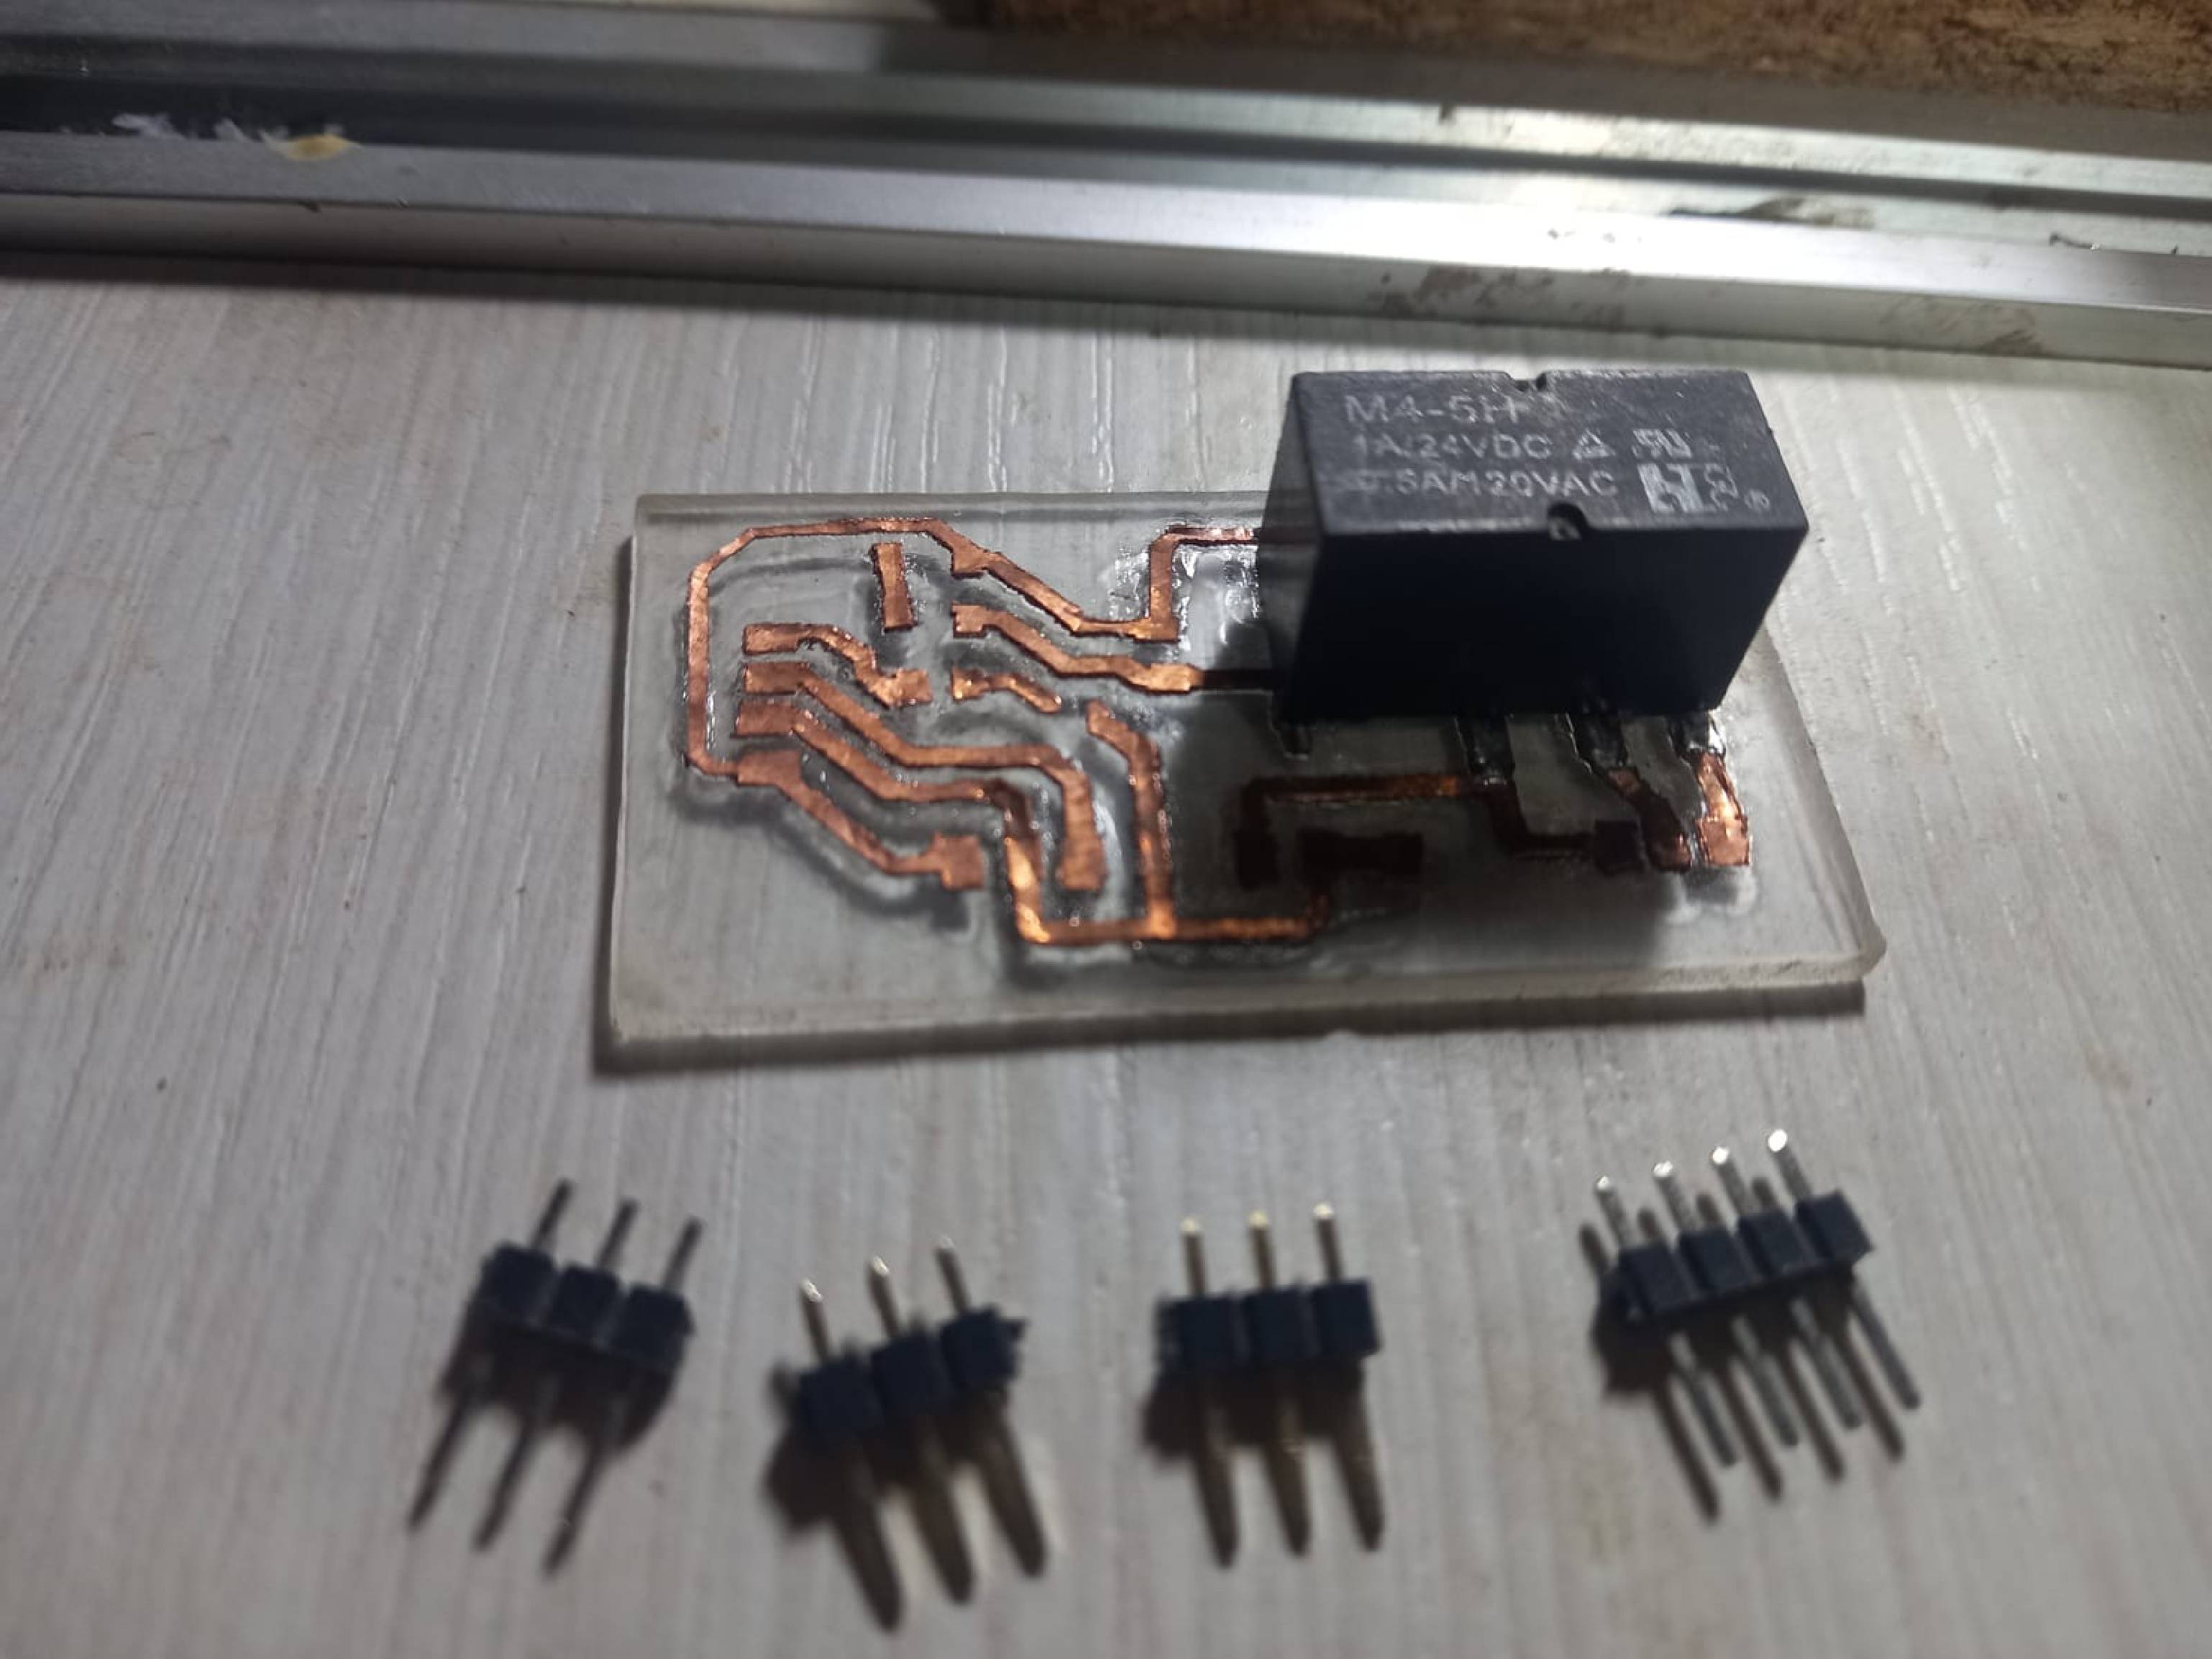
The next step is to solder all the components on the circuit board, starting with the relay, followed by the diode and the transistor. It is crucial to solder each component precisely and ensure they are properly aligned according to the circuit design. The soldering process must be done carefully to avoid damage to components and ensure a strong, long-lasting electrical connection.
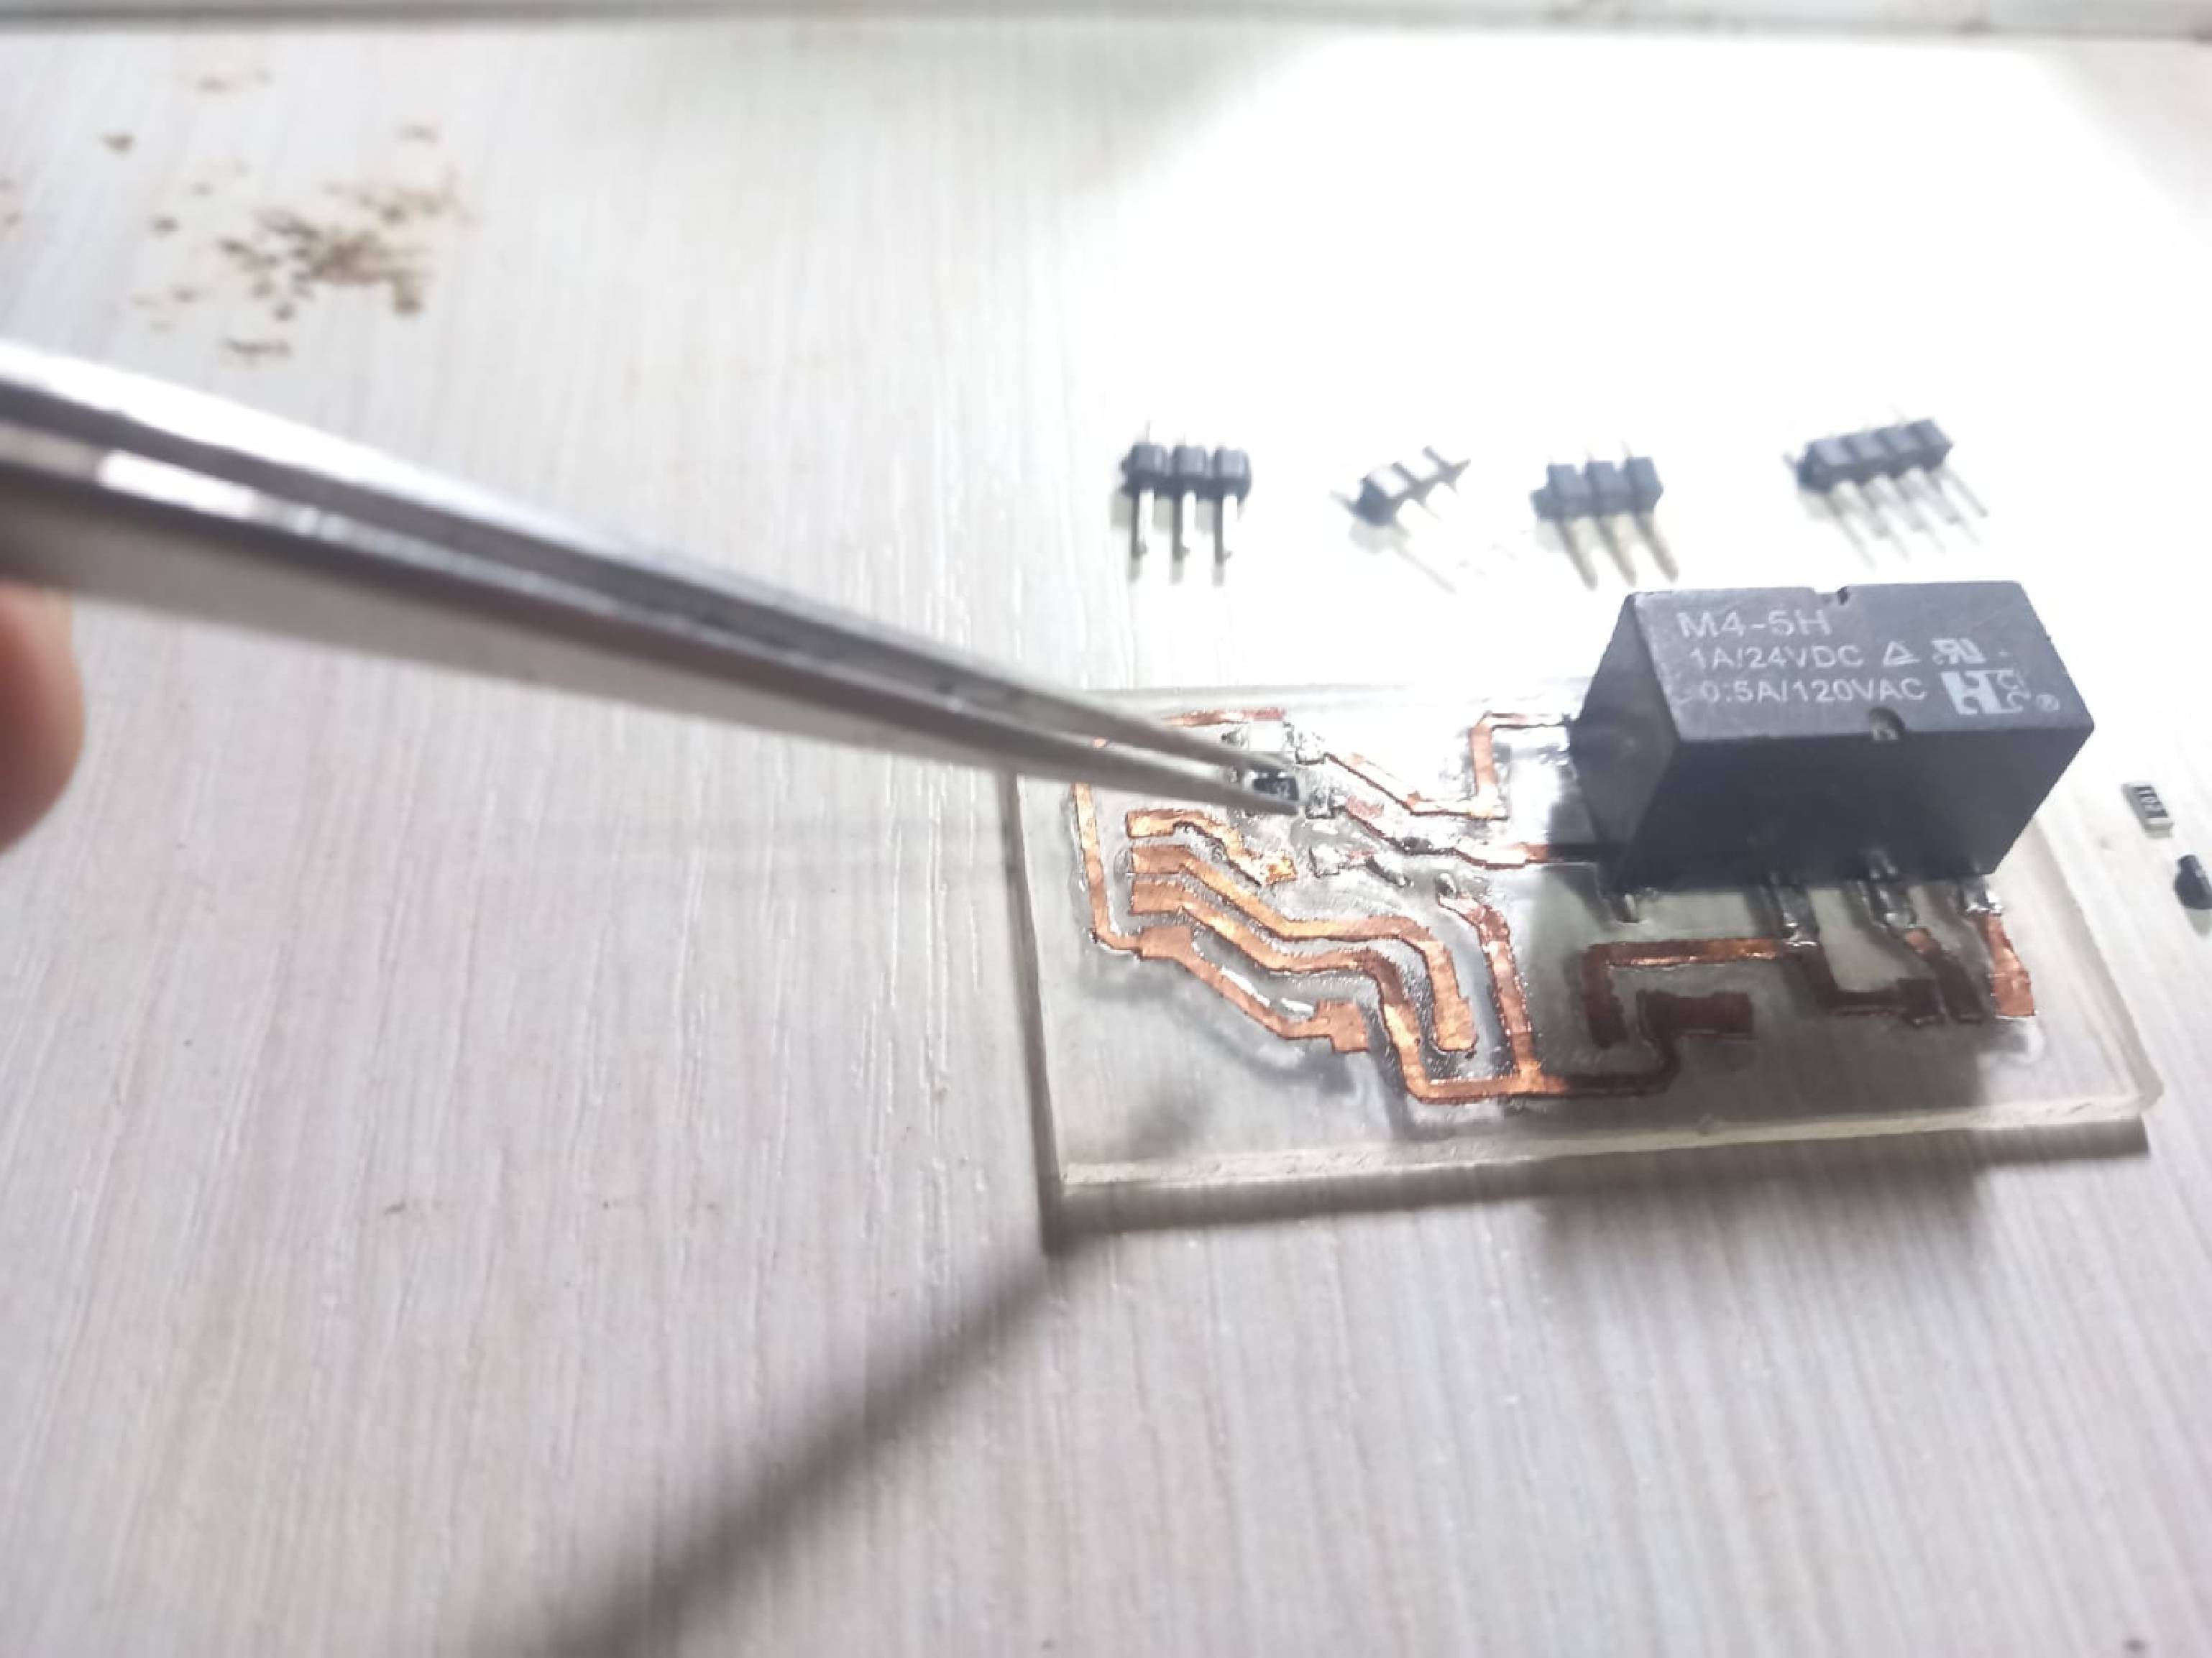
The next step is to continue soldering the LED diode and the resistors. It is important to follow the circuit design to place each component in its correct position and solder it accurately.
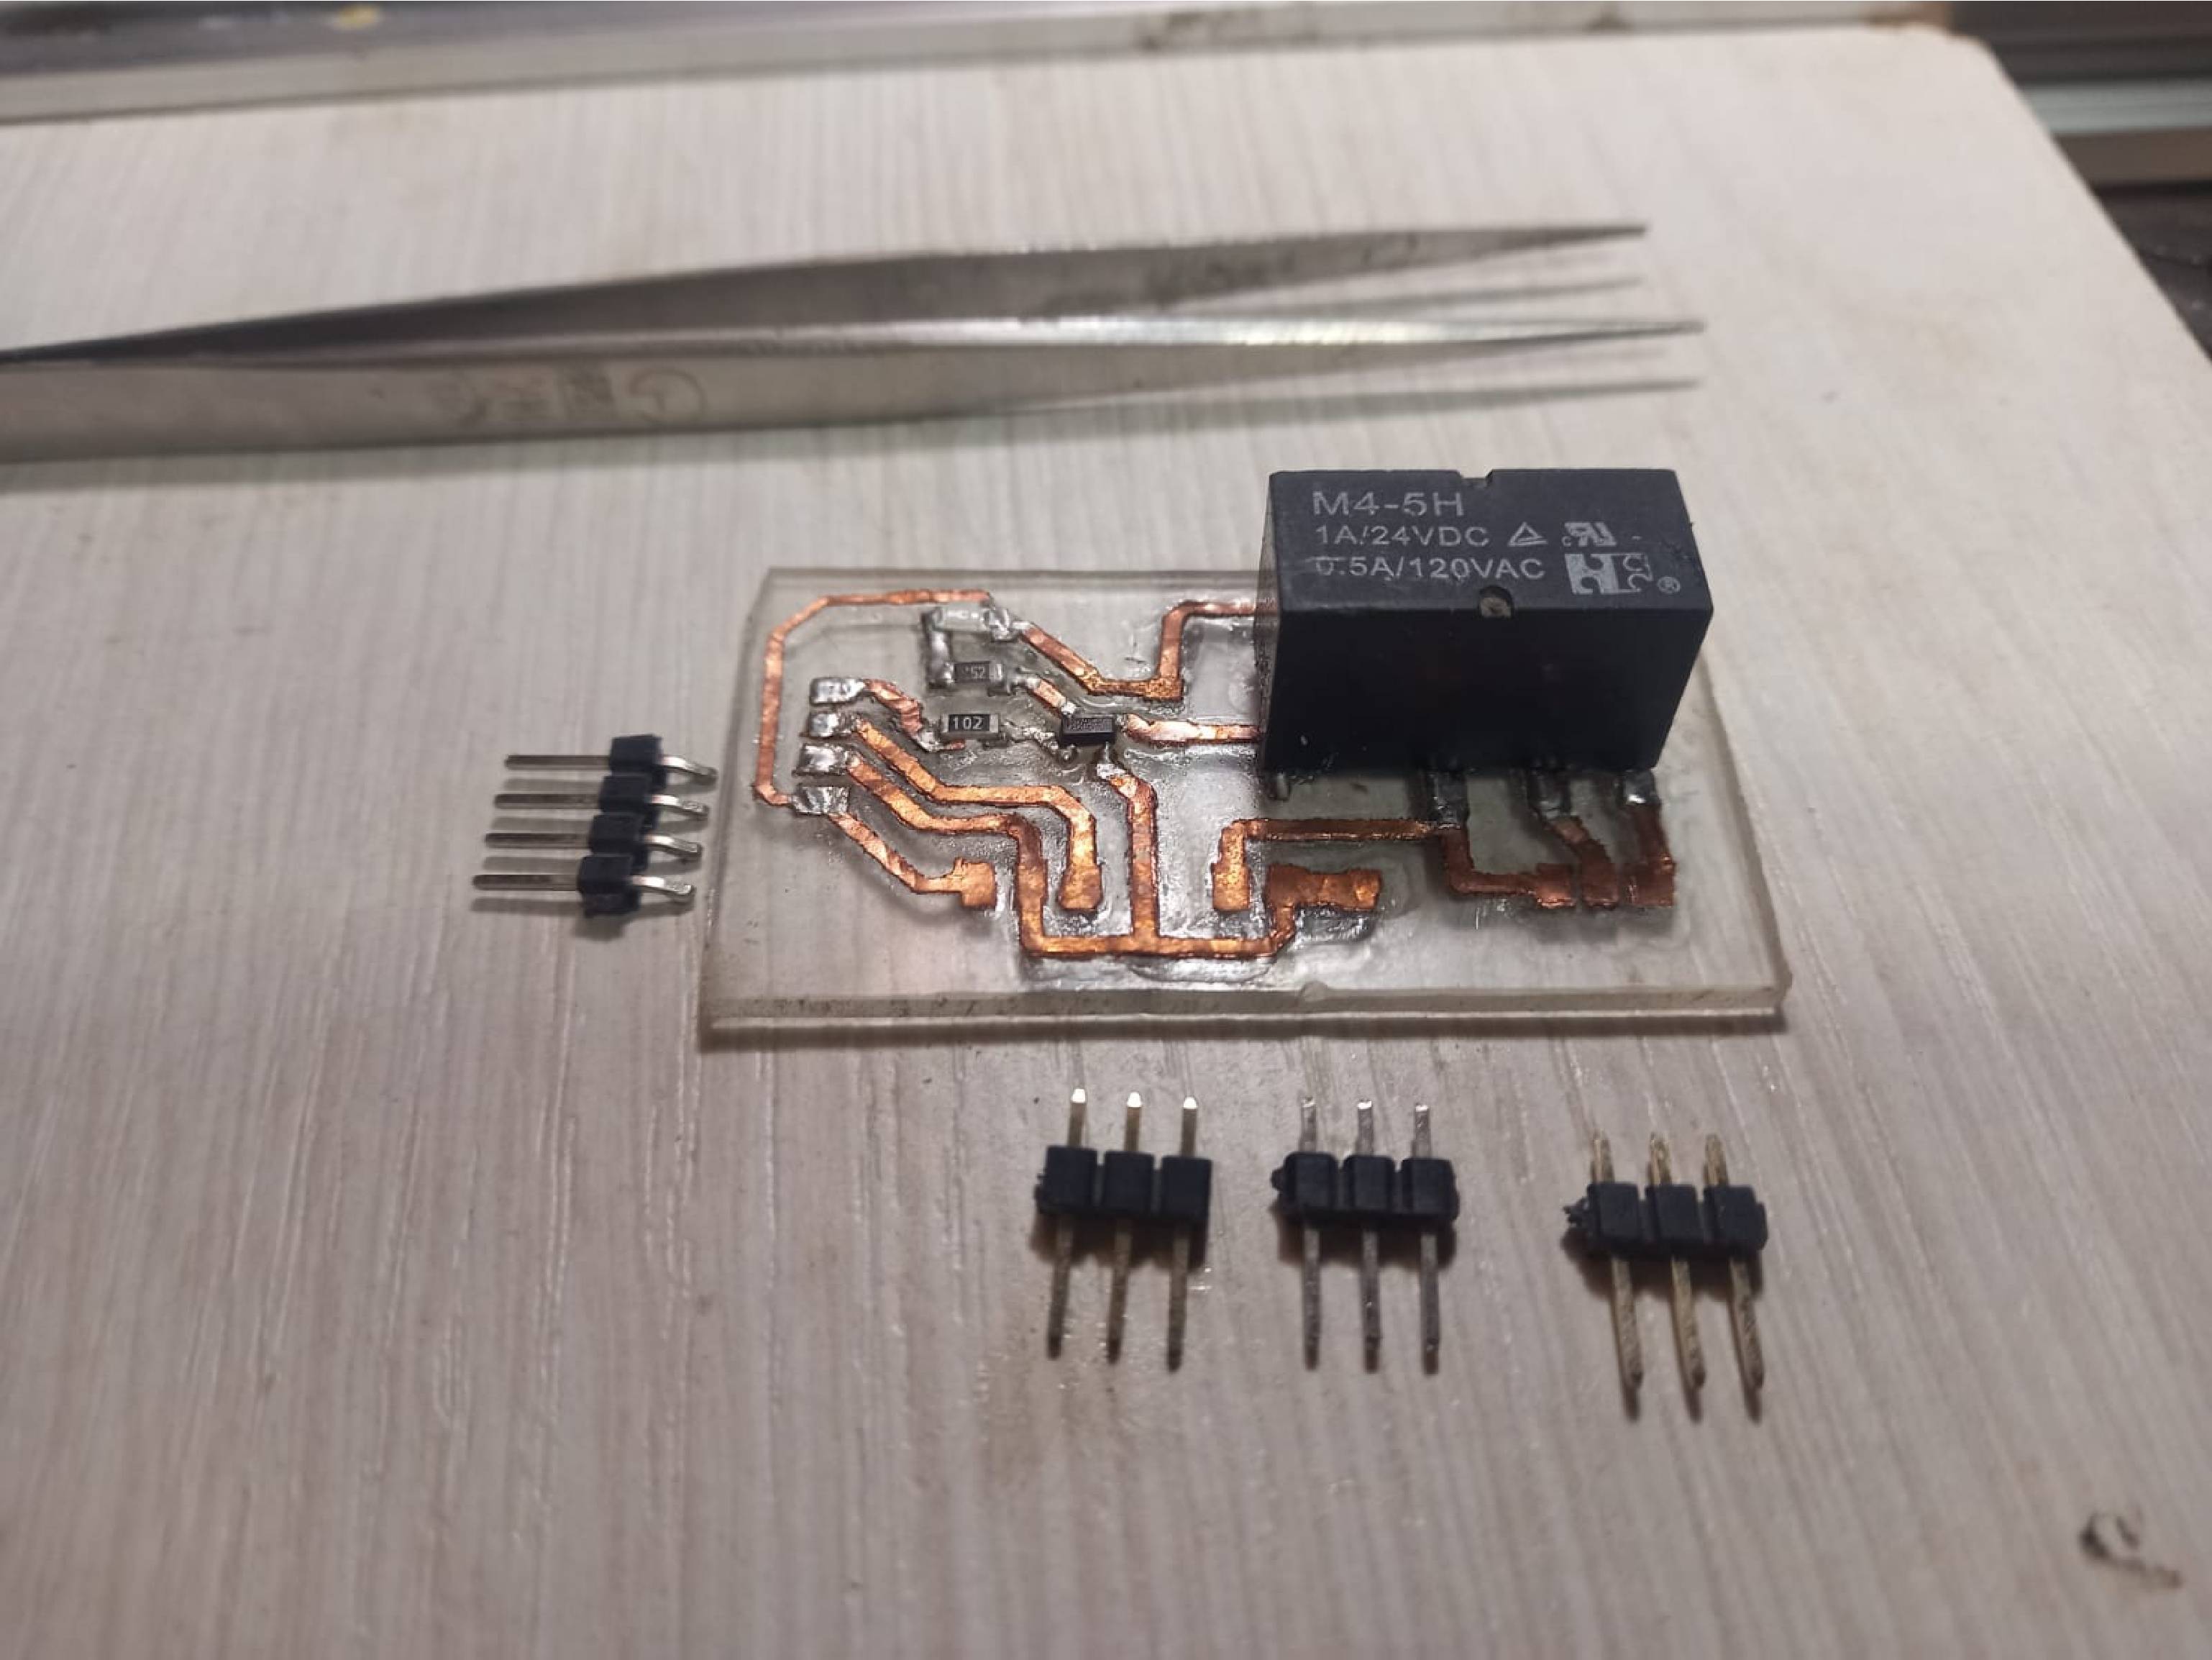
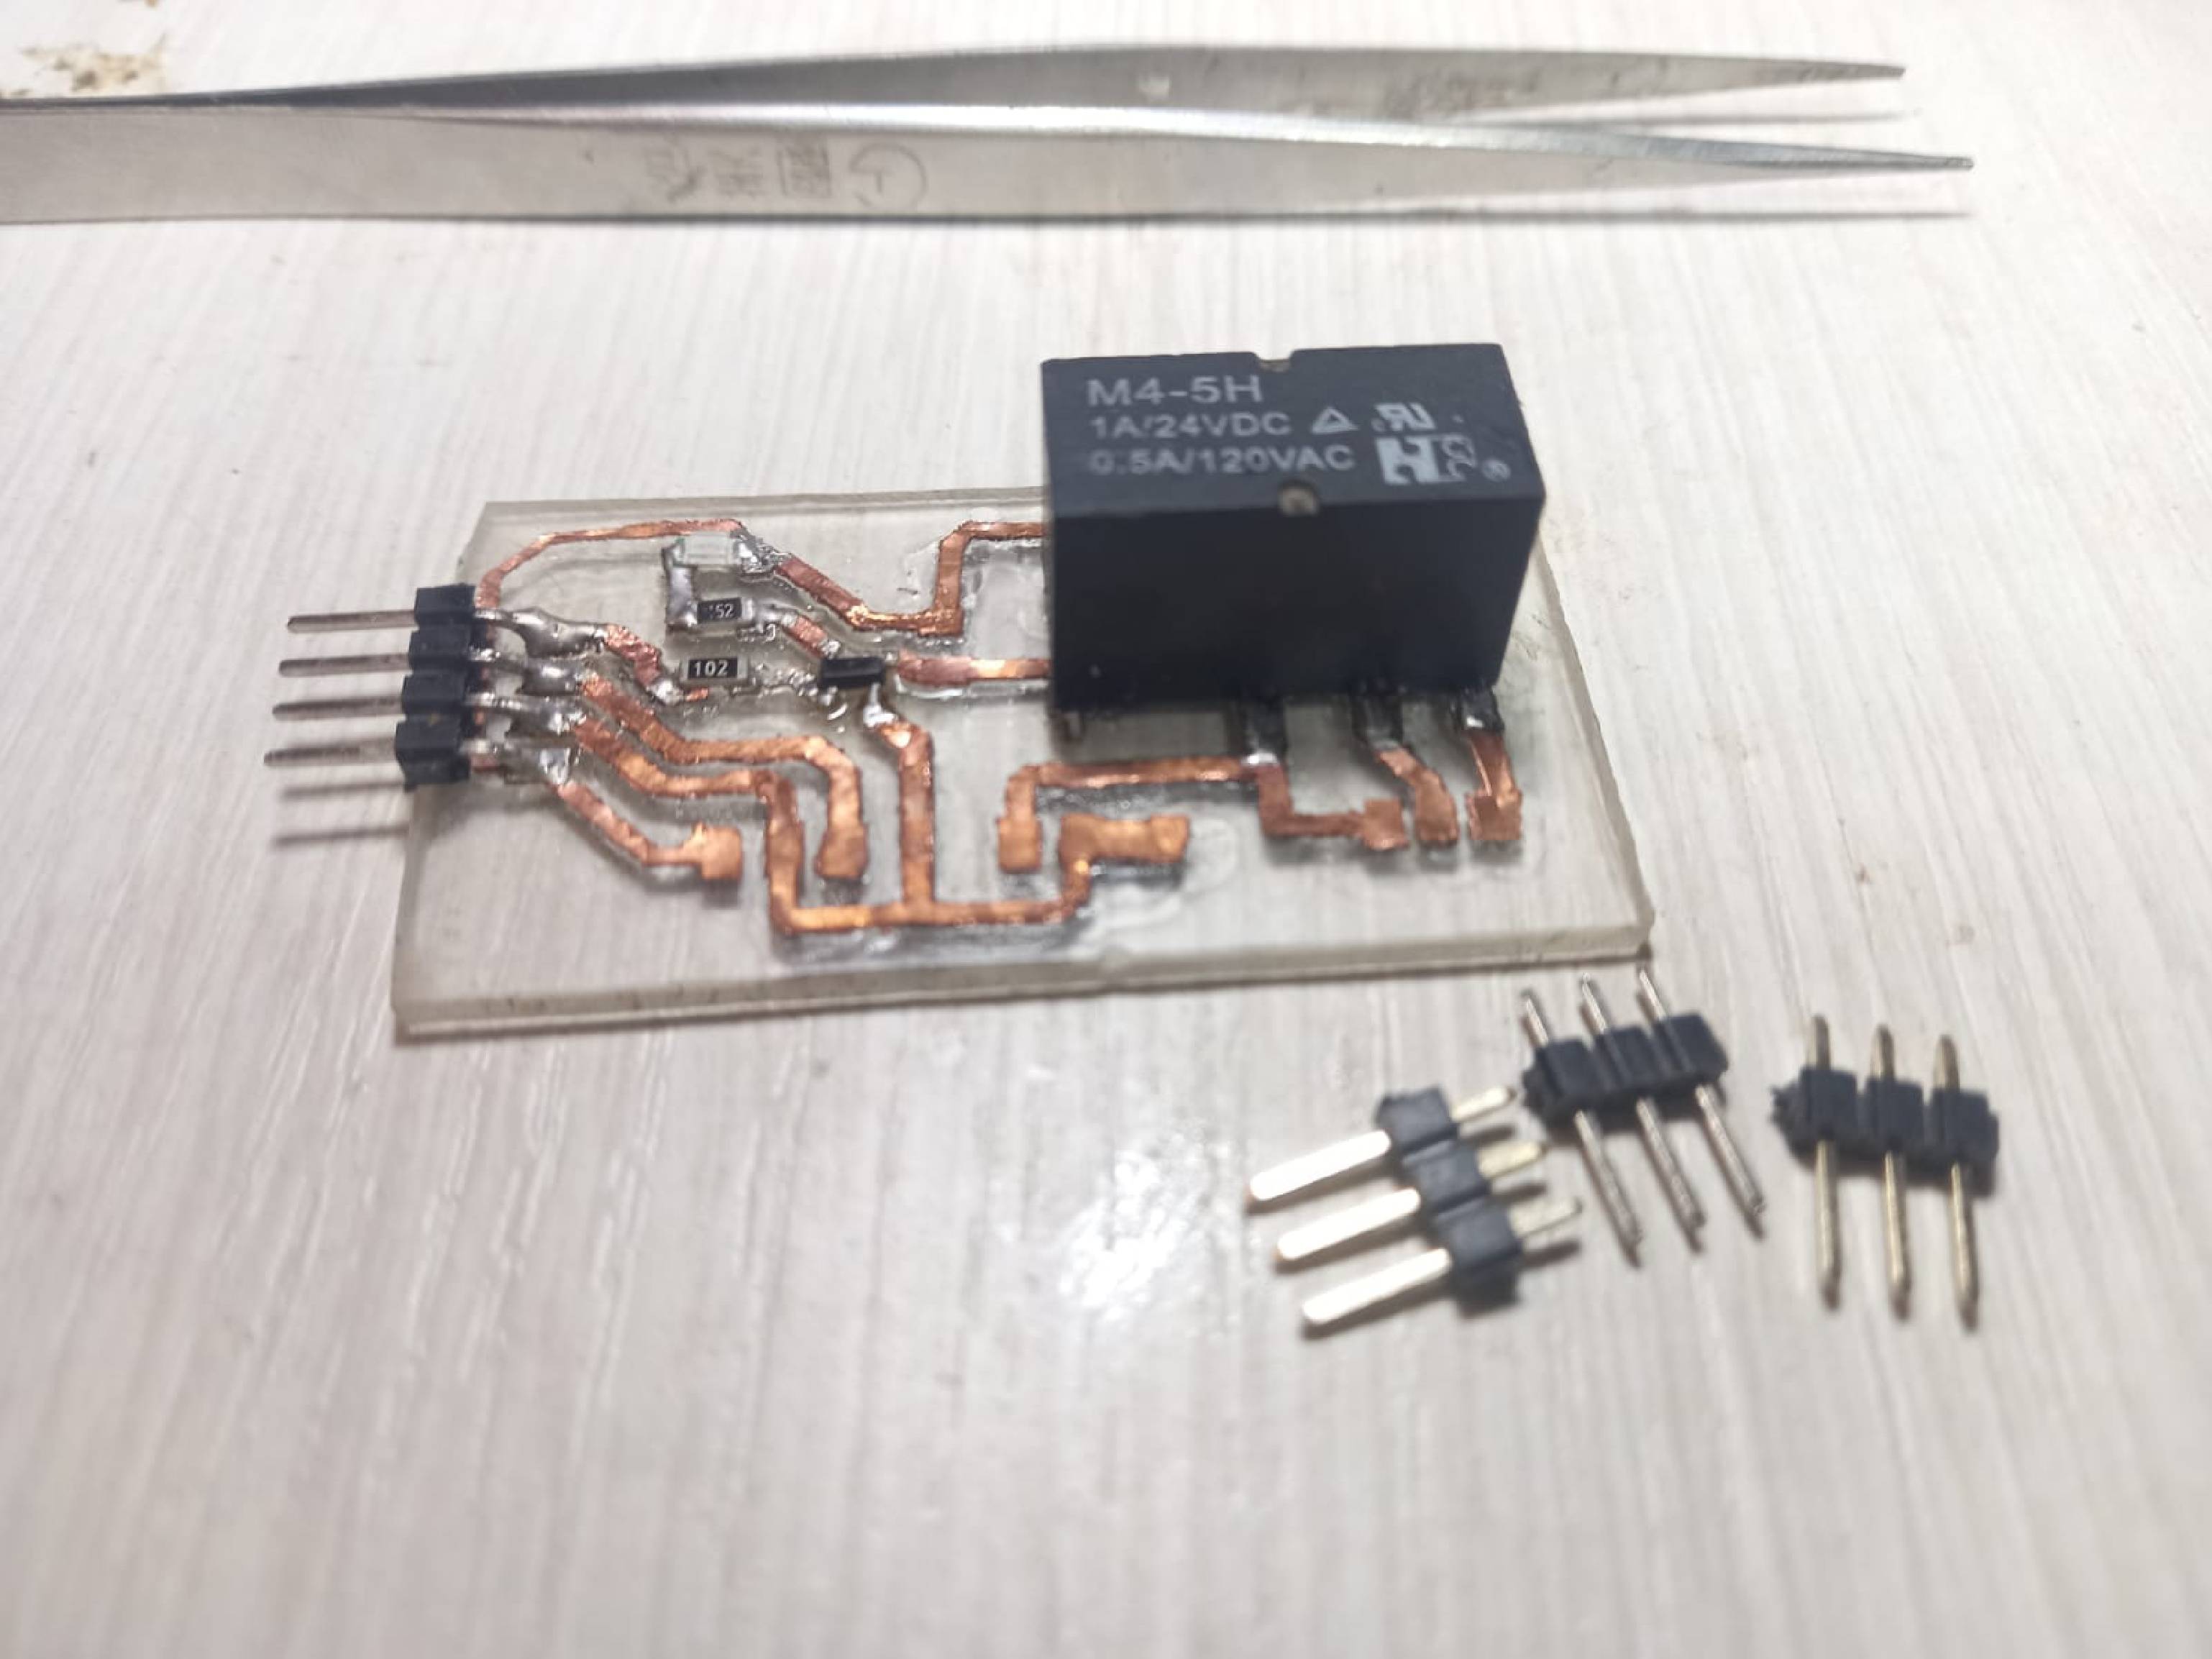
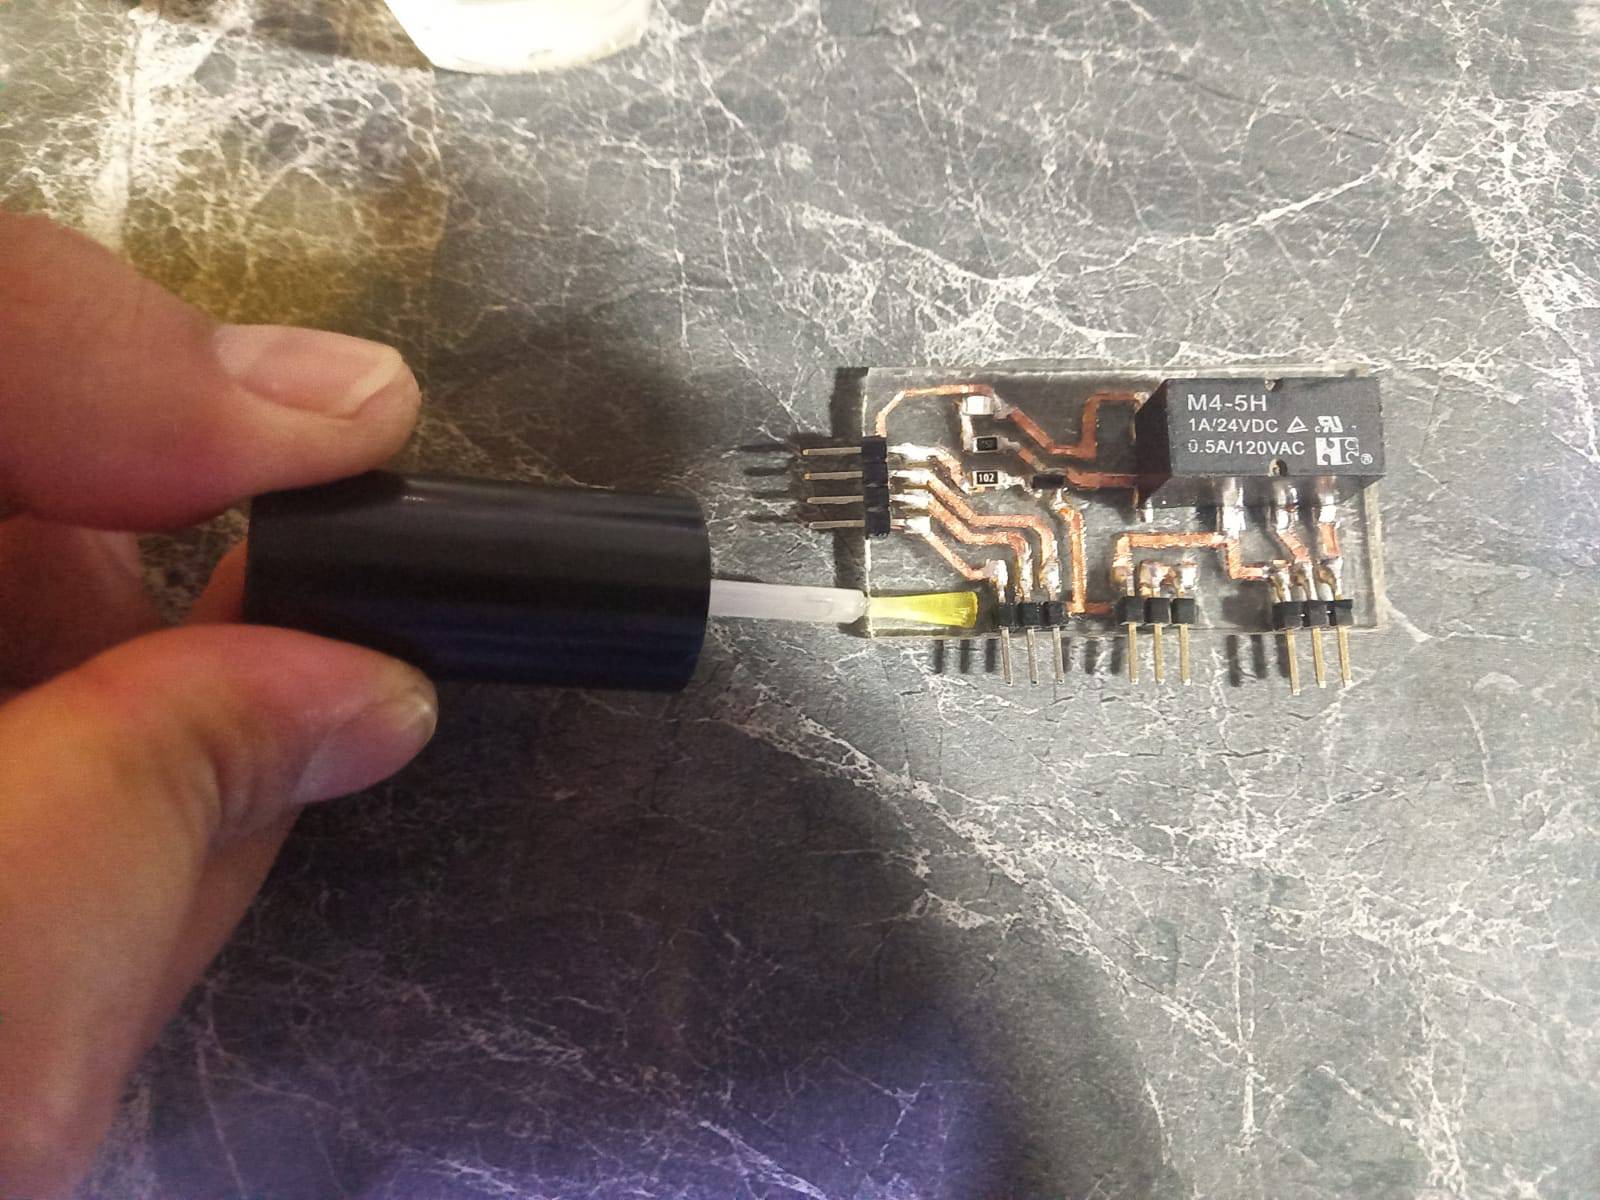
Finally, the last step is to connect the connectors, in this case, the headers. One 4-pin unit and three 3-pin units are required. These connectors will provide the interface for connecting the module to other devices or circuits.
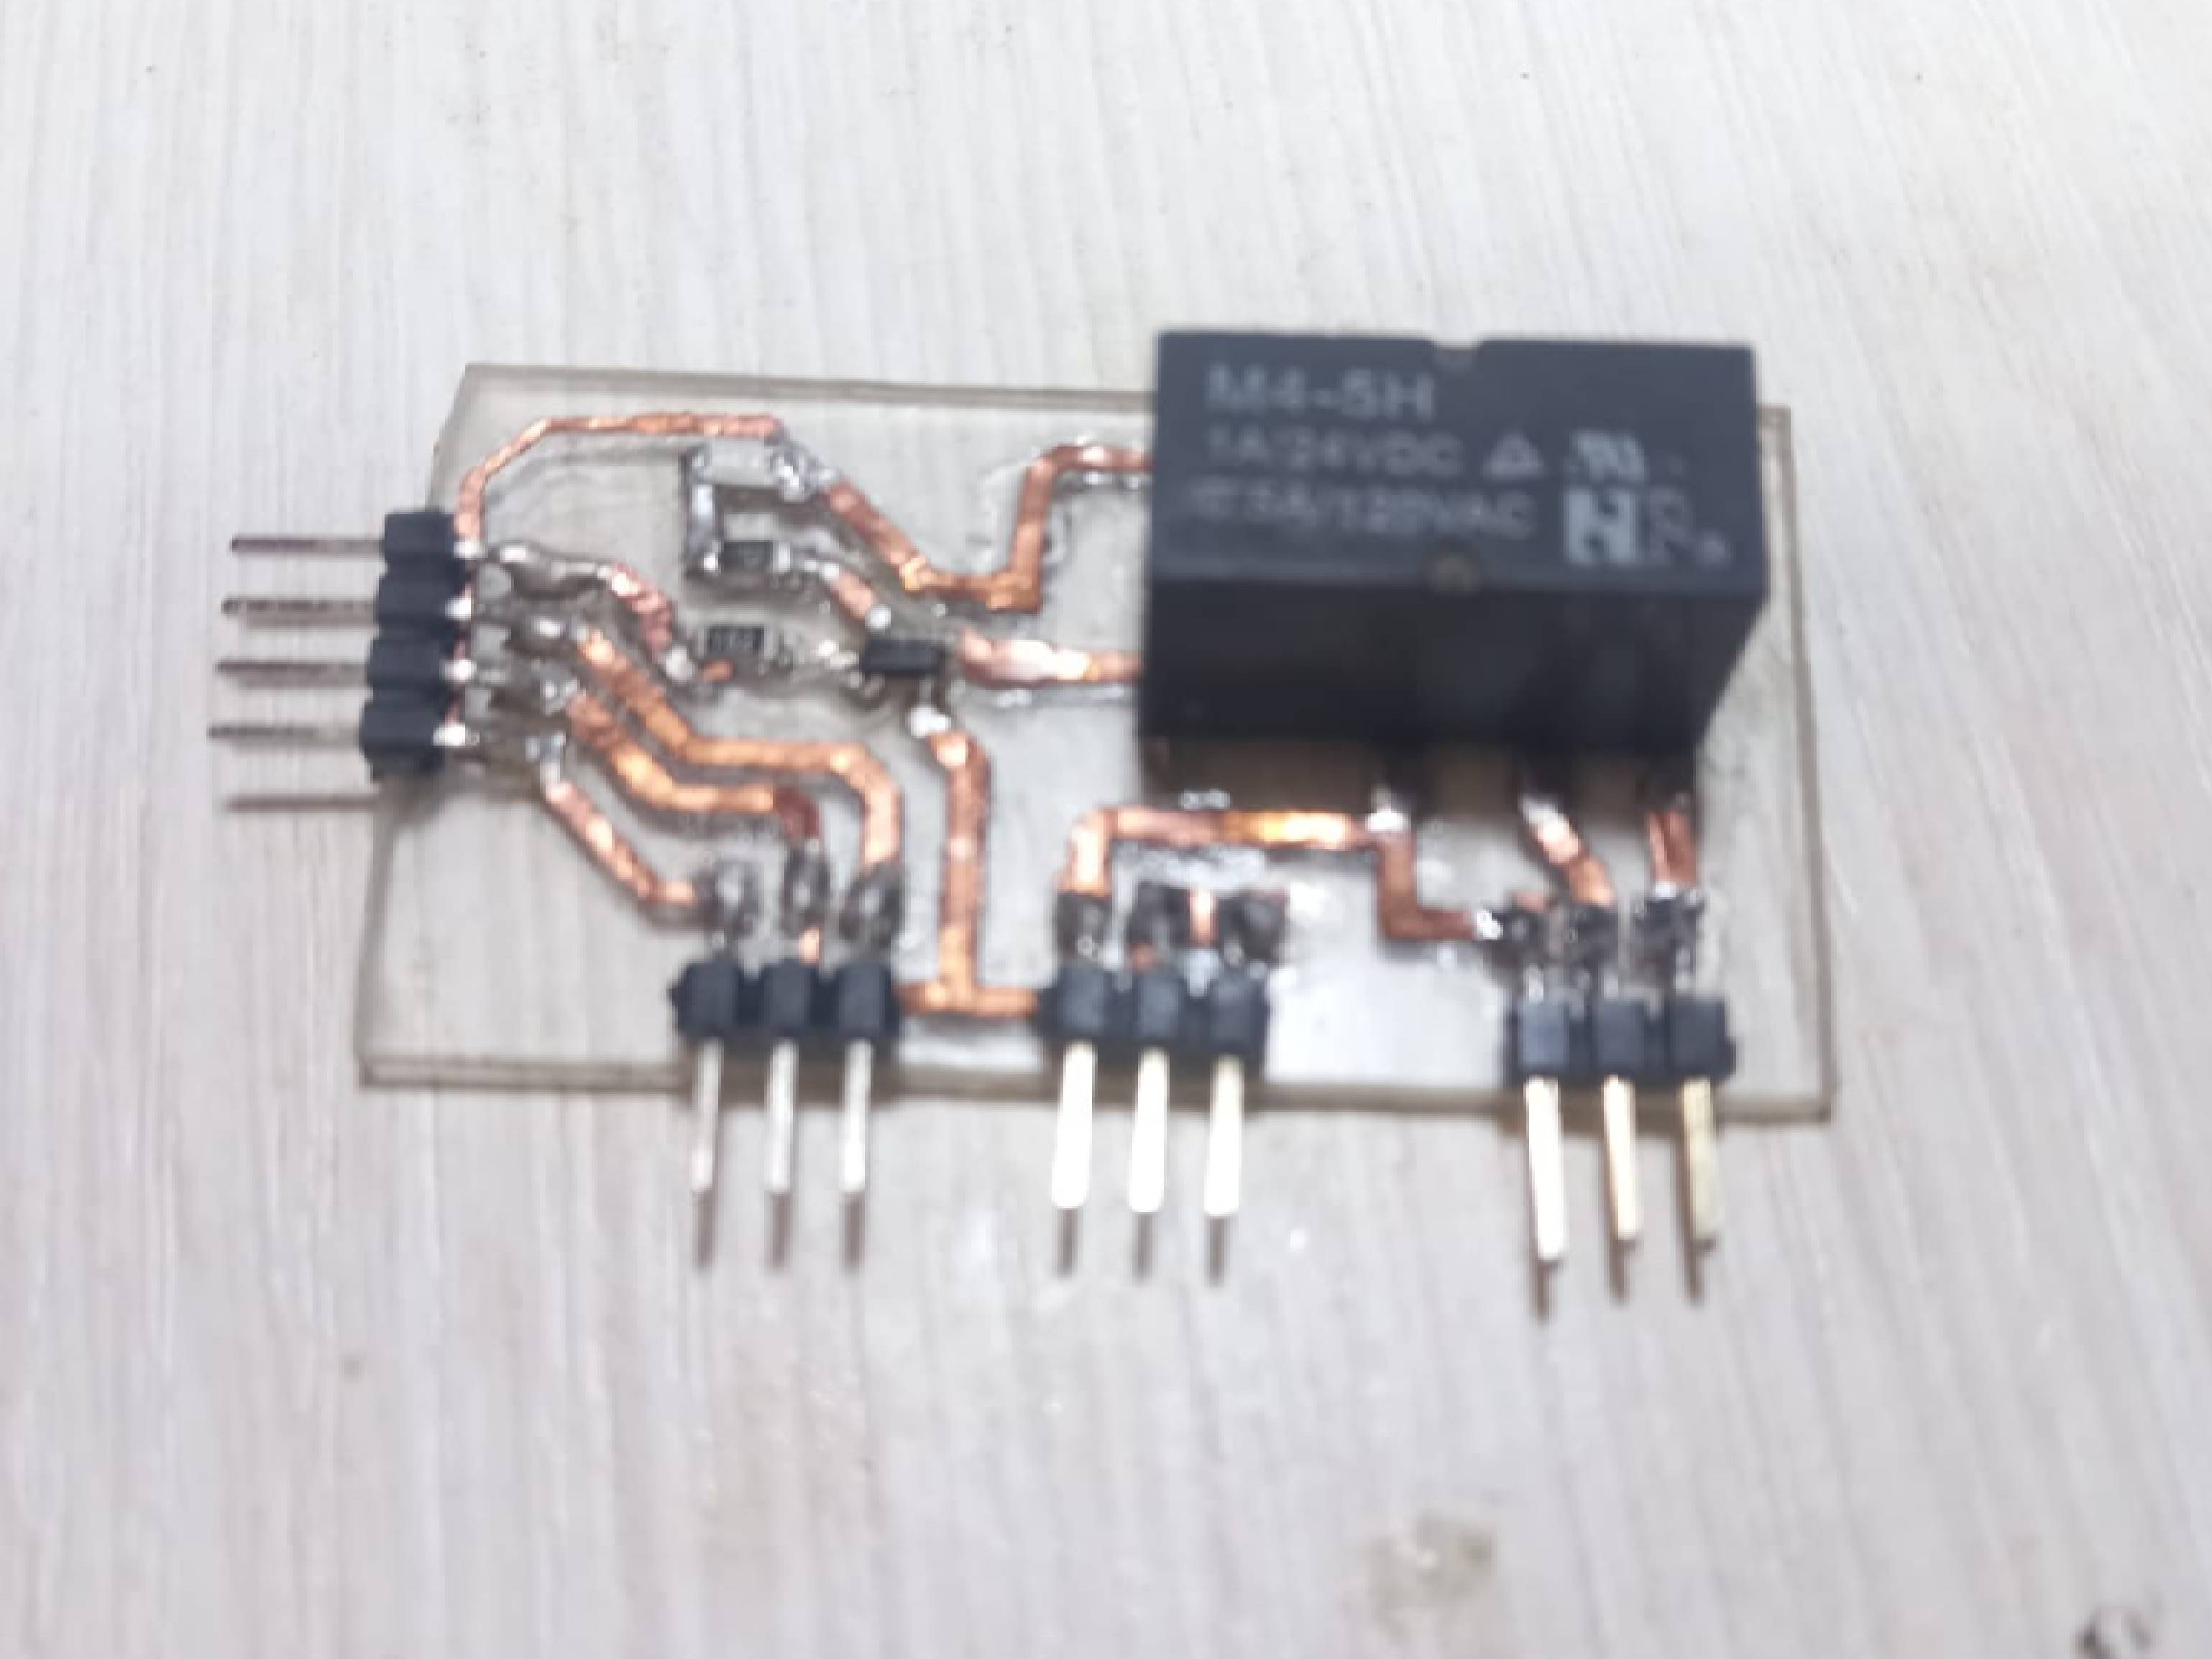
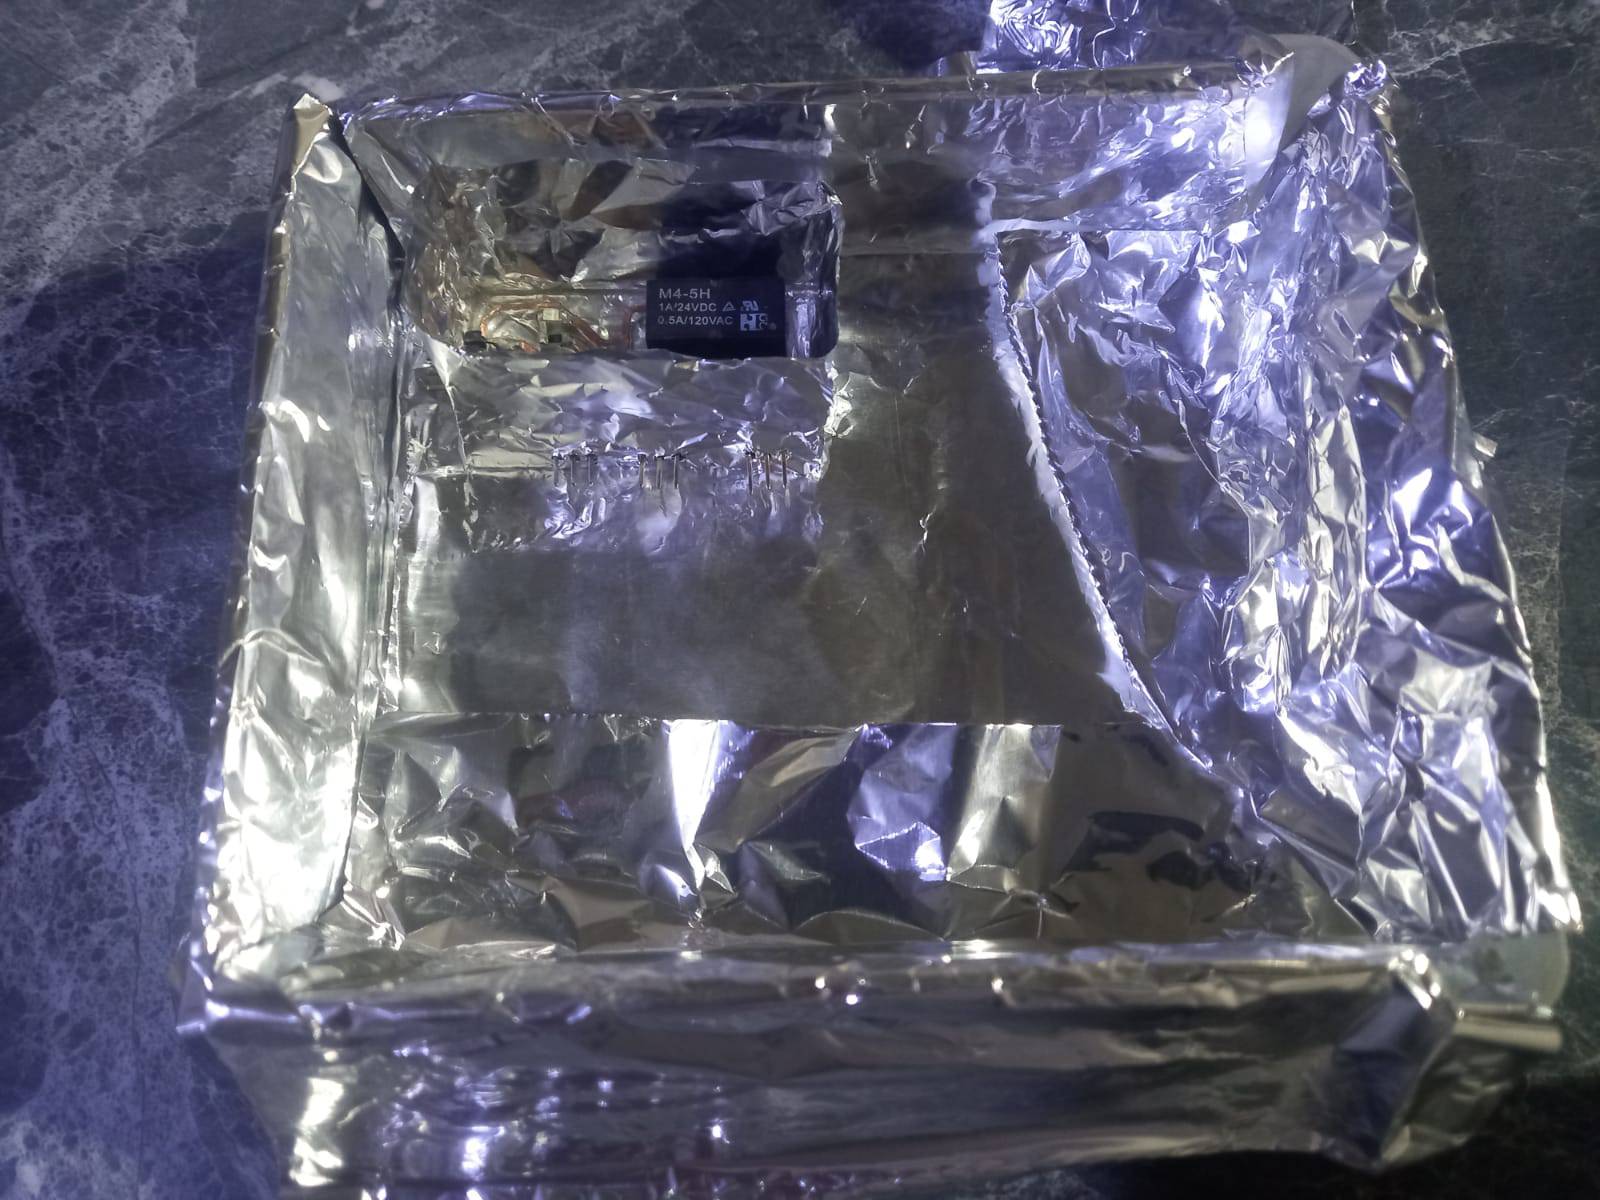
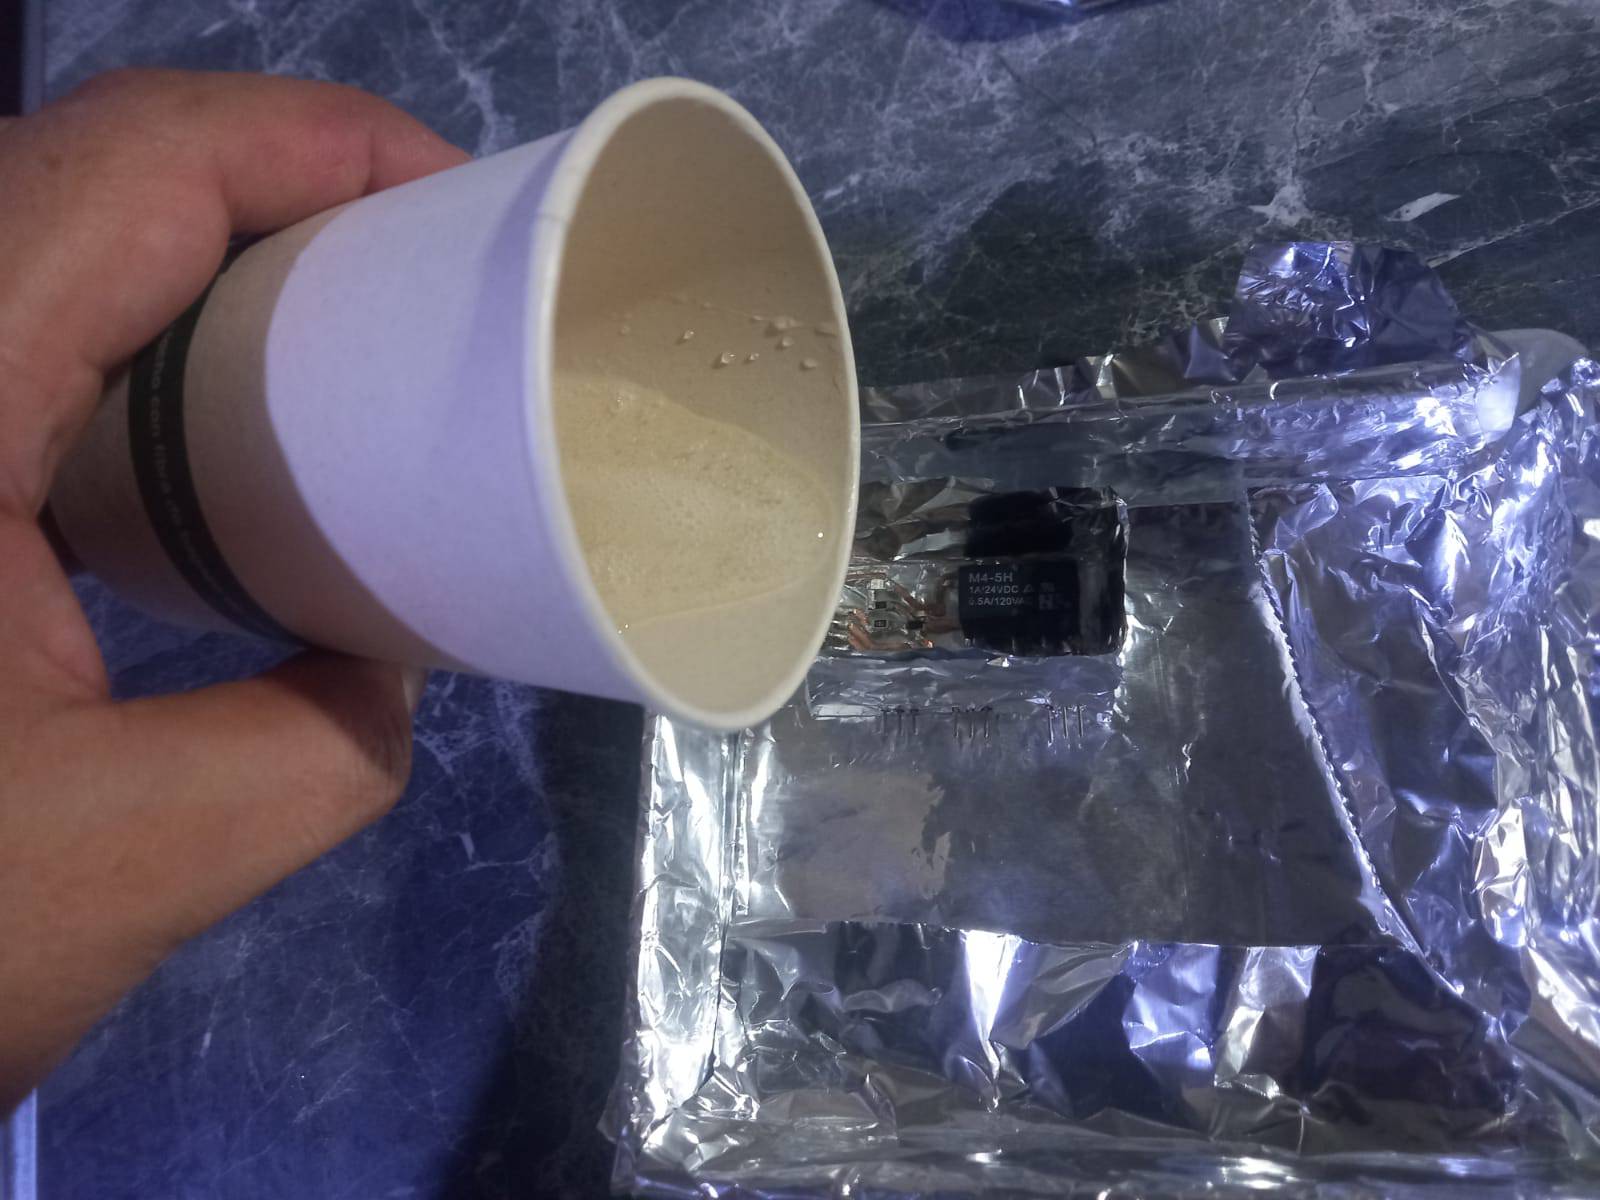
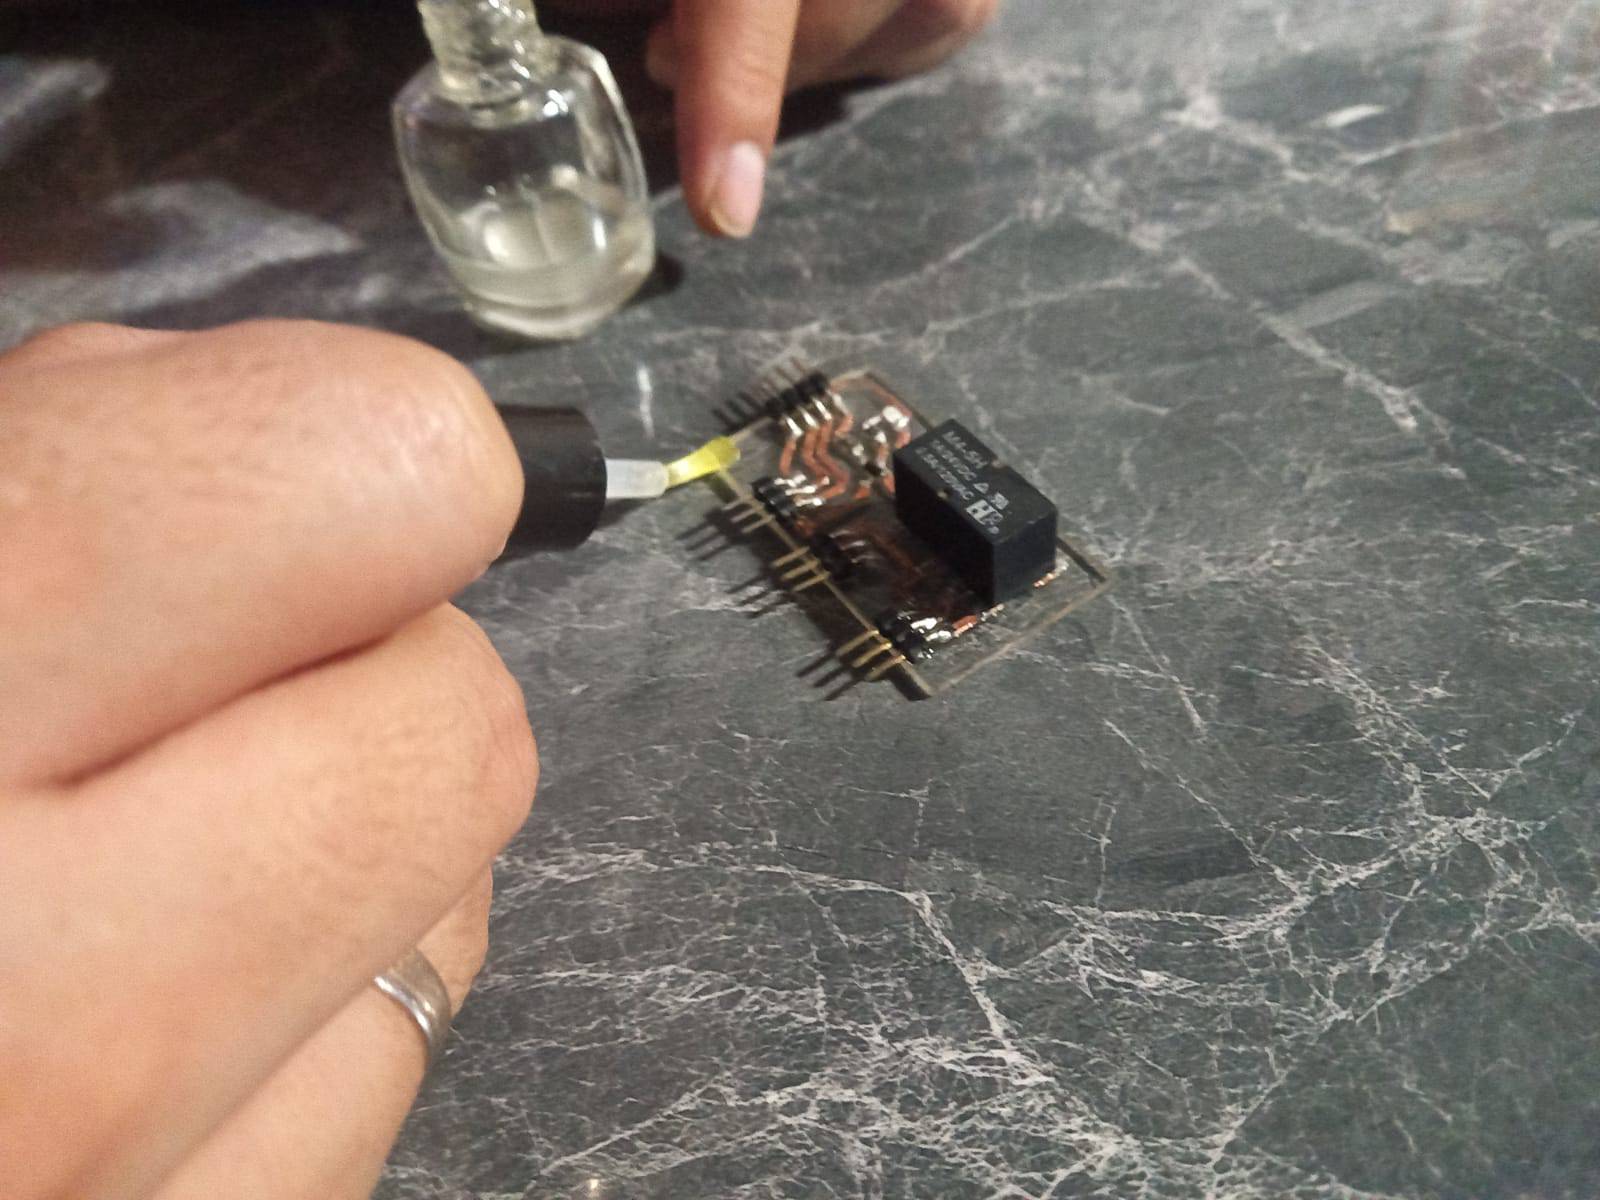
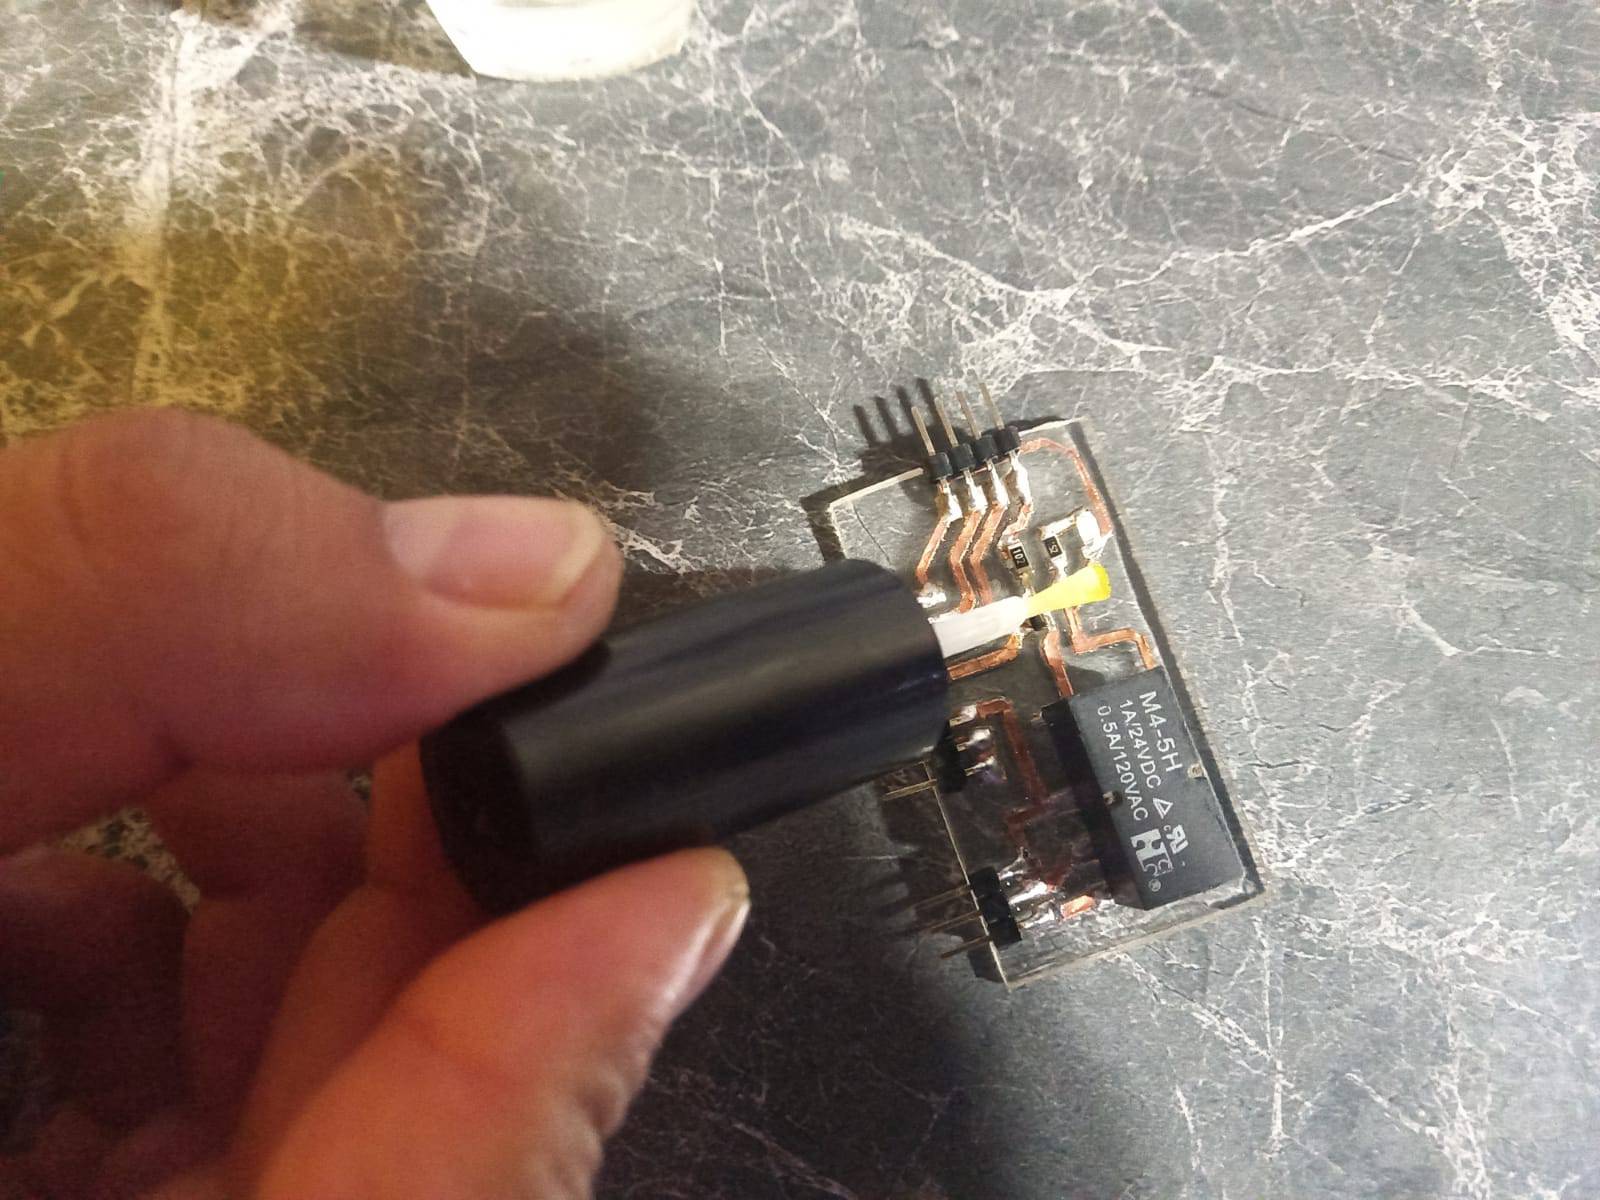
In this process, a thin layer of biomaterial will be applied to the circuit to protect it and prevent it from coming off the acrylic. This protective layer will provide an additional barrier against moisture and other environmental elements that could damage the circuit. It is important to apply this layer evenly and ensure that it completely covers the circuit to provide effective protection. Once the biomaterial has completely dried, the module will be ready for use in the final project.
This week has been very enriching in terms of learning, especially in understanding the various forms of reuse. One of them is the copper of cell phone screens, which stands out for its flexibility. It is inspiring to discover the many ways to recover these materials and give them a new purpose, thus contributing to the preservation of the environment and reducing our carbon footprint. Every small step towards reuse and sustainability is crucial for a healthier future for our planet.
Development of custom electronic boards with CNC Router.

Development of personalized keychains and ornaments with CNC Laser.
Development of custom machines "Desktop CNC Laser.

Huánuco is a Peruvian city, capital of the district, province and department of the same name in the north-central area of the country. The city has a population of 235,529 inhabitants. .